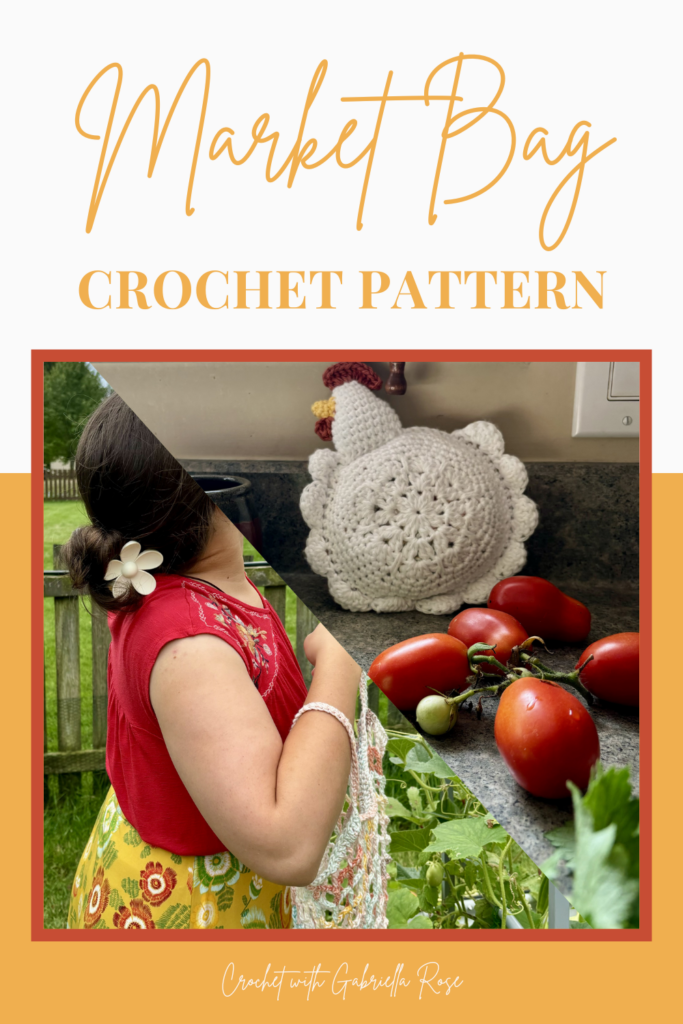
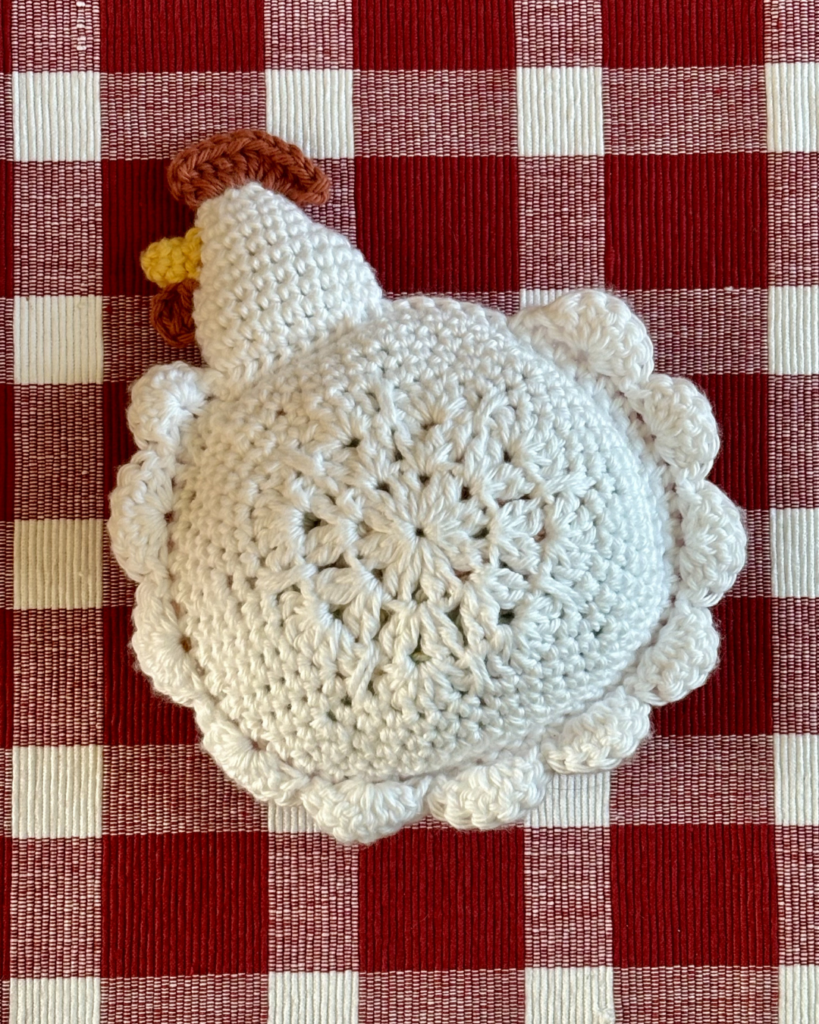
Crochet Market Bag – Convertible Chicken Pattern
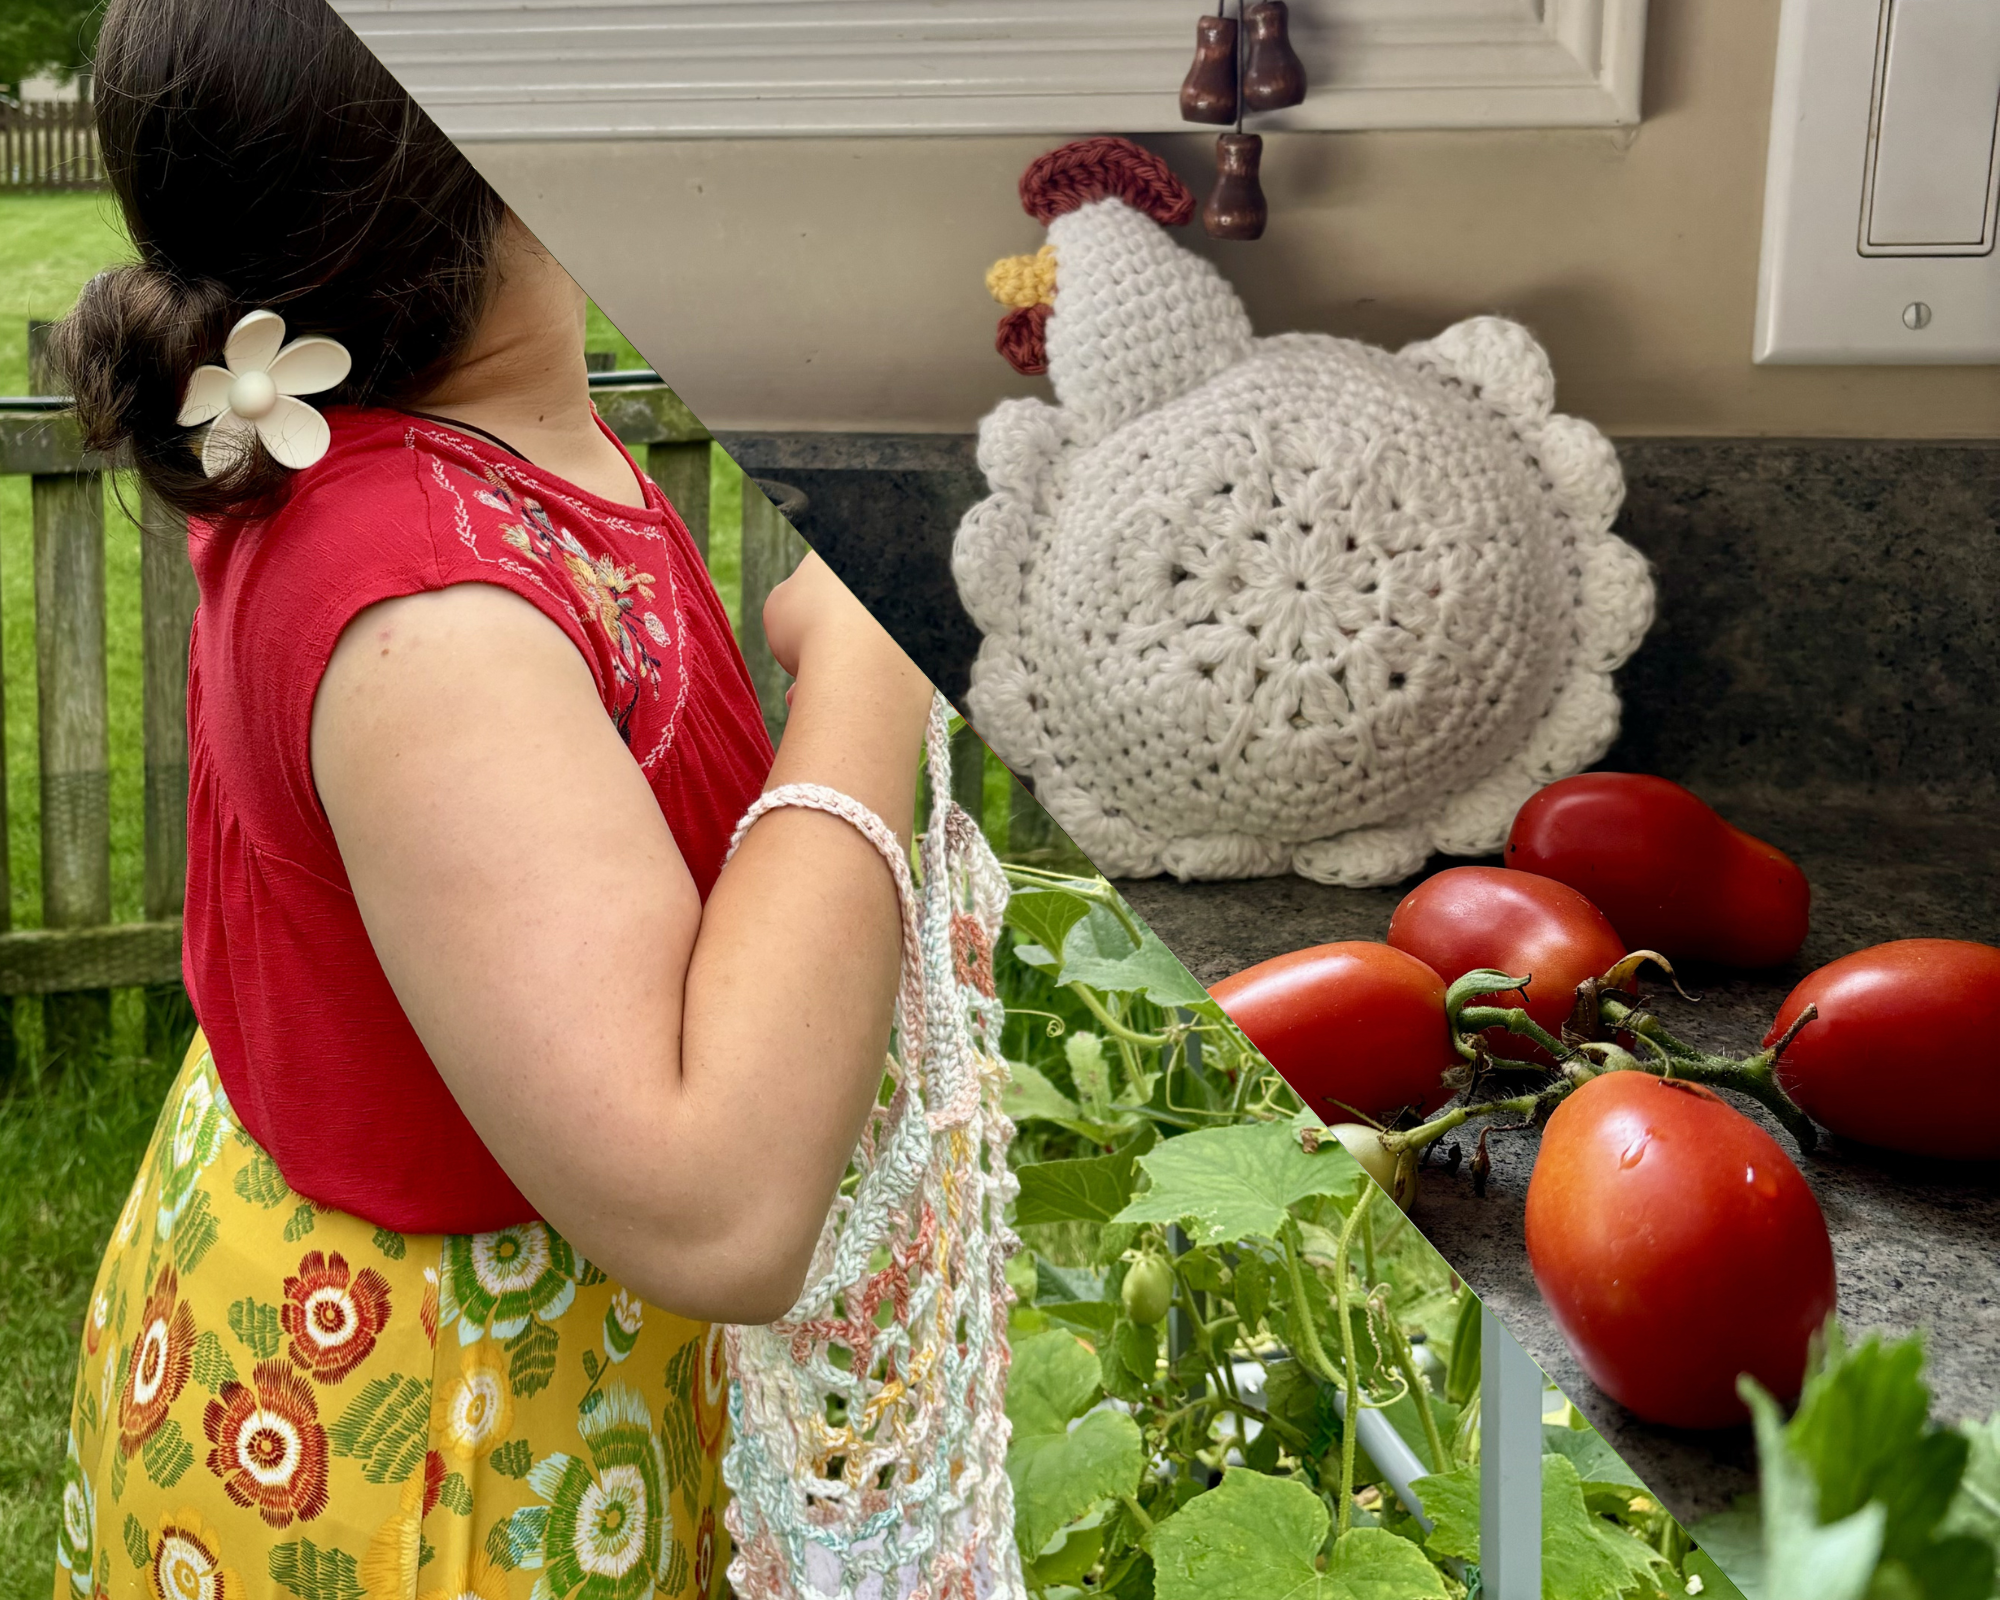
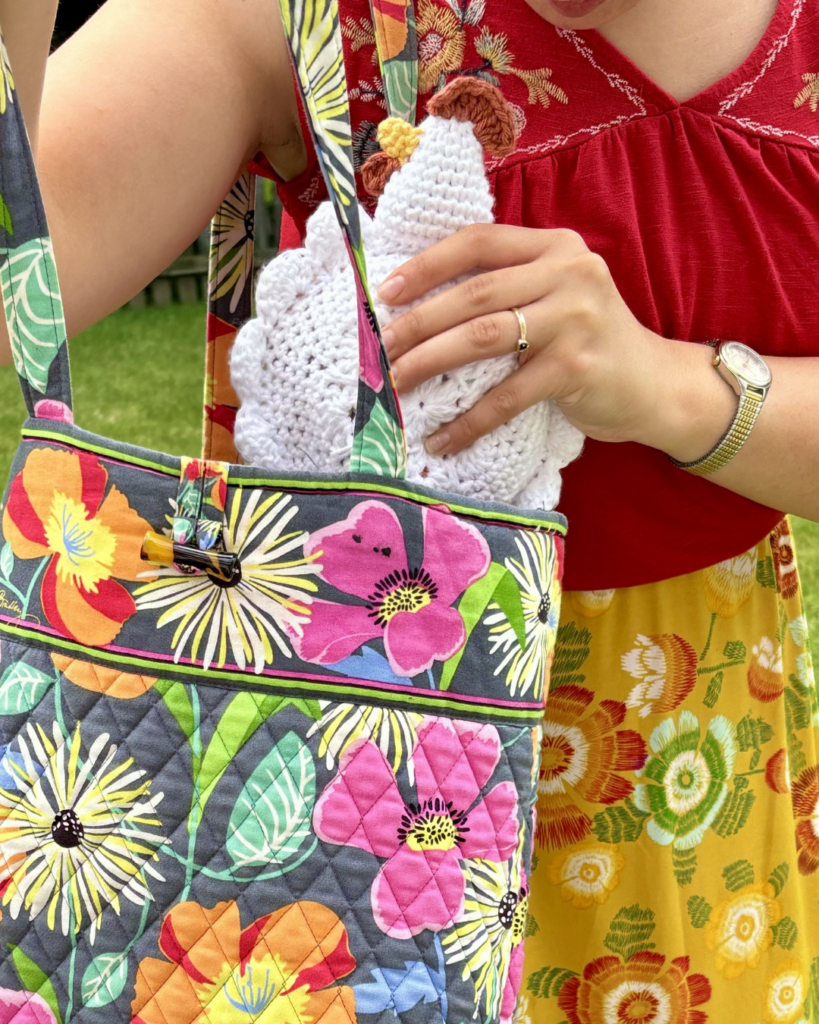
There’s something extra satisfying about a project that is as practical as it is fun—and this new convertible chicken crochet market bag might my new favorite thing! Whether you’re gathering fresh eggs, heading to the farmers market, or just showing off your love of the rustic life… this bag brings together function, homestead quirkiness, and a touch of whimsy in every stitch.
This post contains affiliate links, which means I receive a small commission, at no extra cost to you, if you make a purchase using that link. Please see my disclosure for more details.
Why a Chicken?
Inspired by the beauty of slower living and the uprise in all things “farm core” lately, my chicken crochet market bag pattern came to life. As my husband and I have joined my family in building our own little homestead recently, I’ve found myself craving projects that feel both beautiful and useful—pieces that reflect where I am in life and where I’m going.
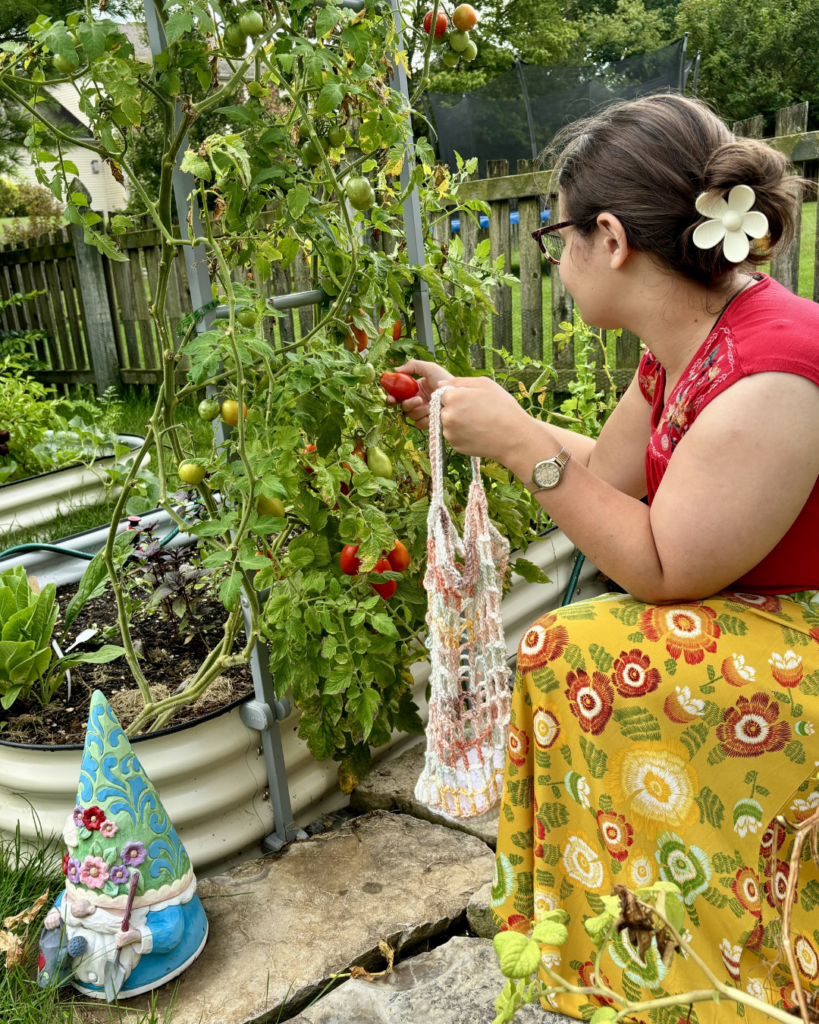
With chickens officially on the way and the coop in progress, we’re deep into the glamorous side of the homestead life—yes, I’m talking about the “compost”… which is just a fancier word for “ew, what is that smell?” My family is hoping to having the chickens fully settled before our baby girl is here. Oh, by the way, we’re expecting! I’m already dreaming of the farmer’s market walks pushing her in our new stroller and my cats staring out the window at the latest TV channel: the Chicken Coop. Our lives are shifting in some of the most incredible and slightly chaotic ways, but having something like this little crochet market bag by my side feels like a small, steady reminder to embrace every moment no matter how messy or new.
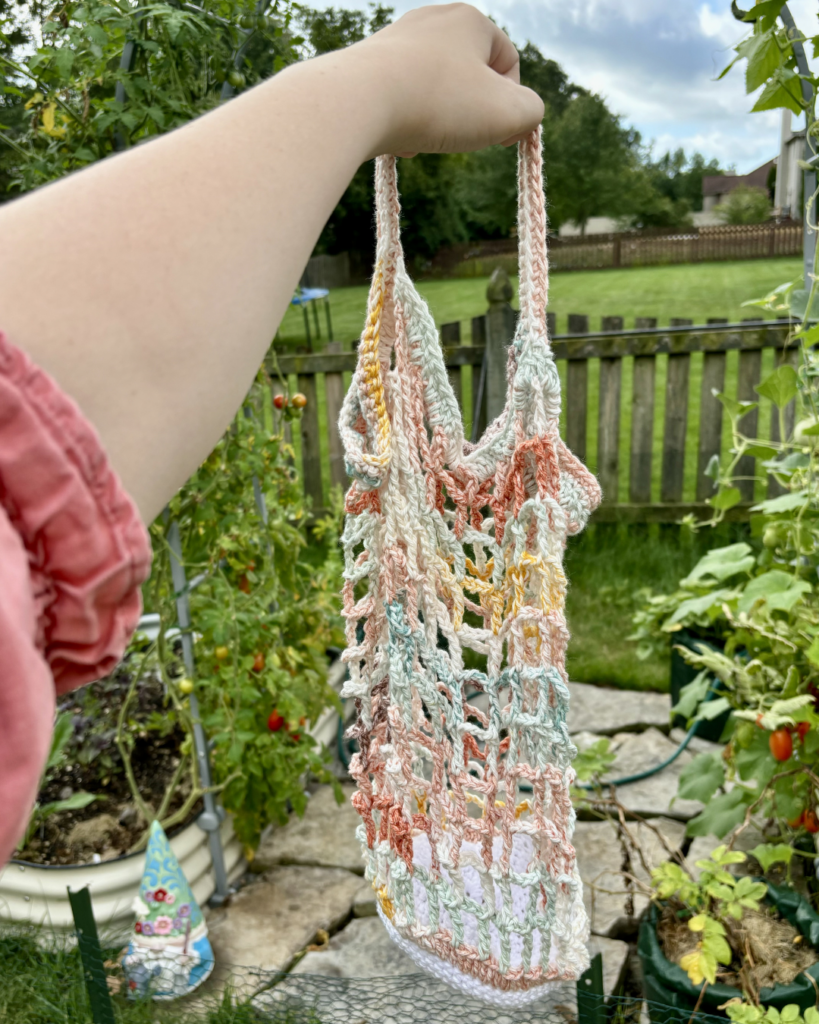
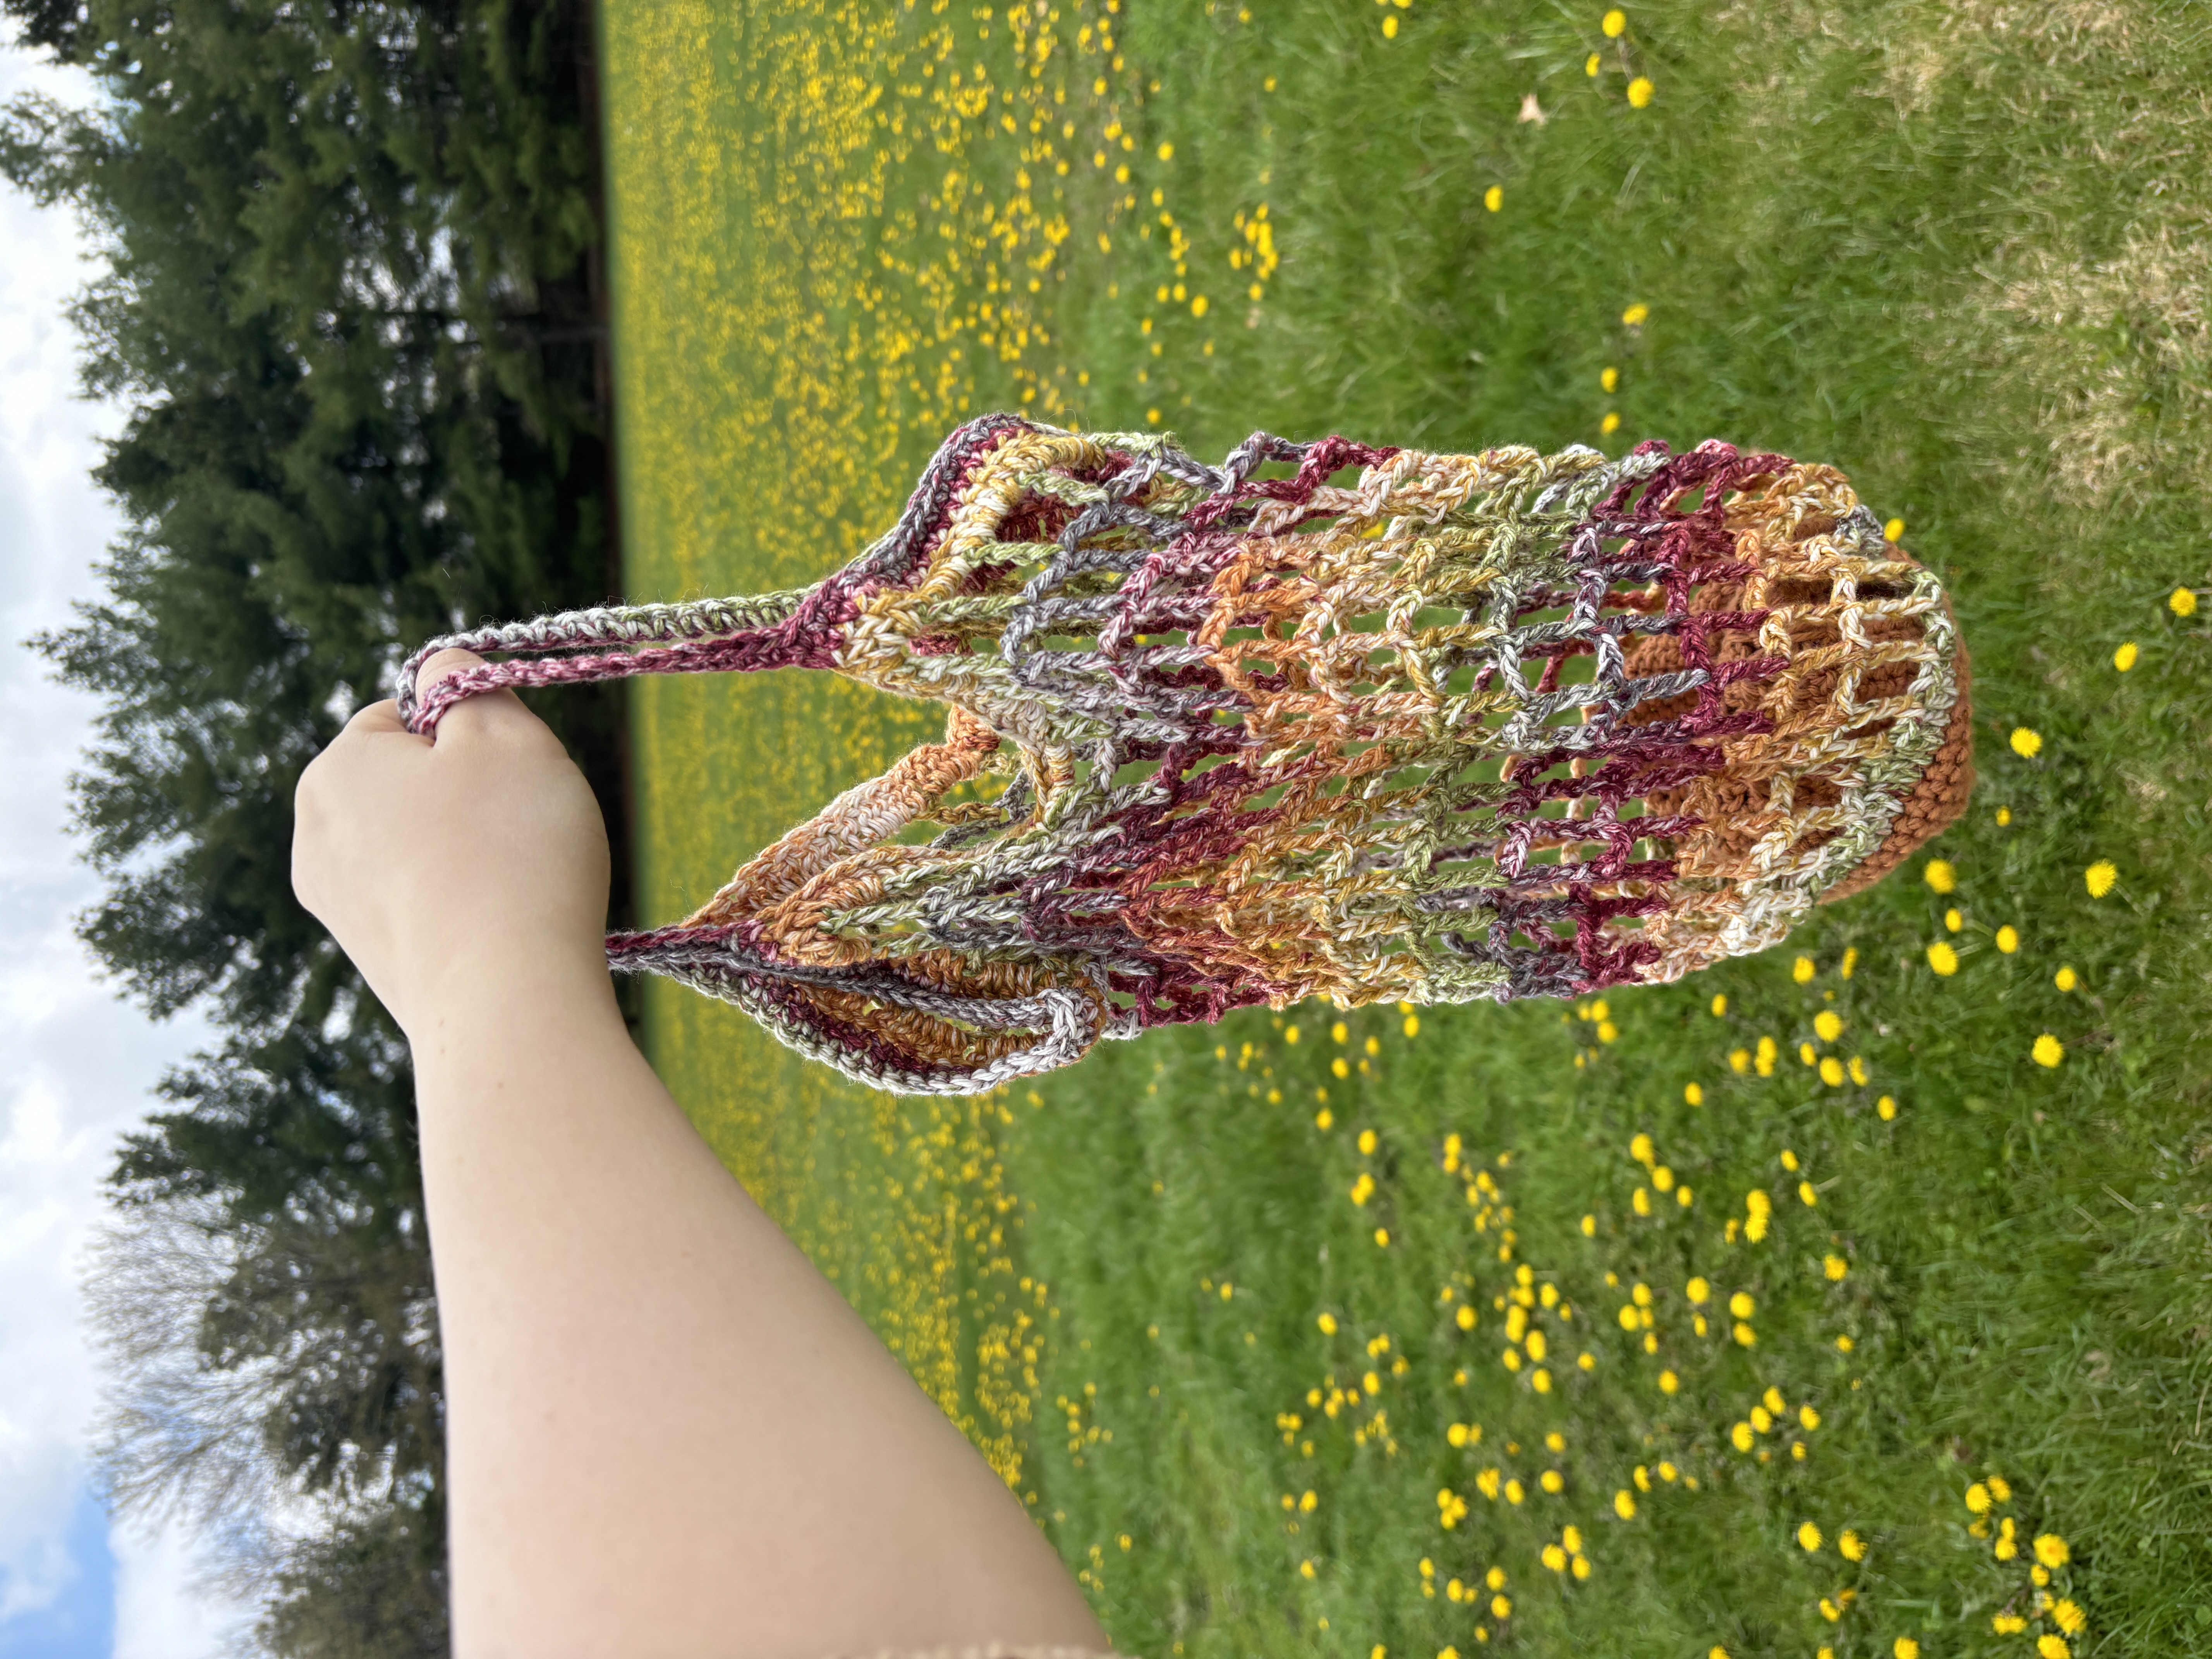
On the less gushy side, I love how much this convertible market tote effortlessly fits into everyday life. It’s lightweight, easy to stash, and designed to adapt—whether you’re filling it with produce, eggs, or daily essentials. Instead of juggling a bunch of bulky bags, this chicken bag folds down small but expands when you need it, making it perfect for throwing in the car on busy days that still deserve a touch of whimsy and charm. It’s the kind of piece that proves functionality can still be pretty, and that even the simplest routines can be made fun and whimsical!
The Pattern
Materials
- I Love This Cotton Yarn. 84 yards of White. 155 yards of Sunlit Seafoam. 10 yards of Bruschetta. 5 yards of Curry.
- US 7/4.5 mm Crochet Hook
- Polyfil stuffing
- Tapestry Needle for weaving in ends
A Second Chicken?
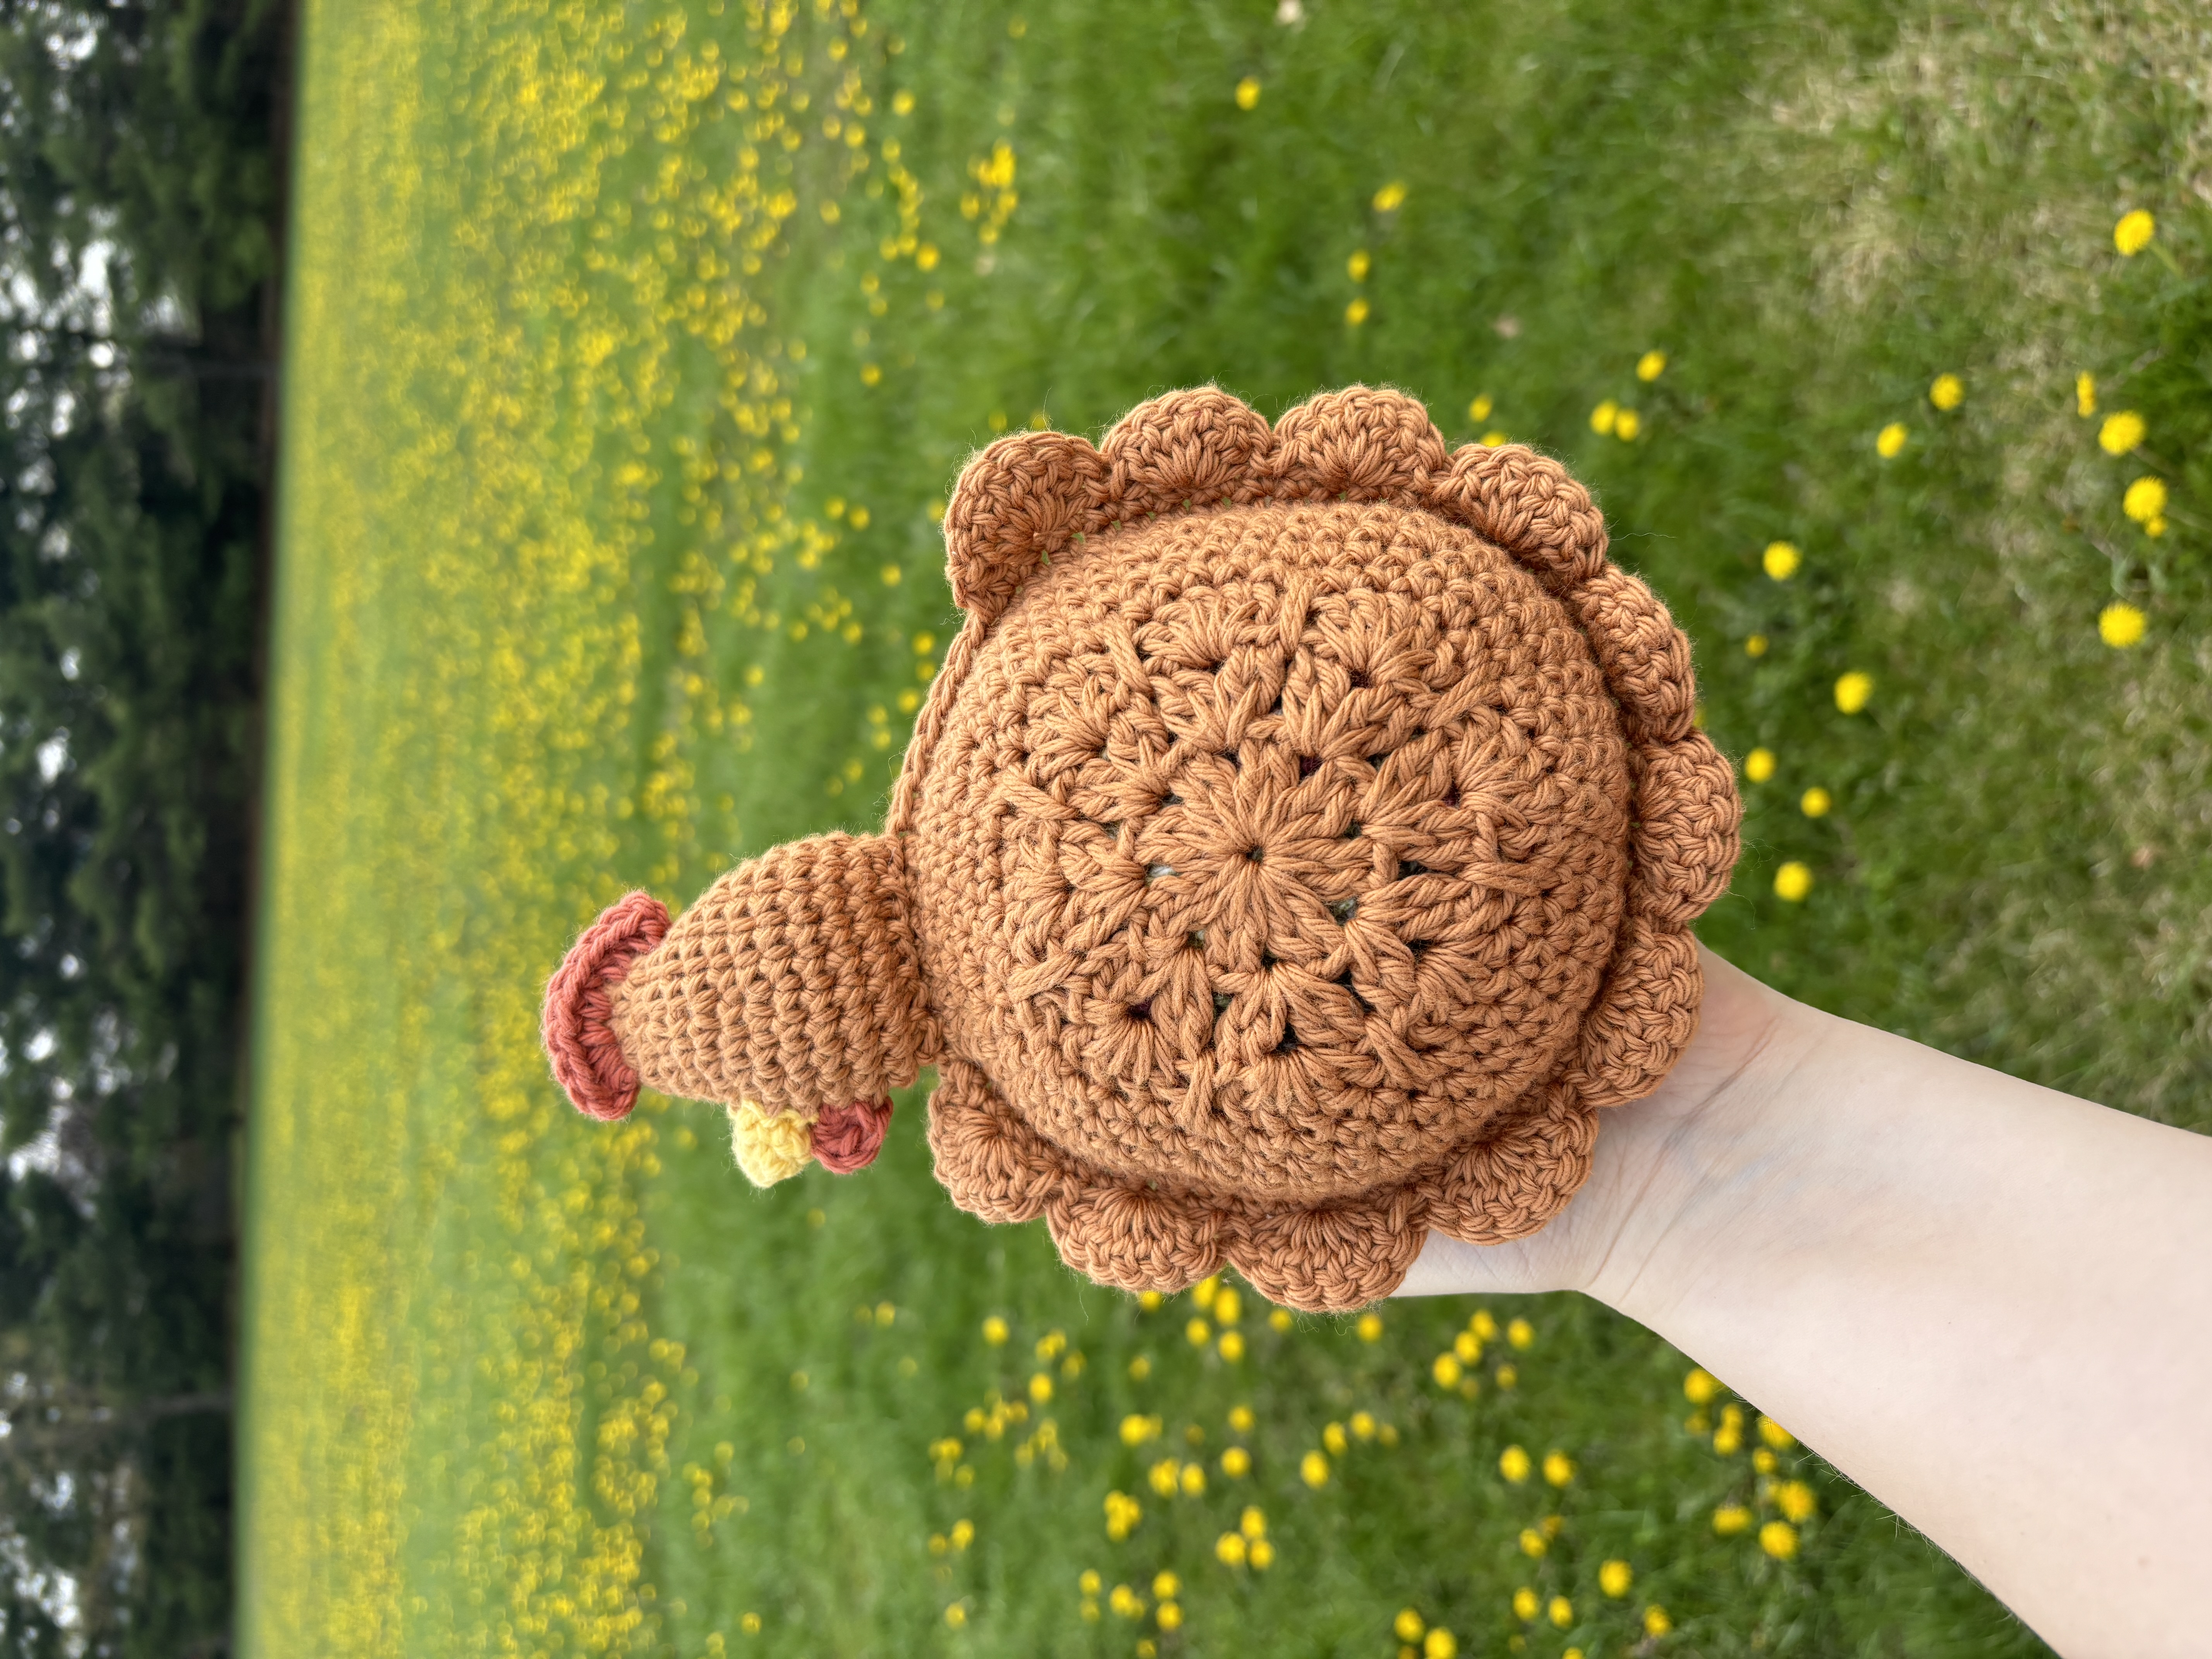
In typical Type B fashion, I did not write the most comprehensive notes the first time round. This turned out to be a blessing in disguise because I LOVE how the brown chicken turned out! The materials and pattern are for the white chicken, but if you want to recreate the brown one, the colors I used were Antique Gold for the chicken and Cinnamon Cedar for the bag. If you change up the colors, I NEED to see, so PLEASE post and tag me when you’re done!
Chicken Body: Make Two
Note: Chicken Body uses color “White”
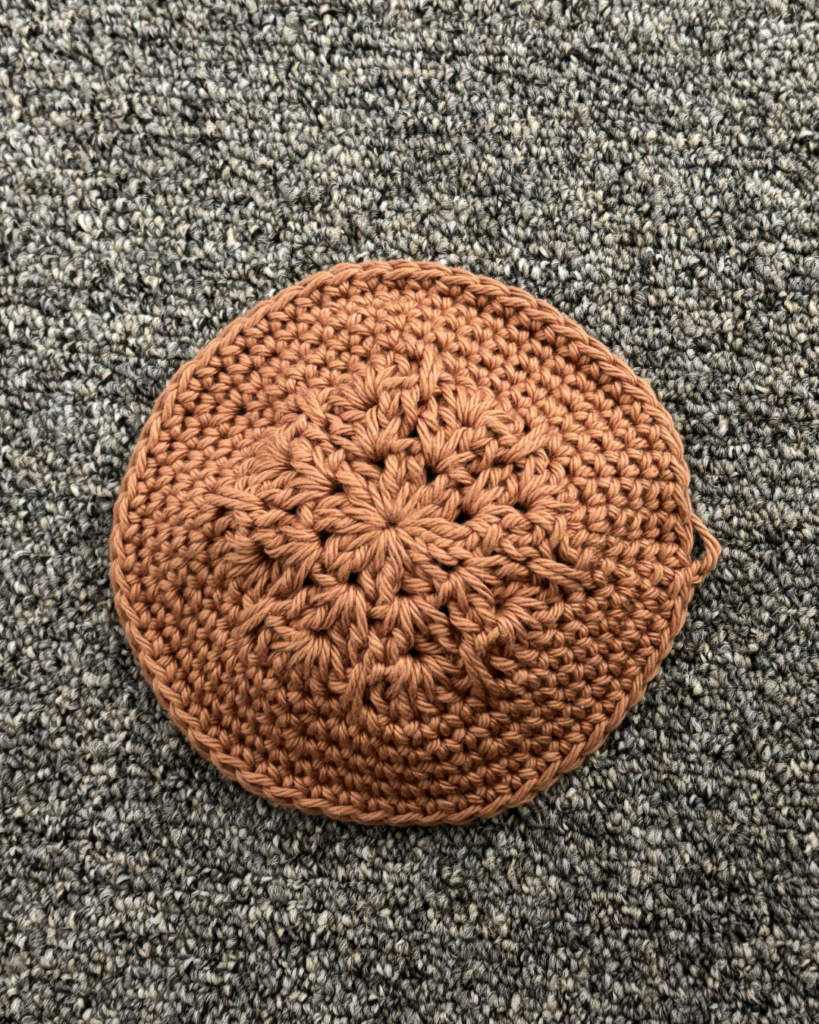
R1: Magic ring. Ch 3 (counts as a dc here and throughout), 1dc, ch1. *2dc, ch1* Repeat from *to* until 8 clusters are made. Join with sl st into top of starting ch3.
R2: Sl st into 1st ch space. Ch3, 1dc, ch1, 2dc in 1st space. *In next space, work 2dc, ch1, 2dc* Repeat from *to* 6 more times. Sl st into ch3.
R3: Sl st into 1st ch space. Ch3 and 4dc in same space. *In next space, work 5dc.* Repeat from *to* 6 more times. Sl st into ch3.
Note: Row 4 is worked in sc with a long sc between each of the 8 petals that have been created. The long sc works as follows: insert hook into the middle of the dc sets from Row 2 and pull up a loose loop. Yarn over and pull through both loops to complete long sc.
R4: Ch1, 1sc in same st. 4sc around first petal. Work long sc between petals. Continue working 5sc around each petal with a long sc between the petals. Sl st into top of starting sc.
R5: Ch1, 1sc in same st. 1sc around. Sl st into starting sc. (48st)
R6: Ch1, 1sc in same st. 5sc, inc. *6sc, inc.* Repeat from *to* till end of row. Sl st into starting sc. (56st)
R7-8: Ch1, 1sc in same st. 1sc around. (56st)
Fasten off.
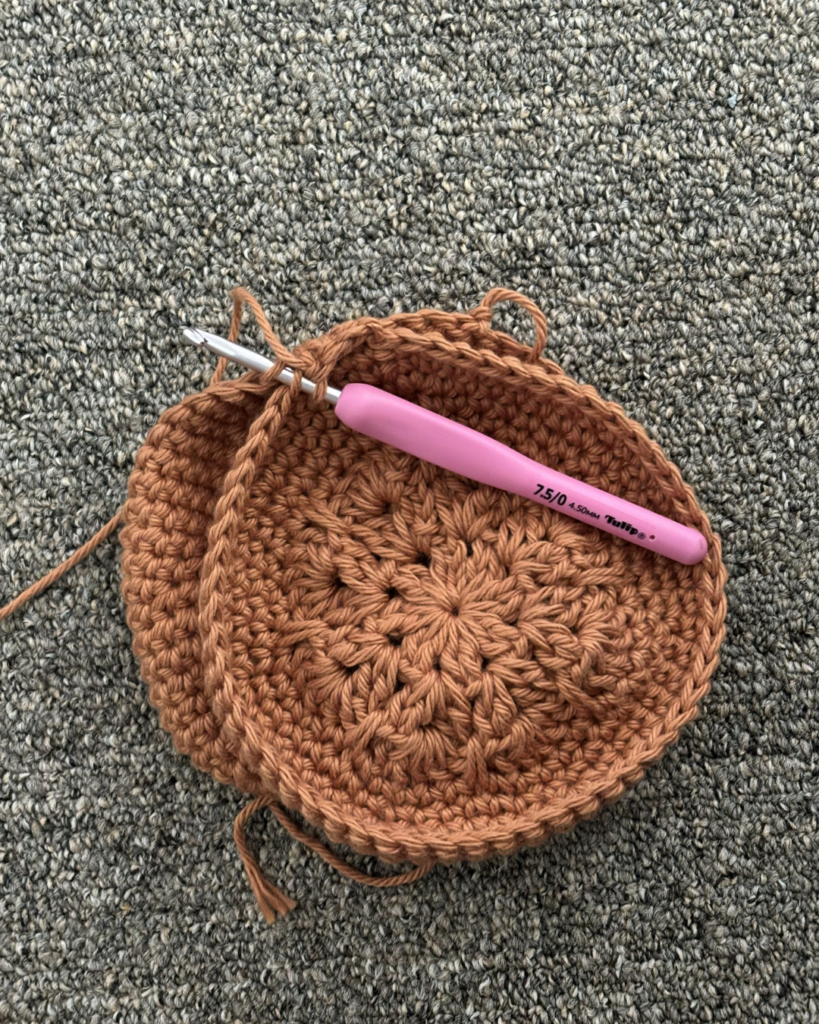
Connecting:
Note: As we are connecting the two chicken body pieces, we will leave part of open for the bag to tuck into later. We will be working with the “outside” loops of each piece as we connect (side left pic), and both loops of the “inside” chicken piece (see right pic) when we get to our open spot.
R1: Insert anywhere. (working in outside loops of both pieces) Ch1, 1sc in same st. 3sc. (working in both loops of inside piece) 15sc (skip the 15st of outside piece and continue, now working again in the outside loops of both pieces) 32sc. Sl st into starting sc. (56st)
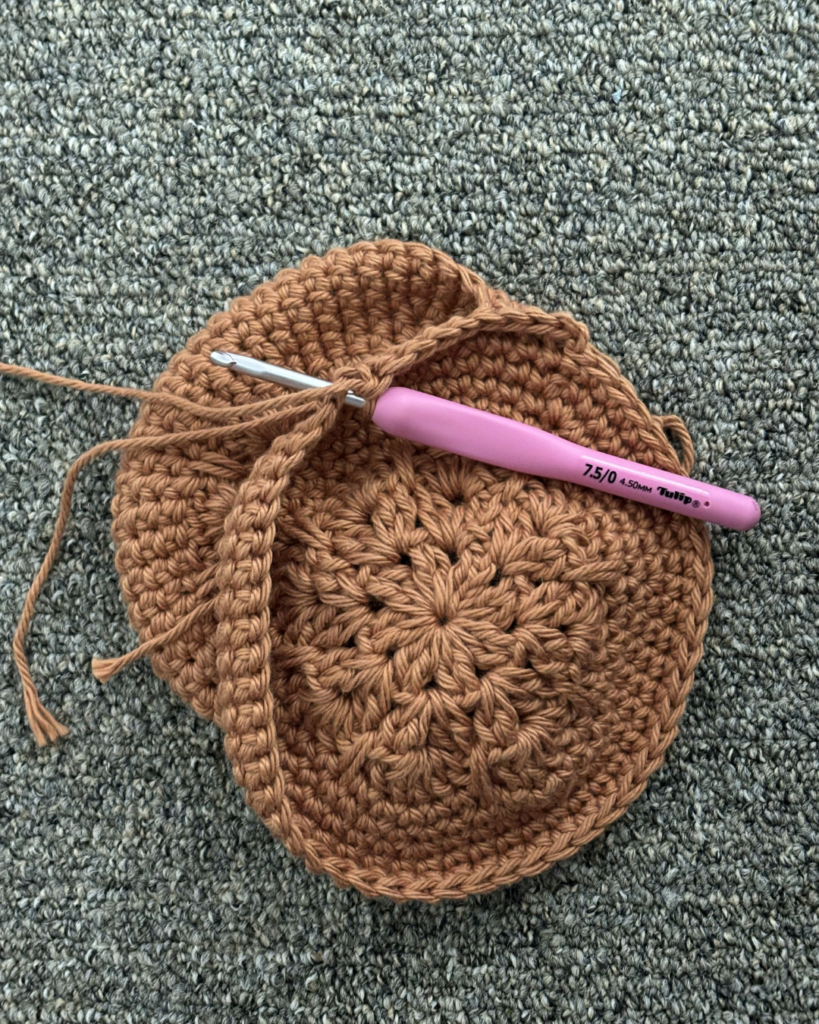
R2: Ch1, 1sc in same st. 44 sc. (45sc)
Note: We are now creating the feathery scallop design around the chicken body.
R3: Ch1, TURN, 6dc in 3rd st. *Skip 1st, sl st in next st, skip 1st, 6dc* Repeat from *to* until 2 sts remain. Skip 1st, 1sl st into last st. Fasten off.
Chicken Head:
Note: Chicken Head is worked in a round.
R1: Magic ring. 6sc. (6st)
R2: Inc, 2sc, inc. 2sc. (8st)
R3: 3sc, inc, 3sc, inc. (10st)
R4: 2sc, inc, 4sc, inc, 2sc. (12st)
R5: 5sc, inc, 5sc, inc. (14st)
R6: 3sc, inc, 6sc, inc, 3sc. (16st)
R7: 7sc, inc, 7sc, inc. (18st)
R8: 4sc, inc, 8sc, inc, 4sc. (20st)
R9-12: 20sc. (20st)
Fasten off, leaving a tail for sewing. Stuff and sew next to end of scallop row.
Chicken Comb:
Note: Chicken Comb uses color “Bruschetta”
R1: Insert near 2nd and 3rd row of head, working up to top of head. Ch2, hdc in same st. *2hdc* Repeat from *to* 3 more times. Ch2, sl st into next st. Fasten off.
Chicken Beak:
Note: Chicken Beak uses color “Curry” working in a round.
R1: Magic ring. 3sc (3st)
R2: Inc, 1sc, inc (5st)
R3: 5sc. (5st)
Fasten off, leaving tail for sewing.
Chicken Wattle:
Note: Chicken Wattle uses color “Bruschetta”
R1: Insert at bottom of beak. Ch2, 1hdc, ch3, sl st back into beak.
Fasten off. Sew down wattle to head as desired.
Bag:
Note: Bag uses color “Sunlit Seafoam”
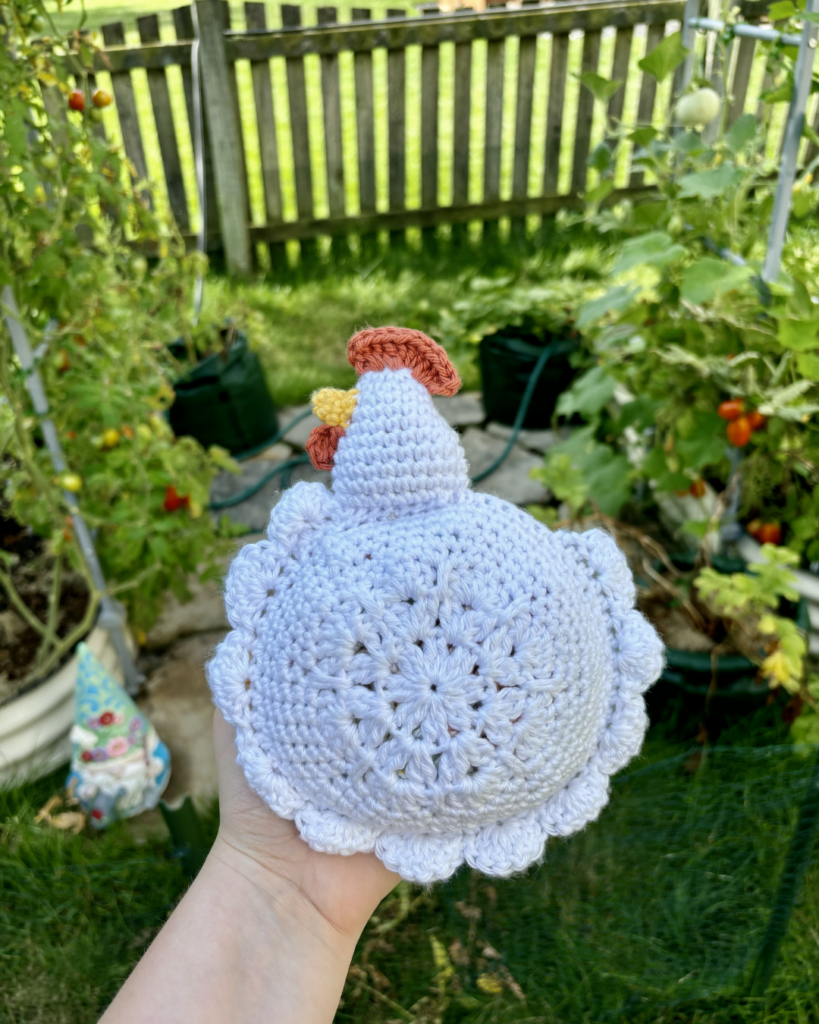
Be sure to turn your chicken inside out before beginning the bag! We will be working in the previously unused loops when we were connecting and around the open side piece without the scallops.
R1: Insert anywhere. Ch3, *inc, 1dc* Repeat from *to* until 1st remains. 2dc. St st into ch3. (84st)
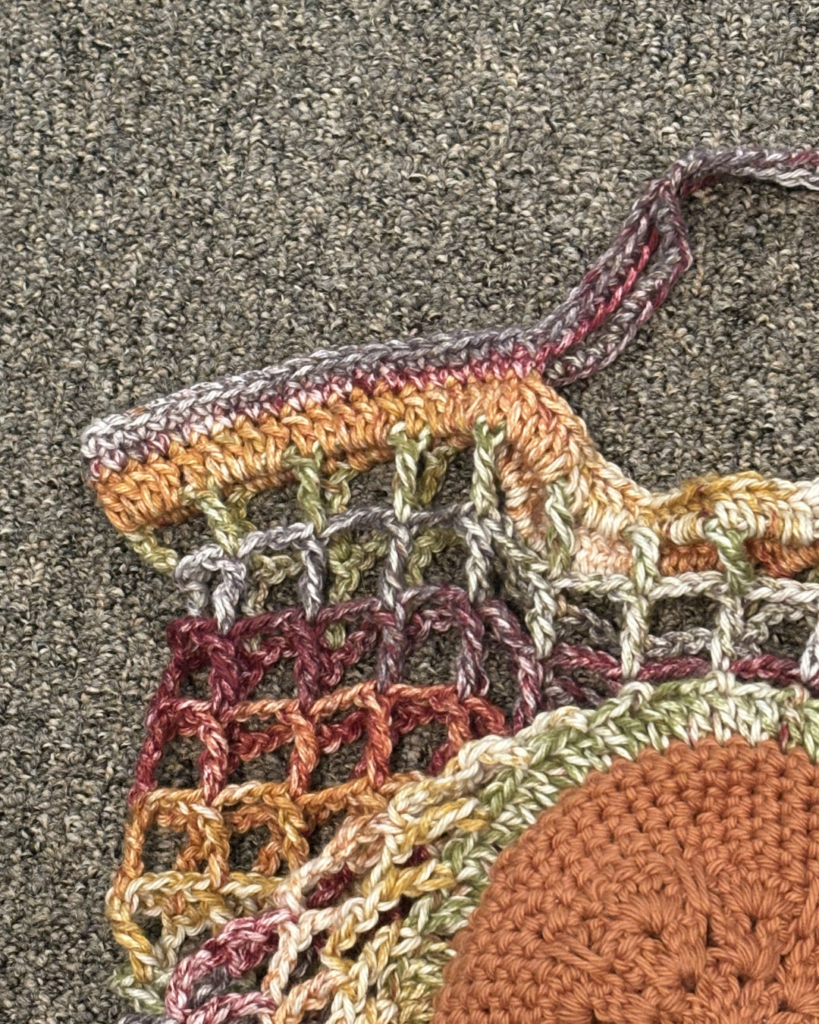
R2: Ch7 (counts as tc and ch3), *skip 2st, 1tc, ch3* Repeat from *to* until 2st remain. Sl st into middle of ch7.
R3-13: Ch7, *Skip ch space, 1tc, ch3* Repeat from *to* until last ch space. Skip ch sts and sl st into middle of ch7.
R14: Ch3, *4dc in ch space, 1dc in tc st* Repeat from *to* until last ch space. 4dc. Sl st into top of ch3. (140st)
Note: We are now creating the straps. When chaining, be careful not to twist your chain!
R15: Ch1, 1sc in same st. 19sc. Ch30, skip 30st. 40sc. Ch30, skip 30st. 20sc. Sl st into starting sc. (140st)
R16: Ch1, 1sc in same st. 1sc in each st and ch st. (140st)
Conclusion
I hope this sweet and chaotic slice of homestead life brought you some joy today! If you want to make your own crochet market bag, check out the pattern on my Etsy and Ravelry shops. If you are looking for some crochet hooks to use, Clover Amour is my favorite! Not sure if Clover Amour is for you? I have a Clover Amour review post that offers some great cheap alternatives!
Do you have a favorite crochet stitch? Don’t know many? Check out some of my favorites!
What kinds of crochet patterns are you loving right now—practical pieces or just-for-fun projects? Are you more of a farmers market wanderer or a backyard garden grower? Does the compost smell get any better? Let me know below!
I love seeing your finished crochet projects! If you enjoyed making one of my patterns I’d love to see it on Instagram! Make sure to tag me @crochetwithgabriellarose. If you are more of a Facebook person, check out the Crochet with Gabriella Rose Facebook page for notifications of new blog posts and crochet patterns!