
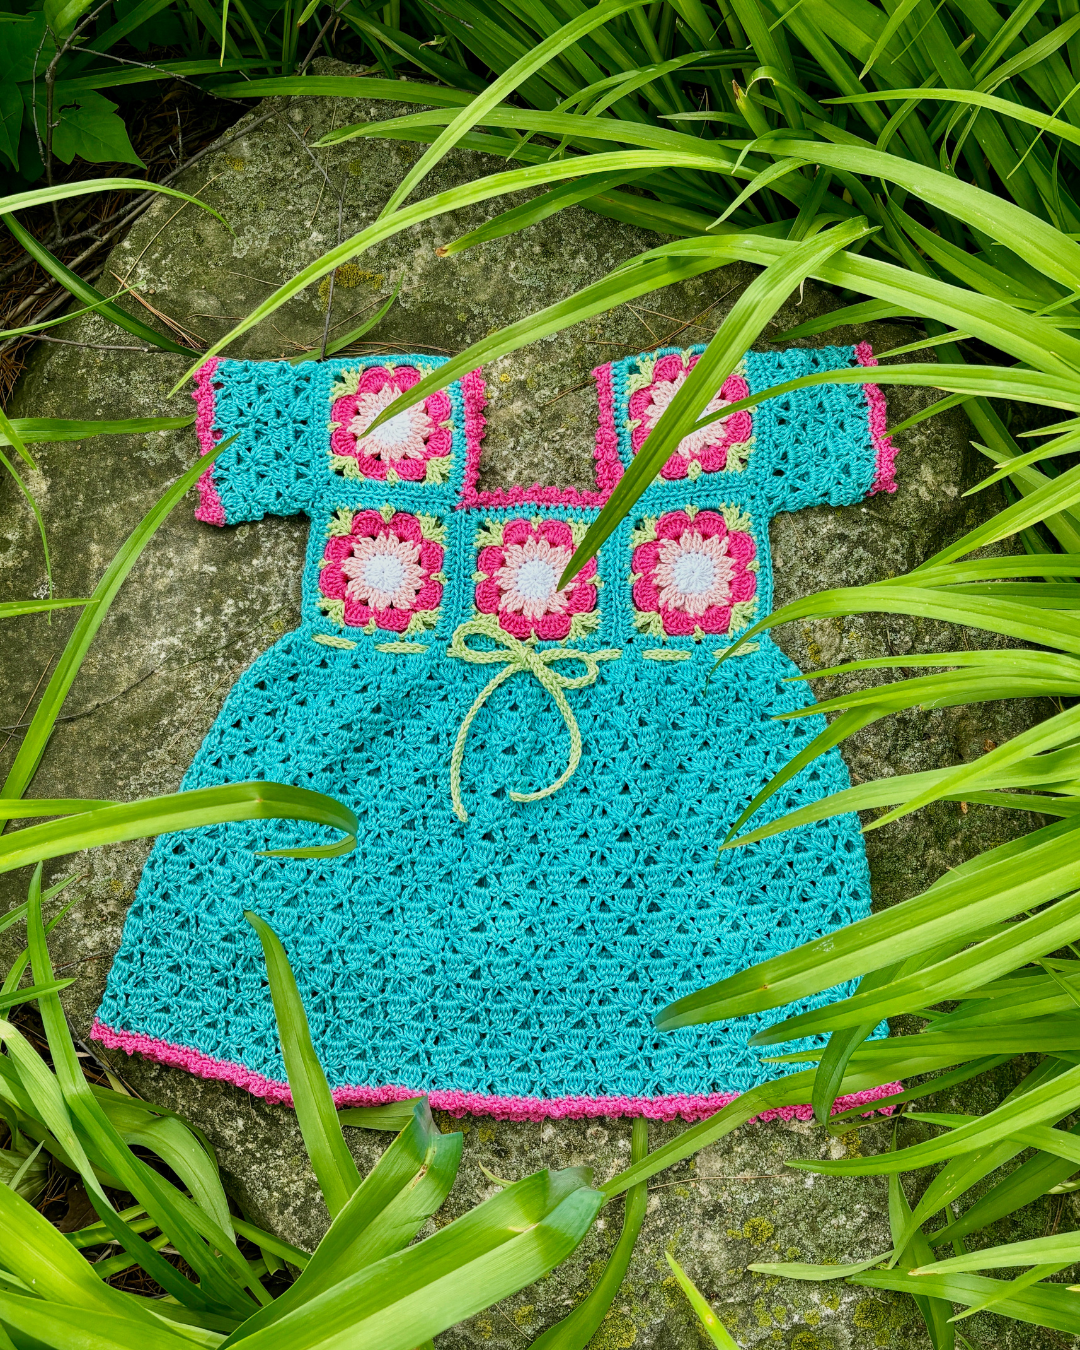
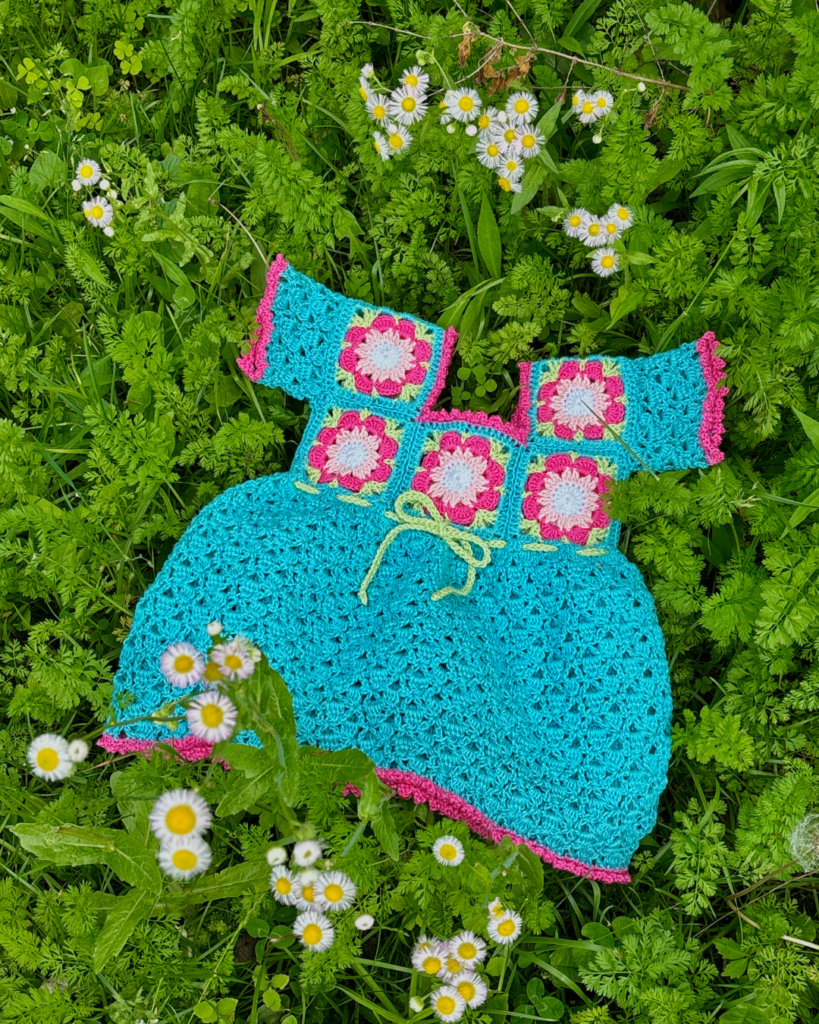
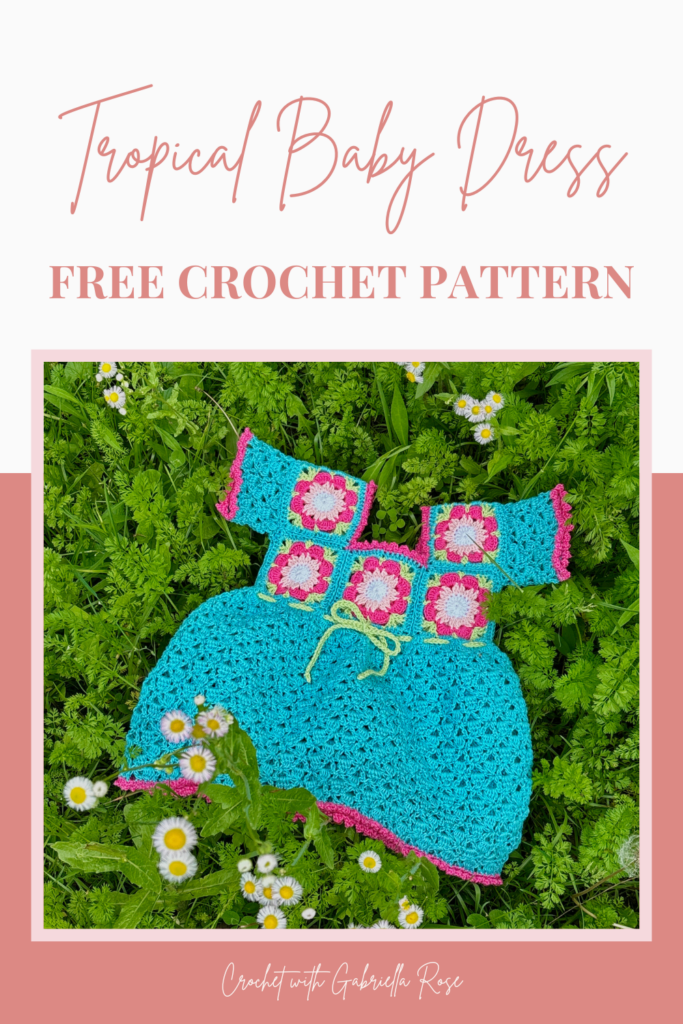
Island Girl – Easy Granny Square Baby Dress Crochet Pattern
Sometimes the best crochet inspiration comes from yarn you didn’t even know you needed yet.
My aunt recently cleaned out part of her yarn stash and passed along what we like to call “the good stuff” — including several colors of Patons Grace cotton yarn that immediately had me dreaming about summer projects. If you’ve been here lately, you already know I’ve been on a bit of a cotton yarn kick between projects like my Butterfly Kisses Baby Hat, Flower Power Steering Wheel Cover, and Stars & Stitches Dishcloth… but this yarn felt different from the moment I picked it up.
Since it’s lighter weight than the cotton yarns I usually reach for, I knew I wanted to make something airy, soft, and perfect for warmer weather. And almost instantly, this tropical little baby dress started forming in my mind.
Between the bright flower squares, the pops of color, and the lacey skirt and sleeves, this whole design just feels like summer to me. My husband’s family is from Hawaii, and I also spent several years there growing up while my family was in the military, so I think a little bit of that tropical inspiration naturally worked its way into this pattern without me even trying.
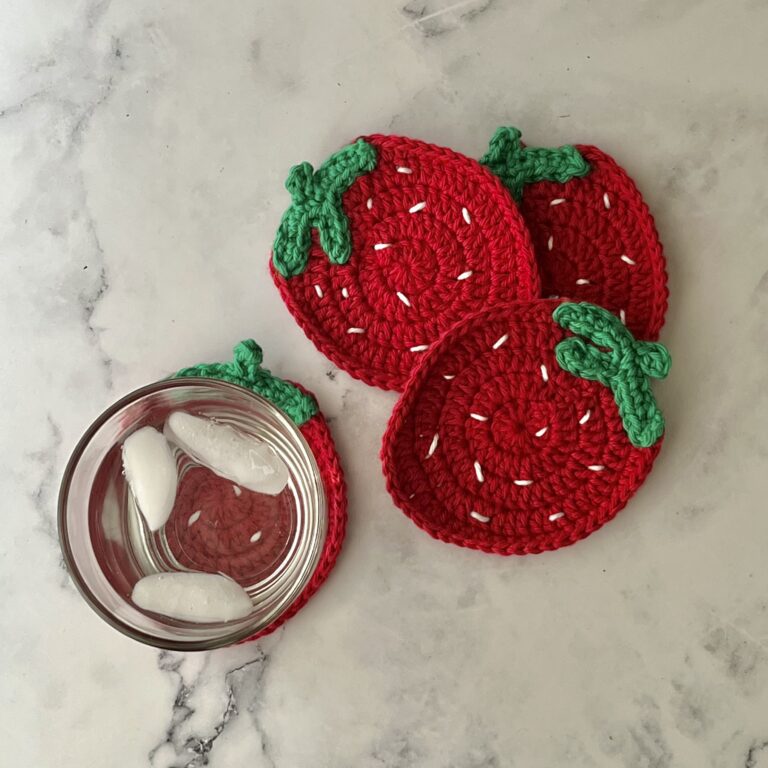
The flower squares that make up the bodice are actually a variation I’ve loved for years now — first used in my A Cup of Sunshine Coasters before making appearances in my Secret Garden Afghan and You Grow, Girl Bag. I keep coming back to them because they’re so simple while still adding so much softness and personality to a project compared to a traditional granny square.
And paired with the same lace stitch repeat from my recent Lullaby Lace Baby Blanket? I was obsessed almost immediately. It gives the prettiest delicate look while still being one of those relaxing stitches you can work without constantly checking the pattern.
I also think this dress carries a little bit of where I’m at emotionally right now too. I’ve been trying to crochet pieces in different sizes for baby girl so I can hold onto each season a little easier instead of feeling sad every time she outgrows something. This dress is made in a 12 month size, and somehow picturing her running around the homestead next summer surrounded by wildflowers and dirt and sunshine turns “she’s growing too fast” into excitement for all the little moments still waiting ahead.
And honestly? I love that the waist tie means I can probably start pretending she fits into it early anyway… because realistically, I’ll be eagerly checking every few weeks to see when I can finally get away with putting her in it so I can enjoy it for as long as possible.
This post contains affiliate links, which means I receive a small commission, at no extra cost to you, if you make a purchase using that link. Please see my disclosure for more details.
Easy Granny Square Baby Dress Crochet Pattern
Size
Finished size fits 12 mth. 21in chest circumference.
Gauge
Squares are approx. 3.5in x 3.5in.
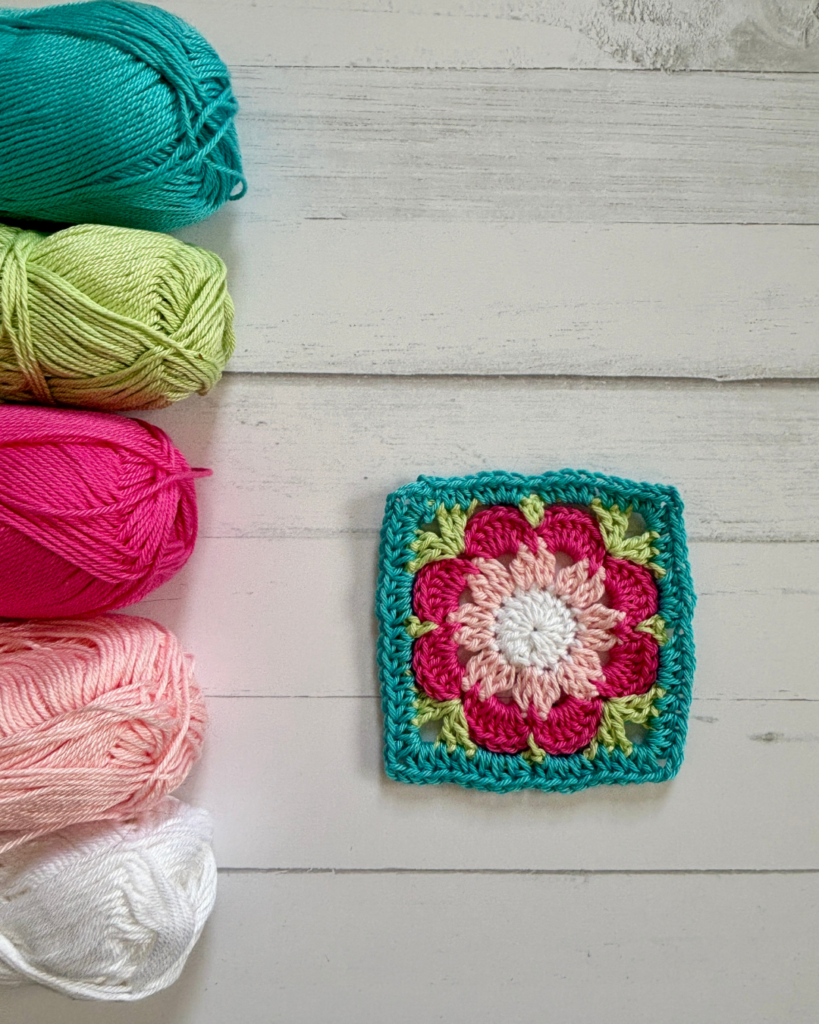
Materials
- Patons Grace Cotton Yarn. 482 yards of Aquifer. 117 yards of Lotus. 51 Yards of Ginger. 43 yards of Blush. 23 yards of Snow.
- E / 3.5mm Crochet Hook
- G / 4.0mm Crochet Hook
- Tapestry Needle for weaving in ends
Special Stitches
Cluster Stitch: Yarn over hook, insert hook into the next stitch, draw a loop through, yarn over hook, draw a loop through two of the loops on the hook. Two loops remain. Then, yarn over, insert hook into the same stitch, draw a loop through, yarn over, draw a loop through two loops. Three loops remain on hook. Finally, yarn over and draw through all three loops. Cluster Stitch made.
Starting Cluster Stitch: Ch 2, yarn over, insert hook into the next stitch, draw a loop through, yarn over, draw a loop through two loops. Three loops remain on hook. Yarn over and draw through all three loops. Starting cluster stitch made.
Bobble Stitch: Working into the same stitch, yarn over, insert the hook into the stitch and pull up a loop. Yarn over and pull through 2 loops. 2 loops are left on the hook (and one incomplete double crochet is made). Repeat these steps 3 more times. There are now 5 loops on the hook (4 incomplete double crochets). Yarn over and pull through all strands on the hook. Ch 1. Bobble stitch made.
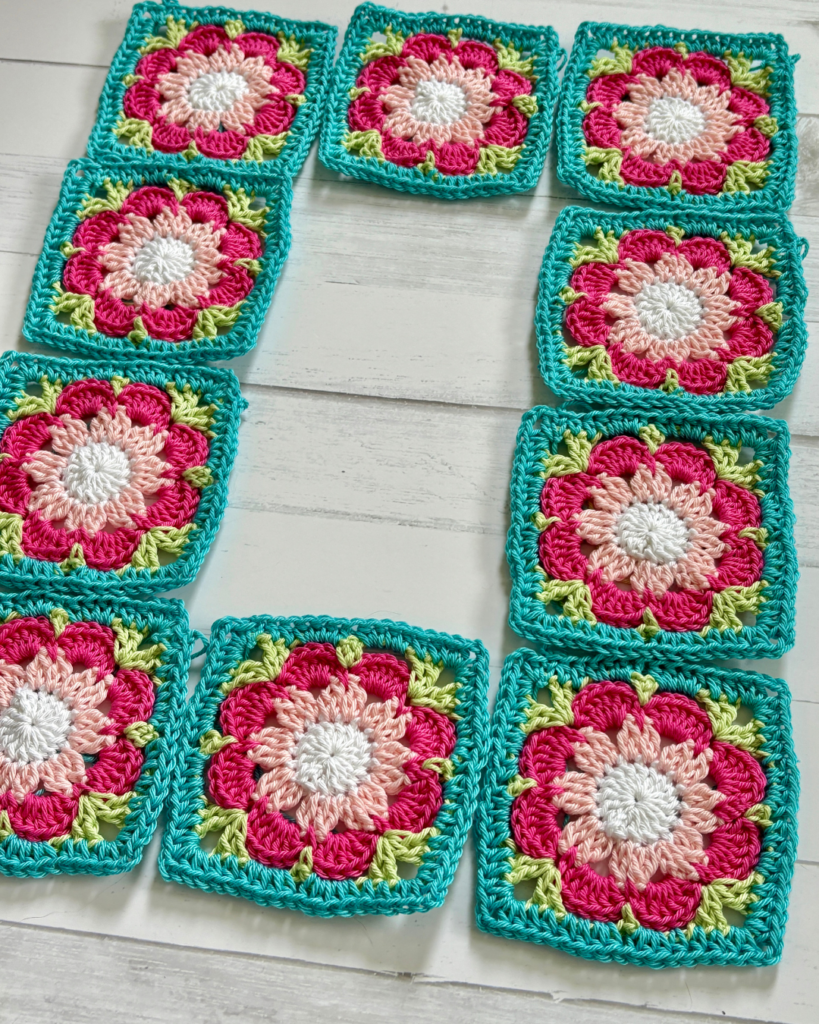
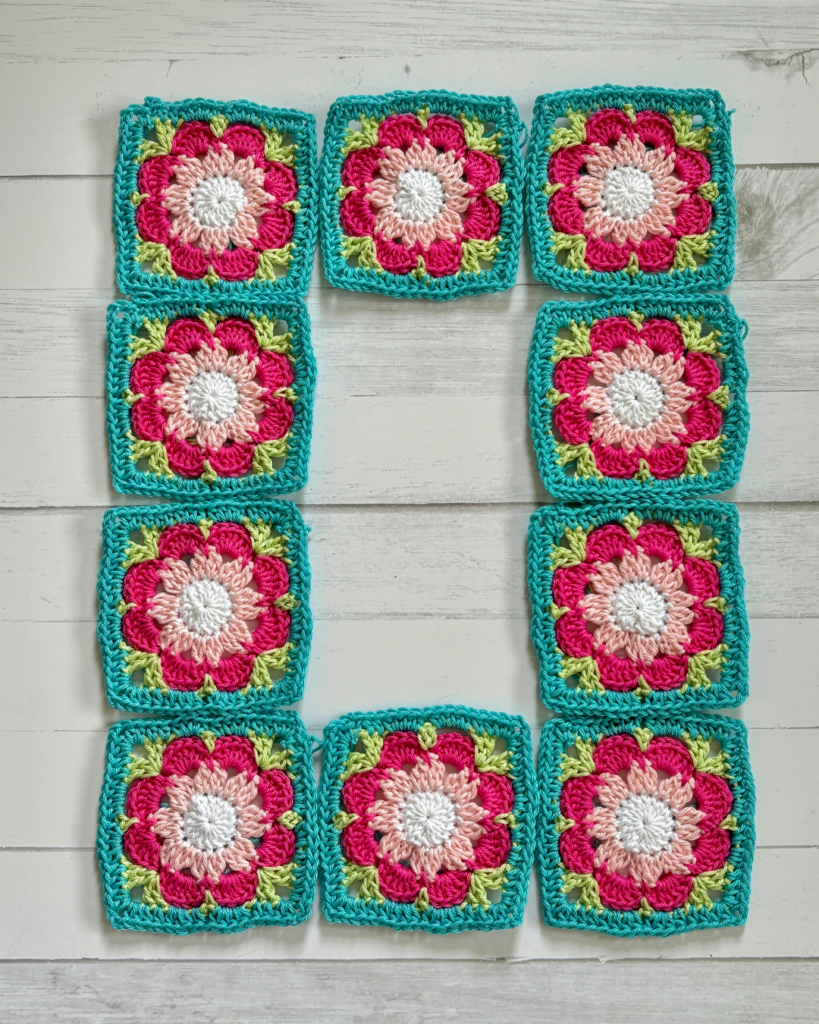
Squares (make 10)
Note: The Squares will be using a 3.5mm hook.
1st Color (Center):
R1: Make a magic ring. Ch 3 (counts as first dc) and work 15 dc into ring. Sl st into top of ch 3. Fasten off first color.
2nd Color (Small Petals):
R2: Join 2nd color to any dc. Make starting cluster stitch as follows: Ch 2, yarn over, insert hook into the same stitch as joining, draw a loop through, yarn over, draw a loop through two loops. Three loops remain on hook. Yarn over and draw through all three loops. (Starting Cluster Stitch made) Work Cluster Stitch (see special stitches) in the next stitch, ch 2. *Work a Cluster Stitch in each of the next 2 stitches, ch 2. Repeat from * around. Sl st into top of starting ch 2. Fasten off second color.
3rd Color (Large Petals):
R3: Join 3rd color in the center of a petal from previous round (between the cluster stitches). Ch 1 and sc in same space as joining. Work 6 dc in next ch-2 space. *sc between the 2 cluster stitches of the next petal, 6 dc in the next ch-2 space. Repeat from * around. Sl st into top of first sc. Fasten off third color.
4th Color (Leaves):
R4: Join 4th color in a sc from prior round. Ch1 and sc in the same stitch as joining, ch 4, (2dc, ch3, 2dc) in the next sc. ch 4, *sc in the next sc, ch 4, (2dc, ch3, 2dc) in the next sc. ch 4 Repeat from * around. Slip stitch into top of starting sc. Fasten off fourth color.
5th Color (Border):
R5: Attach 5th color in any corner space. Ch2 (counts as 1st hdc), 1hdc, ch2, 2hdc (First corner made), *hdc in next 2 stitches. 4hdc in next ch-4 space, 4hdc in next ch-4 space, hdc in next 2 stitches. 2hdc, ch2, 2hdc (corner made). Repeat from * around. Join with a slip stitch to top of starting ch2. Fasten off and weave in ends.
Assembly
Note: Using the diagram below, place down your 10 crochet squares and begin assembly. Only sew where each side meets right now and fold in half. We will finish arm sides later. I ended up turning my project inside out and used a simple whip stitch in the back loops for a flat look. Just keep in mind the width of the finished chest if you do a different joining method!
Skirt
Note: The Skirt will be using a 4.0mm hook and our 5th color (3rd color for edging). Additionally, “1dc, ch2, 1dc” will be called a “v-st” throughout the rest of this pattern.
R1: Ch3 (counts as dc) in back center of the waist in between two sets 4hdc from the squares, 2dc in that same space. *3dc in between each set of 4hdc or ch corners.* Repeat from *to* around, working the arm sides as if they are attached. Sl st into top of ch3. (30 clusters of 3dc)
R2: Sl st into 2nd dc of 3dc cluster of previous row. Ch5 (counts as dc and ch2), dc in same st [V-St made]. *Skip next dc, Bobble st in space, V-St in 2nd dc of next cluster from previous row.* Repeat from *to* around. Sl st into middle of ch5. (30 Bobble Sts AND 30 V-Sts)
R3: Turn, sl st into Bobble st. Ch5, dc in same st [V-St made]. Work Bobble into next V-St. *Work V-St into next Bobble st. Work Bobble into next V-St. * Repeat from *to* around. Sl st into middle of ch5. (30 Bobble Sts AND 30 V-Sts)
R4-20: Repeat R3 until desired length (roughly 8-10in from waist). Fasten off.
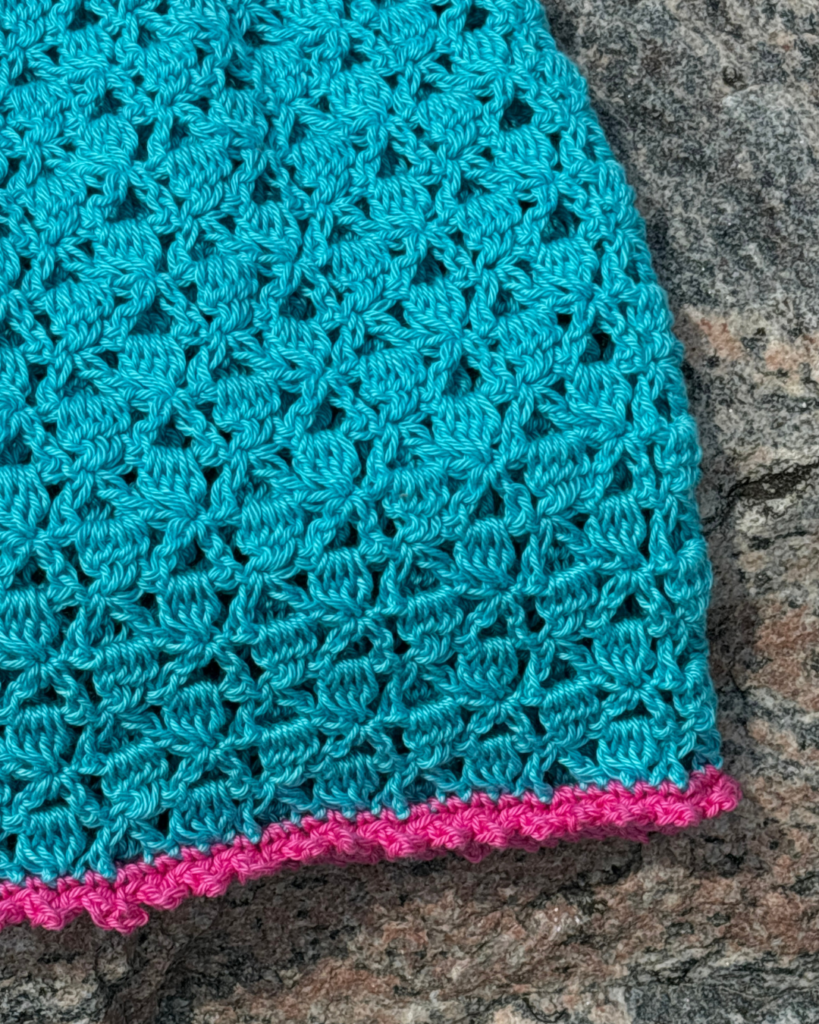
R21: Attach 3rd color near where you fastened off previously. Sc evenly spaced around.
Note: You want to end with an even number of stitches. I did 2sc in each bobble st, 1sc in each dc of the v-sts, and 2sc in ch2 space of the v-sts, which came out to 360 sts.
R22: Ch1 (do NOT turn), 1sc in same st, ch3, sl st into same st and in next sc st. *1sc in next st, ch3, sl st into same st and next st.* Repeat from *to* around. Sl st into first sc. Fasten off.
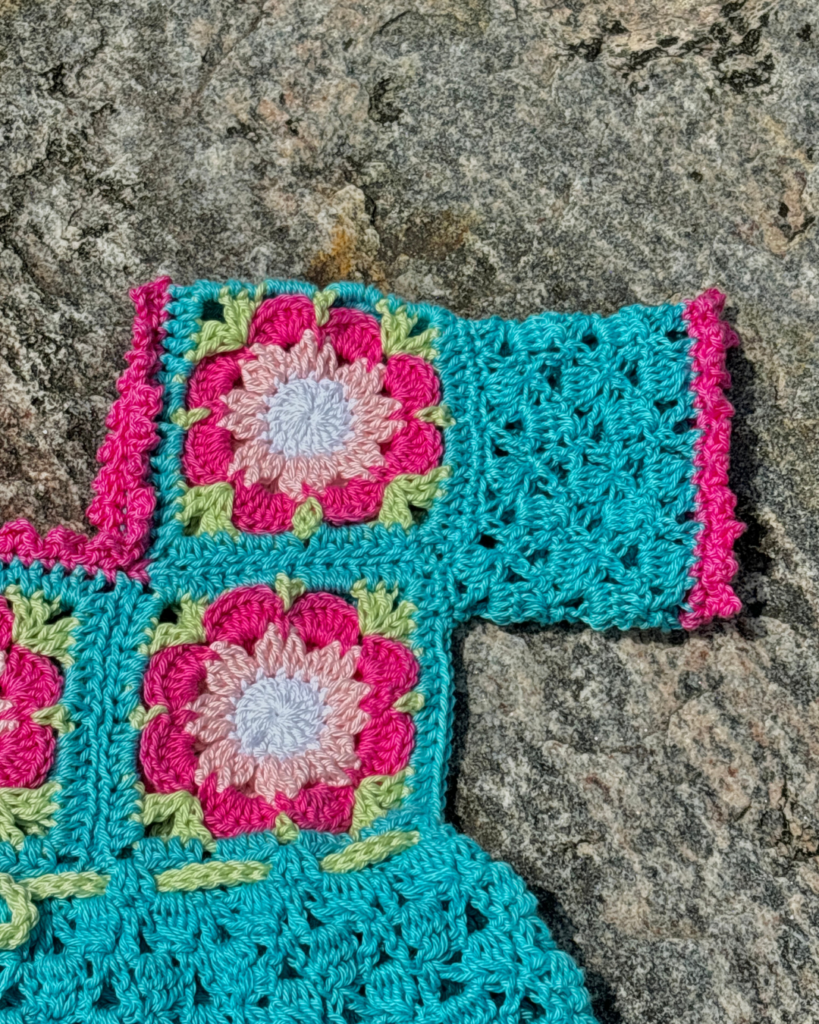
Sleeves (Repeat for Each Side)
Note: The Sleeves will be using a 4.0mm hook and our 5th color (3rd color for edging). Additionally, “1dc, ch2, 1dc” will be called a “v-st” throughout the rest of this pattern.
R1: Attach yarn at the bottom of the waist and sl st up the front and back squares until you are 20 sts from the top of the shoulder. Ch1, sc 40 sts evenly around. Sl st into first sc. (40 sts)
R2: Ch5 (counts as dc and ch2), skip next 2 sts, work Bobble st in next st. *Skip 2 sts, work V-St in next st, skip next 2sts, work Bobble St in next st.* Repeat from *to* around. Sl st into middle of ch5. (7 Bobble Sts AND 7 V-Sts)
R3: Turn, sl st into Bobble st. Ch5, dc in same st [V-St made]. Work Bobble into next V-St. *Work V-St into next Bobble st. Work Bobble into next V-St. * Repeat from *to* around. Sl st into middle of ch5. (7 Bobble Sts AND 7 V-Sts)
R4-6: Repeat R3 until desired length. Fasten off.
R7: Attach 3rd color near where you fastened off previously. Sc evenly spaced around.
Note: You want to end with an even number of stitches. I did 2sc in each bobble st, 1sc in each dc of the v-sts, and 2sc in ch2 space of the v-sts, which came out to 84 sts.
R8: Ch1 (do NOT turn), 1sc in same st, ch3, sl st into same st and in next sc st. *1sc in next st, ch3, sl st into same st and next st.* Repeat from *to* around. Sl st into first sc. Fasten off.
Neckline
Note: The Neckline will be using a 4.0mm hook and our 3rd color.
R1: Attach yarn in the center back of the neck. Sc evenly spaced around.
Note: You want to end with an even number of stitches. I did 1sc in each hdc st, 1sc in each space, but I decreased a little bit in the corners where 3 squares meet to avoid it getting bunched up. It came out to roughly 100 sts.
R2: Ch1 (do NOT turn), 1sc in same st, ch3, sl st into same st and in next sc st. *1sc in next st, ch3, sl st into same st and next st.* Repeat from *to* around. Sl st into first sc. Fasten off.
Belt
Note: The Belt will be using a 4.0mm hook and our 4th color.
R1: Ch 201. Sl st into 2nd ch from hook. Sl st in each ch. Fasten off.
Note: Don’t overthink the ch count too much. I ended up with a 44in chain, but it is up to your preference! You’ll loop it through every other 3dc cluster from our first row of the skirt, and then I like to tie it in the front.

Conclusion
I hope you enjoyed making this Island Girl Crochet Baby Dress as much as I enjoyed dreaming it up! There’s something about bright cotton yarn, floral granny squares, and lacey stitches that just feels extra special together… especially in a project meant for warm weather and little summer adventures.
I still can’t get over how much personality these flower squares bring to a project while staying so beginner-friendly and relaxing to work on! I have a feeling they’ll keep finding their way into future designs around here because apparently, I’m incapable of leaving them alone for too long.
If you’re anything like me and keep falling down the rabbit hole of baby crochet projects lately, check out these Quick Crochet Baby Gifts You Can Make in Under 2 Hours and Crochet Baby Shower Gift Ideas, along with this Crochet Baby Lovey vs Snuggler guide for anyone debating which cuddly project to make next!
As always, you can always find more of my ad-free patterns over on Etsy and Ravelry. And of course, if you make your own dress, feel free to tag me @crochetwithgabriellarose on Instagram so I can see your color choices and cheer you on. Seeing your finished projects never gets old for me.
One Comment
Comments are closed.