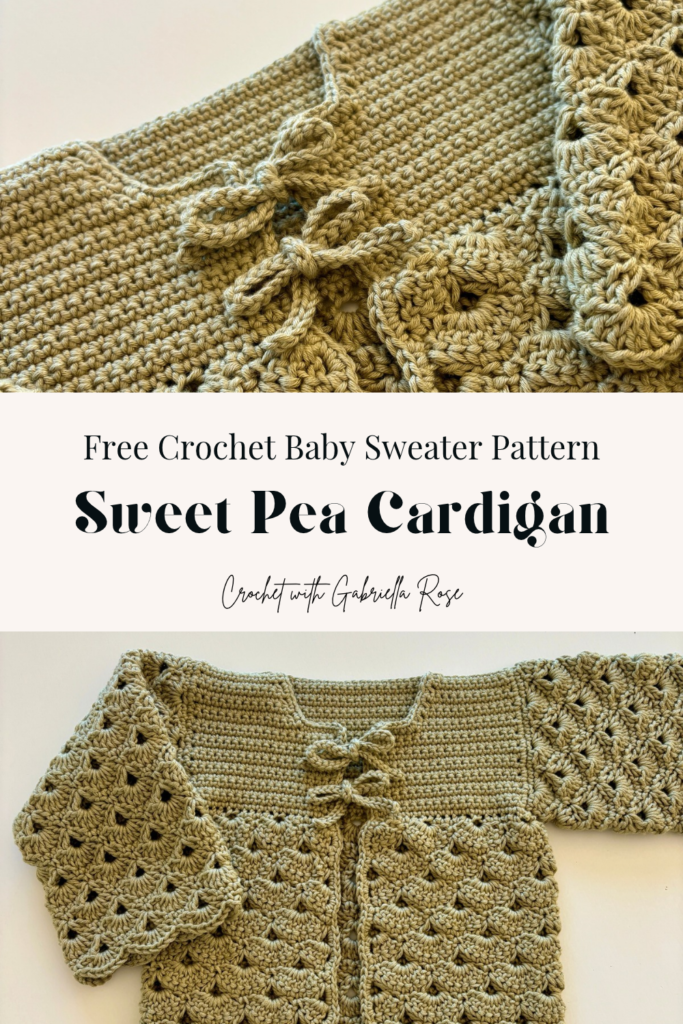
Sweet Pea Crochet Baby Cardigan Pattern (A Timeless Baby Sweater)
Well… she’s finally here.
After months of counting down, wondering when she would decide to make her grand entrance, and joking that she was going to keep us waiting forever, our little girl is officially one month old.
And somehow, that month has already gone by way too quickly.
I feel like I’m caught somewhere in the middle of wanting to freeze time completely and being so excited for everything that’s still ahead. I want to soak up every sleepy newborn snuggle, every tiny stretch, and every little expression she makes before it changes again. At the same time, I can’t wait to watch her personality come out more and more, celebrate her first holidays, and see what this next season of life looks like with our little girl along for the ride.
She’s already growing out of some of the clothes we brought her home in, which is something I wasn’t quite prepared to see happen so soon. Everyone keeps assuring me that she’s still so little, but when I look at her, I can already see how much she’s changed. She’s been a family-record-breaking baby from day one, so she’s always felt a little “big” to me. Watching her already outgrow those first few outfits is just another little reminder of how quickly this season is moving.
I think this is God’s little way of reminding me to slow down and enjoy this season for what it is, rather than wishing I could hold onto every stage before it even arrives. There’s something so bittersweet about watching her grow while also knowing I wouldn’t want to miss any of what’s coming next.
Which is probably why I’ve been having so much fun making things for the baby she’s going to become too!
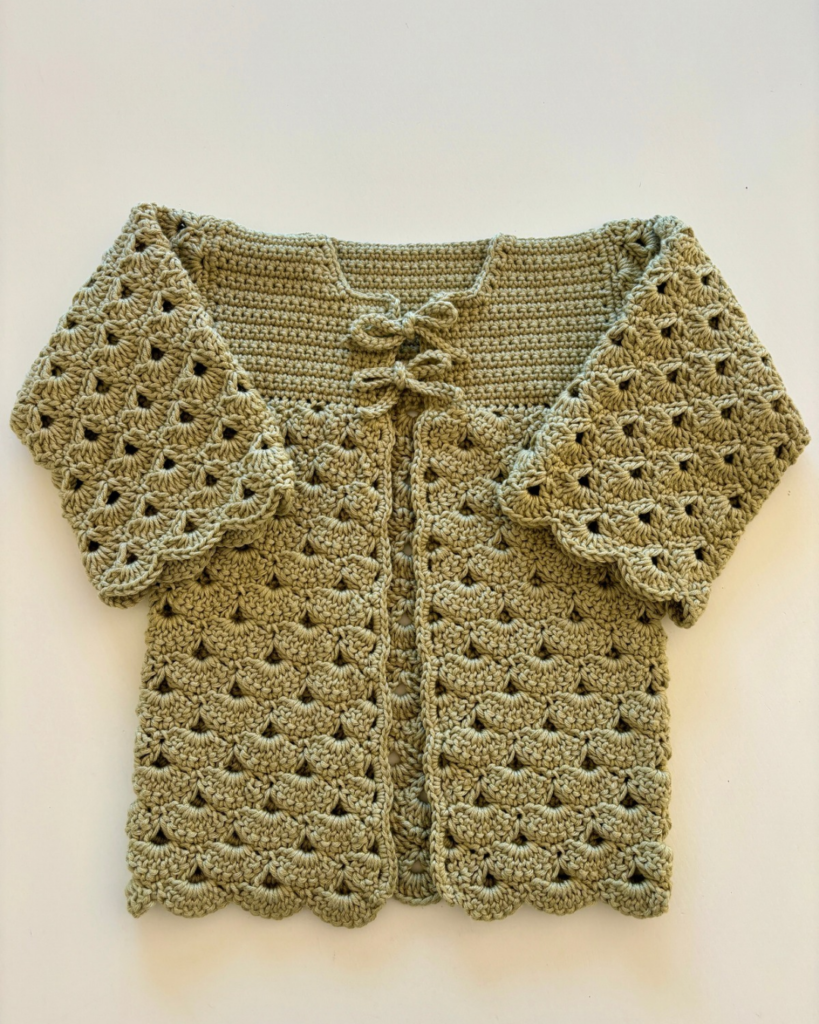
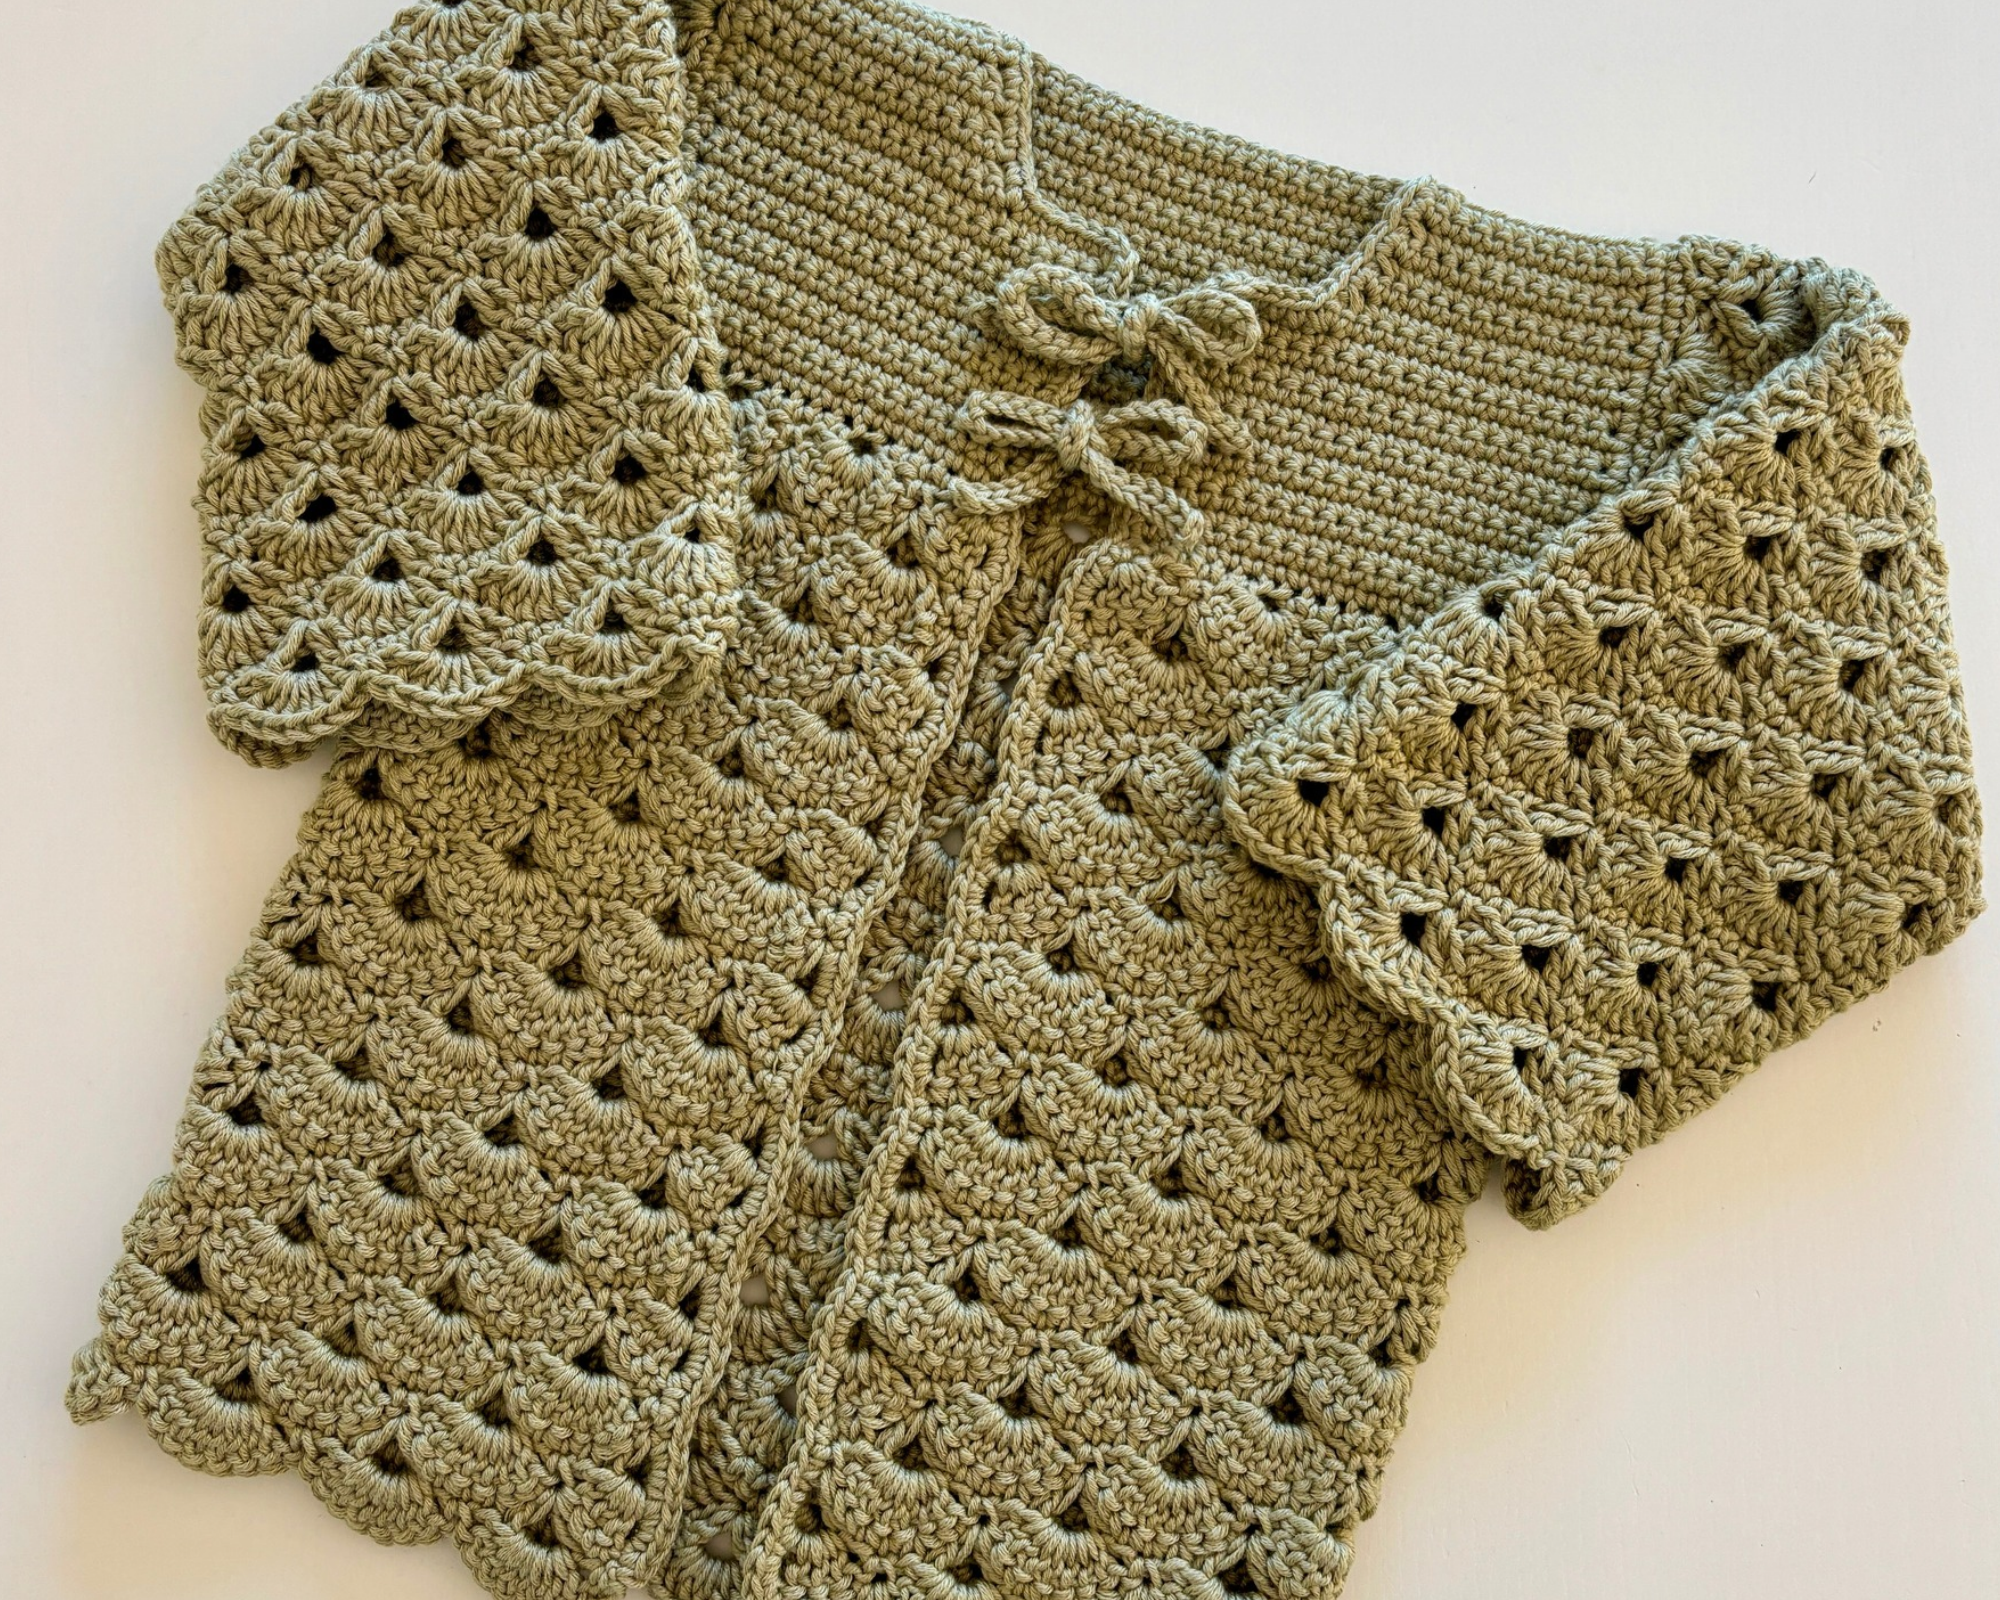
The Sweet Pea Baby Cardigan is sized for 6–12 months, so it’ll be a little while before this one actually fits her. But I have a feeling that time is going to fly by. Before I know it, she’ll be reaching for the yarn on my lap, outgrowing another stack of clothes, and somehow be big enough to wear this little cardigan I made while she was still so tiny.
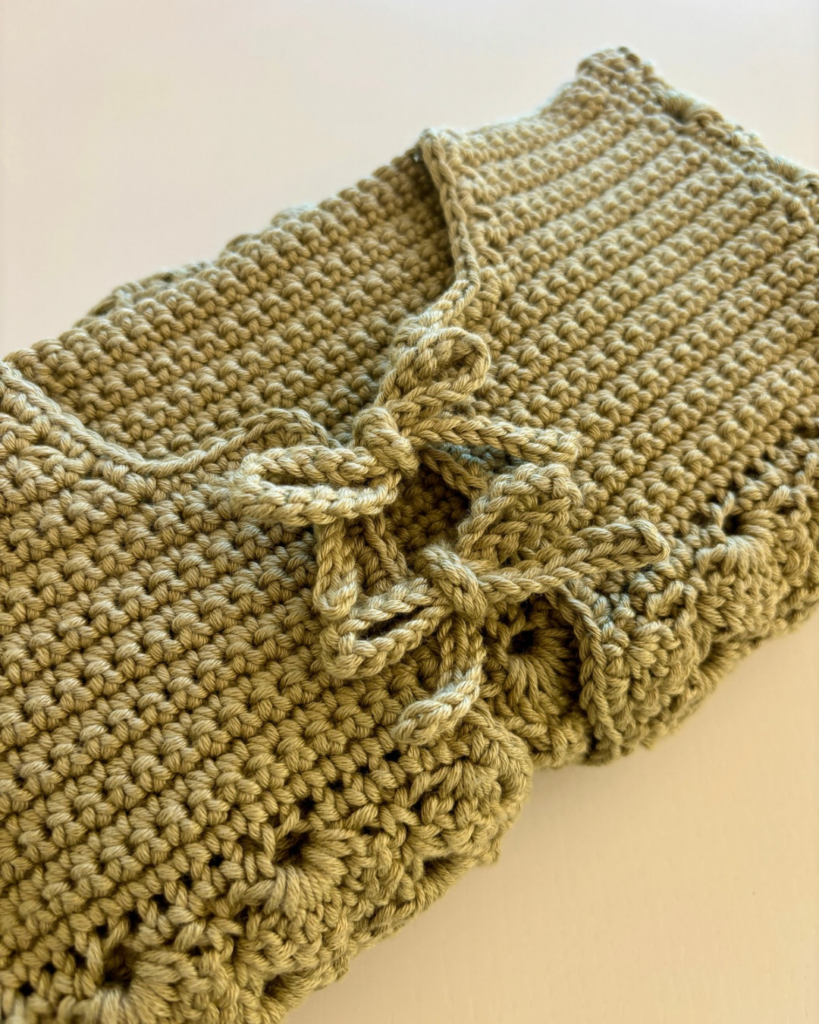
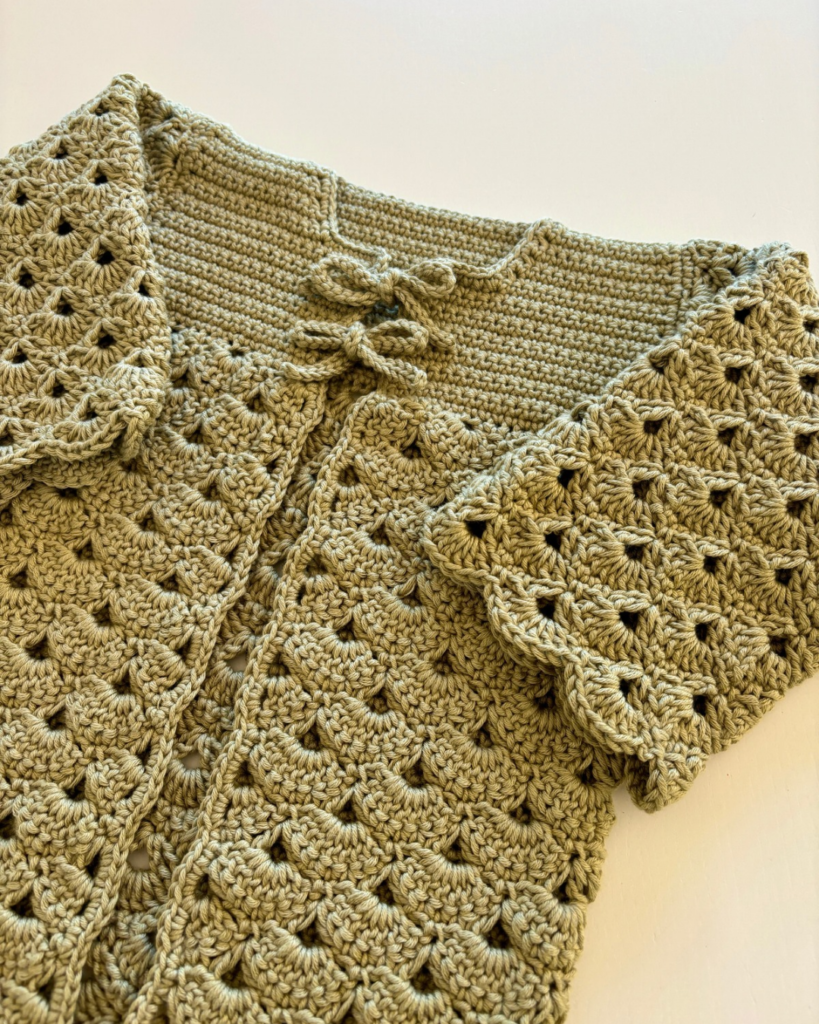
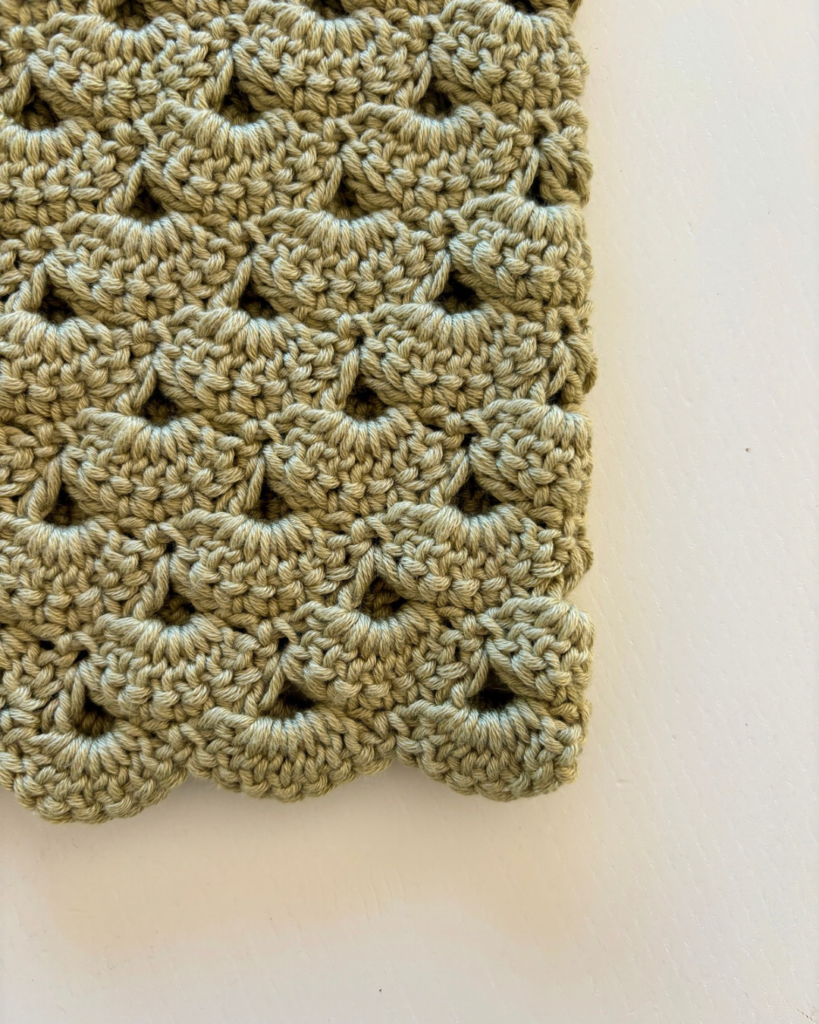
This cardigan uses the same shell stitch that I used in my Storybook Lane Baby Overall Dress, so if you loved the texture of that pattern, you’ll probably recognize it here! I wanted to give that pretty, delicate stitch an extra touch by adding two little bows that tie the cardigan together at the chest.
It’s sweet without being overly fussy, and I think it would make such a special handmade piece for a little one—whether you’re making it for your own baby, a grandbaby, or a baby shower gift.
So while my daughter may have to wait a few more months before she gets to wear her Sweet Pea Cardigan, I’m going to enjoy knowing it’s waiting for her in the closet.
And honestly, I think I’m going to blink and it’ll already fit!
This post contains affiliate links, which means I receive a small commission, at no extra cost to you, if you make a purchase using that link. Please see my disclosure for more details.
Crochet Baby Cardigan Pattern
Materials
- Yarn Bee Bamboo-Tiful Yarn. 560 yards of Sage.
- E-4/3.5 mm Crochet Hook
- 7 / 4.5mm Crochet Hook
- Tapestry Needle for weaving in ends
Size
Finished cardigan fits an average 6-12 mo baby. About 13.5” long and 28” wingspan.
Body
Note: Body uses a 4.5mm hook. We will be turning after each row.
R1: Ch87. Sc into 2nd ch from hook. 5sc. *Ch2, skip 1 st, 1sc in next 5 sts* Repeat from *to* until last 6 sts. 6sc.
R2: Ch3 (counts as a dc here and throughout) and 3dc in same st. *Skip 2 sts, 1sc, skip 2 sts, 7dc in ch2 from previous row (shell made).* Repeat from *to* until last 3 sts. Skip 2 sts, 4dc in last st.
R3: Ch1 and sc in same st. 1sc in next st. *Skip 2 sts, V-st in sc from previous row, skip 2 sts, 1sc in top 3 sts of shell.* Repeat from *to* until last 5 sts. Skip 2 sts, V-st, skip 2 sts, 1sc in last 2 sts.
R4: Ch1 and sc in same st. *Skip 1 st, 7dc (shell) in V-st from previous row, skip 1 st, 1sc.* Repeat from *to* until last 2 sts. Skip next st, 1sc in last st.
R5: Ch4 and dc in same st (counts as a V-st here and throughout). *Skip 2 sts, 1sc in top 3 sts of shell, skip 2 sts, V-st in sc from previous row.* Repeat from *to* until the end.
R10-28: Repeat R2-5. Fasten off.
Body should measure roughly 10.5” long and 20” across.
Yoke
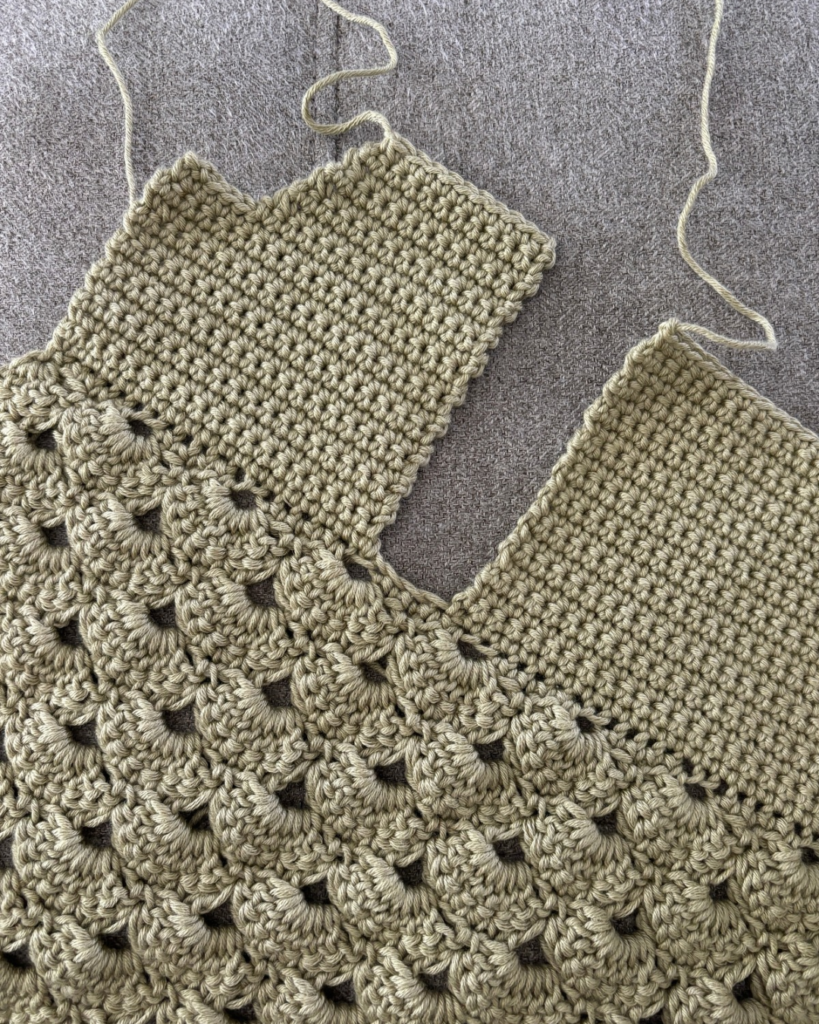
Right Side: Yoke uses a 3.5mm hook. Starting back up at the beginning chain of the Body.
R1: Ch1 and sc in same st. 1sc in next 18 sts. (19 st)
R2-13: Ch1 and turn. 1sc in each st across. (19 st)
R14: Ch1 and turn. 1sc in 14 sts. (14 st)
R15: Ch1 and turn. 1dec, 1sc in each st across. (13 st)
R16: Ch1 and turn. 1sc in each st across. (13 st)
R17: Ch1 and turn. 1dec, 1sc in each st across. (12 st)
R18: Ch1 and turn. 1sc in each st across. (12 st)
R19: Ch1 and turn. 1dec, 1sc in each st across. (11 st)
R20: Ch1 and turn. 1sc in each st across. (11 st)
R21: Ch1 and turn. 1dec, 1sc in each st across. Fasten off. (10 st)
Left Side: Starting on the other end of the top of the Body.
R1: Ch1 and sc in same st. 1sc in next 18 sts. (19 st)
R2-13: Ch1 and turn. 1sc in each st across. (19 st)
R14: Ch1 and turn. Sl st into first 6 sts. 1sc in each st across. (14 st)
R15: Ch1 and turn. 1sc in each st across until last 2 sts. 1dec. (13 st)
R16: Ch1 and turn. 1sc in each st across. (13 st)
R17: Ch1 and turn. 1sc in each st across until last 2 sts. 1dec. (12 st)
R18: Ch1 and turn. 1sc in each st across. (12 st)
R19: Ch1 and turn. 1sc in each st across until last 2 sts. 1dec. (11 st)
R20: Ch1 and turn. 1sc in each st across. (11 st)
R21: Ch1 and turn. 1sc in each st across until last 2 sts. 1dec. Fasten off. (10 st)
Back Side: Starting 3 sts past the Right Side on the top of the Body.
R1: Ch1 and sc in same st. 1sc in next 39 sts. (40 st)
R2-21: Ch1 and turn. 1sc in each st across. Fasten off. (40 st)
Fold and line up the Right Side and Left Side over the Back Side. Sew shoulders seams together.
Sleeves
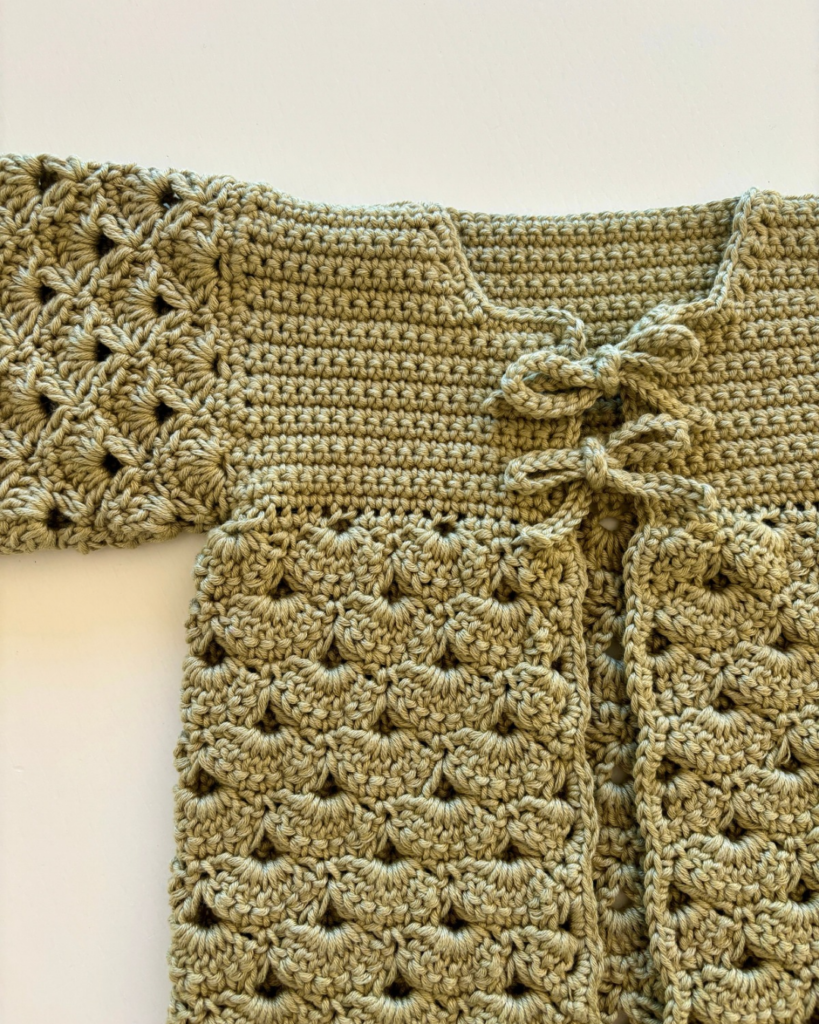
Note: Sleeves uses a 4.5mm hook. Insert hook in the side of the first row of Yoke. We will no longer be turning after each row.
R1: Ch1, 1sc in each of the 21 rows up the Yoke and 21 rows down the Back Side. Sl st into first sc st. (42 sts)
R2: Ch1, 1sc in 3 sts. *Ch2, skip 1 st, 1sc in 5 sts.* Repeat from *to* until last 3 sts. Ch2, skip 1 st, 1sc in last 2 sts. Sl st into first sc st.
R3: Ch1, 1sc. *Skip 2 sts, 7dc in ch2 space, skip 2 sts, 1sc in next st.* Repeat from *to* until last ch2 space. 7dc in ch2 space, skip 2 sts, sl st into first sc st.
R4: Ch5, 1dc in same st. (counts as v-st here and throughout), *skip 2 sts, 1sc in each of top 3 sts of shell, skip 2 sts, v-st in sc from previous row.* Repeat from *to* until last shell. Skip 2 sts, 1sc in each of top 3 sts of shell, skip 2 sts, sl st into middle of ch5 of first v-st.
R5: Sl st into center of v-st. Ch3 (counts as a dc here and throughout), 3dc. *Skip 1 st, 1sc in center st, skip 1 st, 7dc in ch2 space of v-st.* Repeat from *to* until last 3 sts. Skip 1 st, 1sc in center st, skip 1 st, 3dc in first v-st. Sl st into top of ch3 to complete first shell.
R6: Ch1, 1sc in next 2 sts. *Skip 2 sts, v-st in sc from previous row, skip 2 sts, 1sc in top 3 sts of shell.* Repeat from *to* until last v-st spot. Skip 2 sts, v-st in sc from previous row, skip 2 sts, 1sc and sl st in first sc st.
R7: Ch1, 1sc. *Skip 1 st, 7dc in ch2 space of v-st, skip 1 st, 1sc in center st.* Repeat from *to* until last ch2 space of v-st. Skip 1 st, 7dc in ch2 space of v-st, sl st into first sc st.
R8-27: Repeat R4-7. Fasten off.
Sleeves should measure roughly 9.5”. If needed, sew up any holes in the armpit area.
Finishing
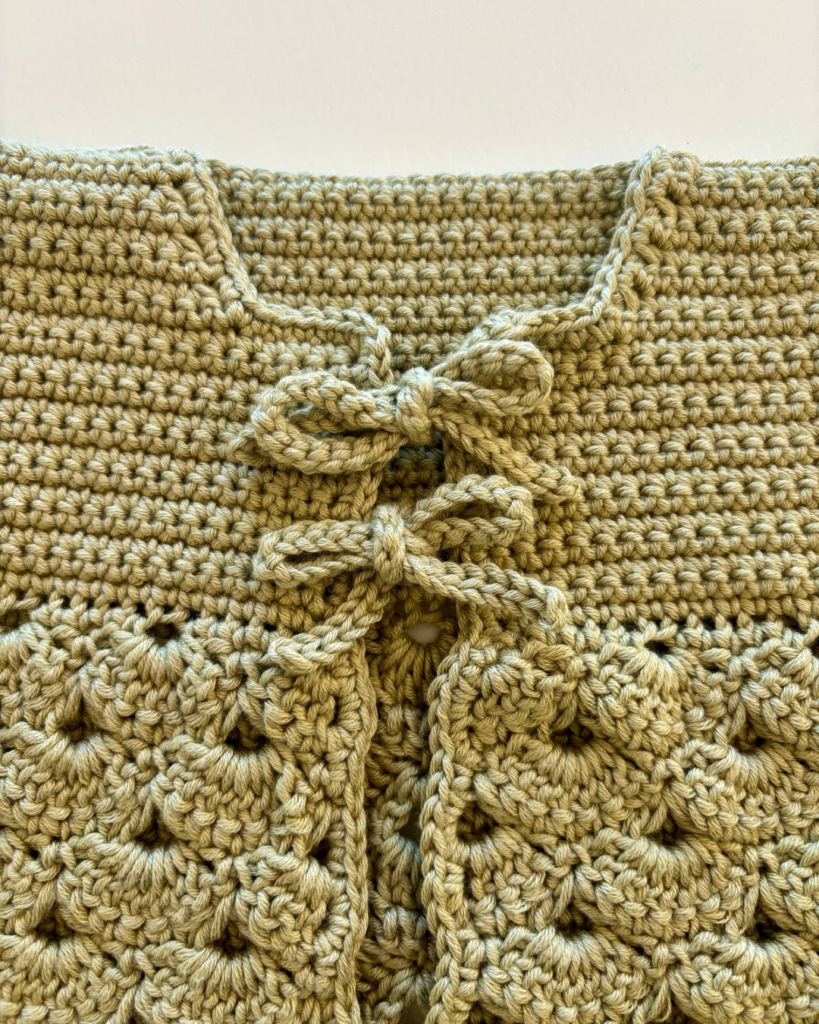
Note: Finishing uses 3.5mm hook. Starting at the bottom of the Right Side of the Body.
Ch1, work 52sc up the Body (roughly 3sc in the dc sts and 1sc in the sc sts). 5sc up the Yoke, ch30, sl st into each ch st. Continuing up the Yoke, 5sc, ch30, sl st into each ch st. 1sc in next 2 sts, 3sc in corner, 1sc in each st up and around the neck of Yoke, Back Side, and neck of Yoke on the other side back down to the corner (roughly 46 sts). 3sc in corner, 1sc in next 2 sts, ch30, sl st into each ch st. Continuing down the Yoke, 5sc, ch30, sl st into each ch st. 1 sc in last 5 sts of Yoke. Work 52sc again down the Body of the other side. Fasten off.
Conclusion
I hope you enjoyed making the Sweet Pea Baby Cardigan! There’s something extra special about crocheting baby clothes when you know just how quickly those tiny sizes disappear. This cardigan may be sitting in my closet for a little while before my own little girl can wear it, but I already know I’m going to be so excited when the day finally comes. Somehow, I have a feeling it’ll be here before I know it!
If you enjoyed the shell stitch in this cardigan, be sure to check out my Storybook Lane Baby Overall Dress for another sweet baby outfit using the same stitch! And if you’re looking for more handmade baby projects, my Cozy Fall Baby Crochet Patterns collection has plenty of ideas for the little ones in your life.
What color would you make your Sweet Pea Cardigan? Let me know in the comments below. I genuinely love reading your comments and seeing what’s on your hook!
If you’d like a clean, ad-free version of the pattern, you can find the printable PDF on my Etsy and Ravelry shops. And if you’re looking for a crochet hook I always reach for, Clover Amour is still my favorite! I’ve also shared a full review with a few budget-friendly alternatives if you’re curious.
And as always, I also love seeing your finished pieces! If you make this blanket, feel free to share it on Instagram and tag me @crochetwithgabriellarose so I can see! You can also follow along on the Crochet with Gabriella Rose Facebook page for new patterns and updates.