
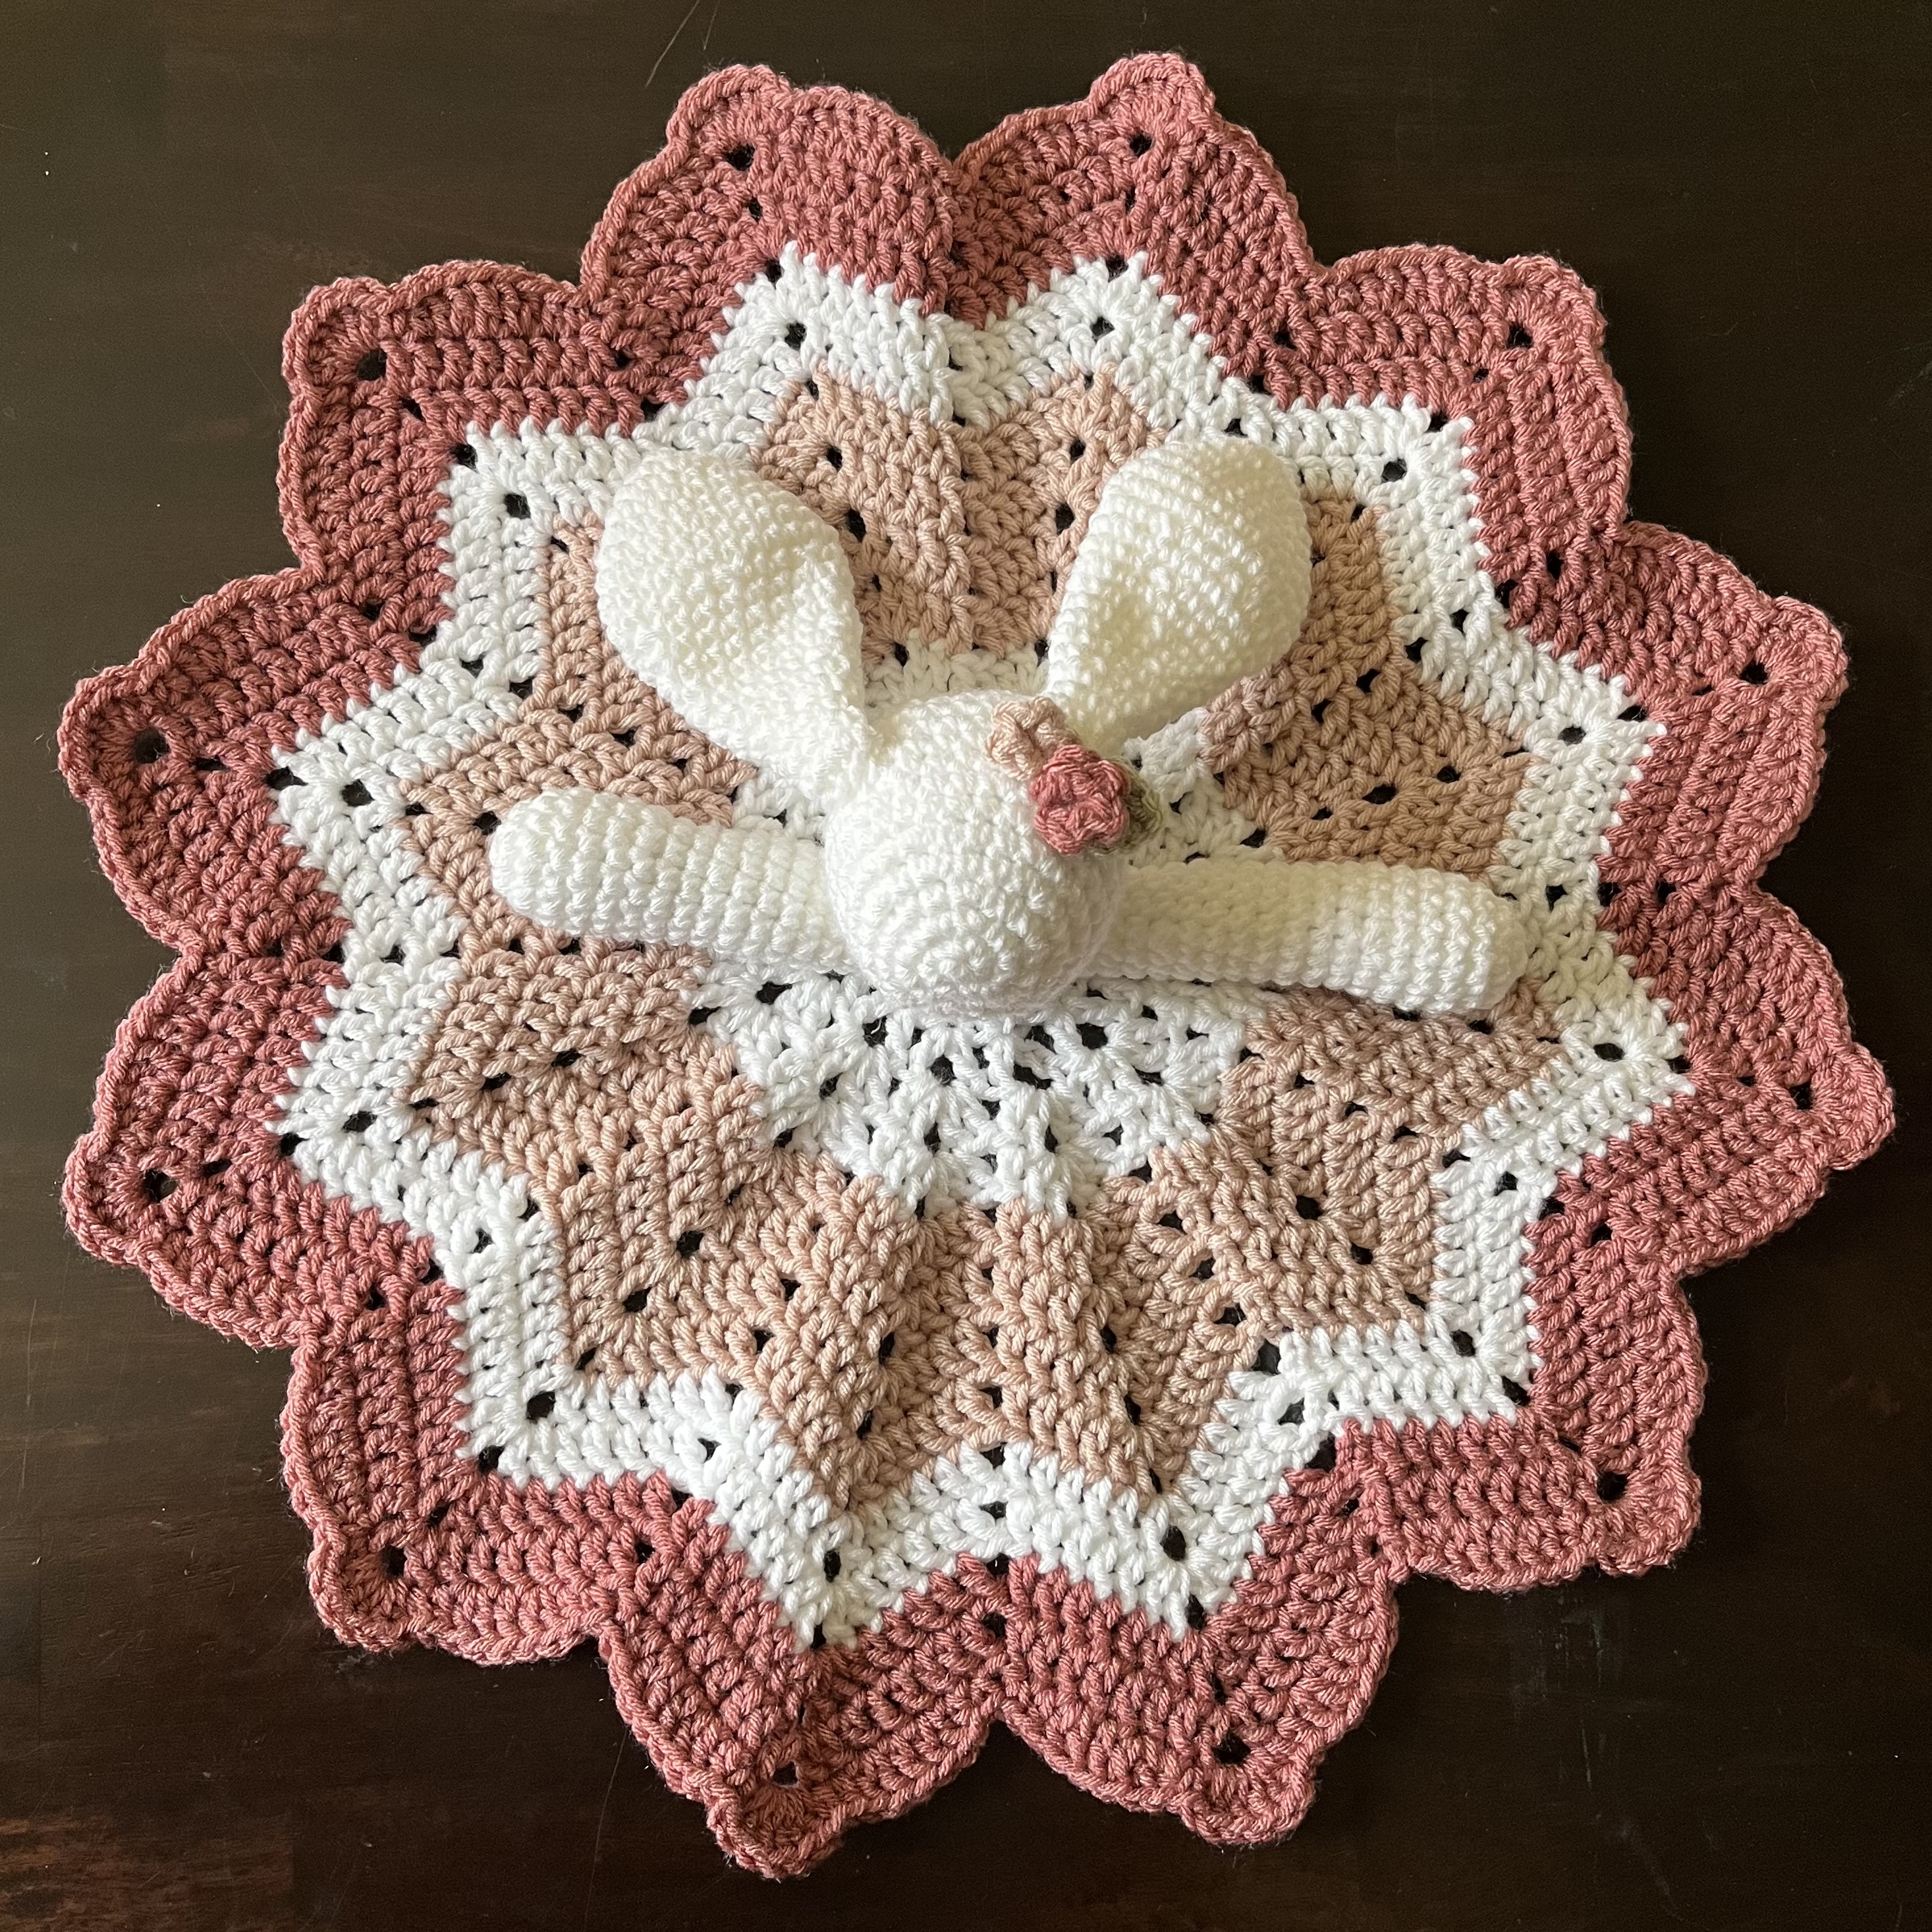
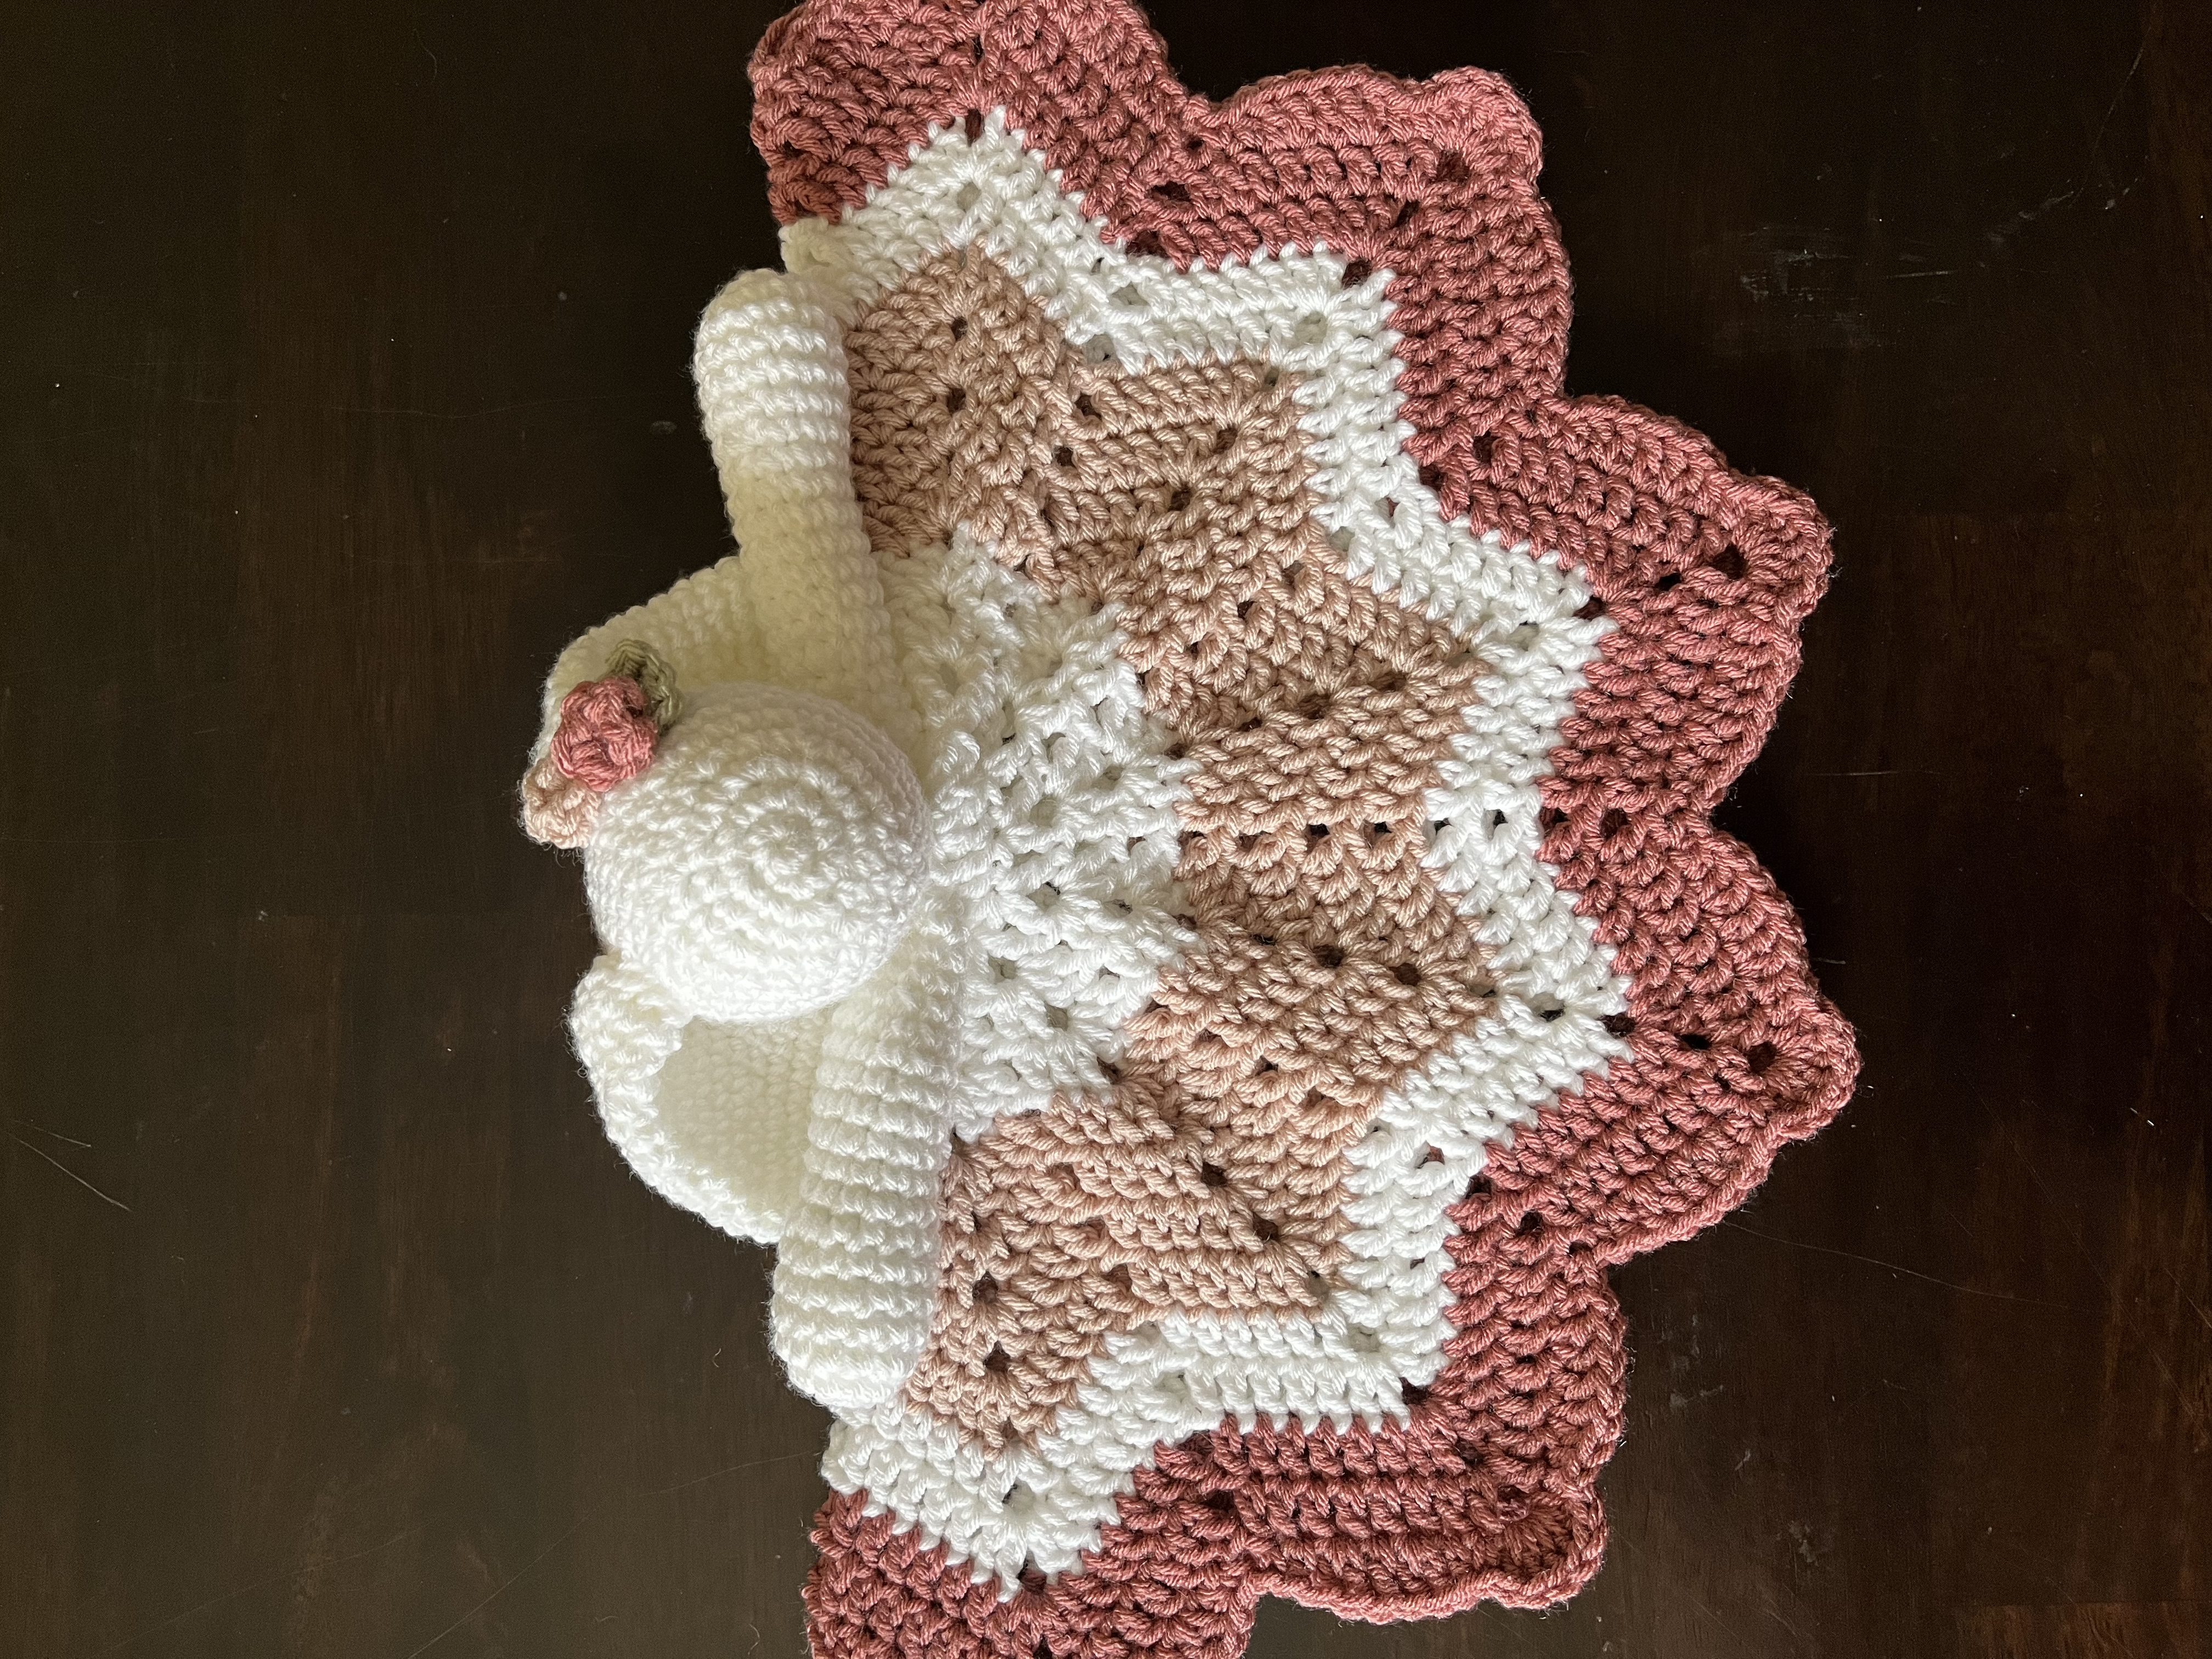
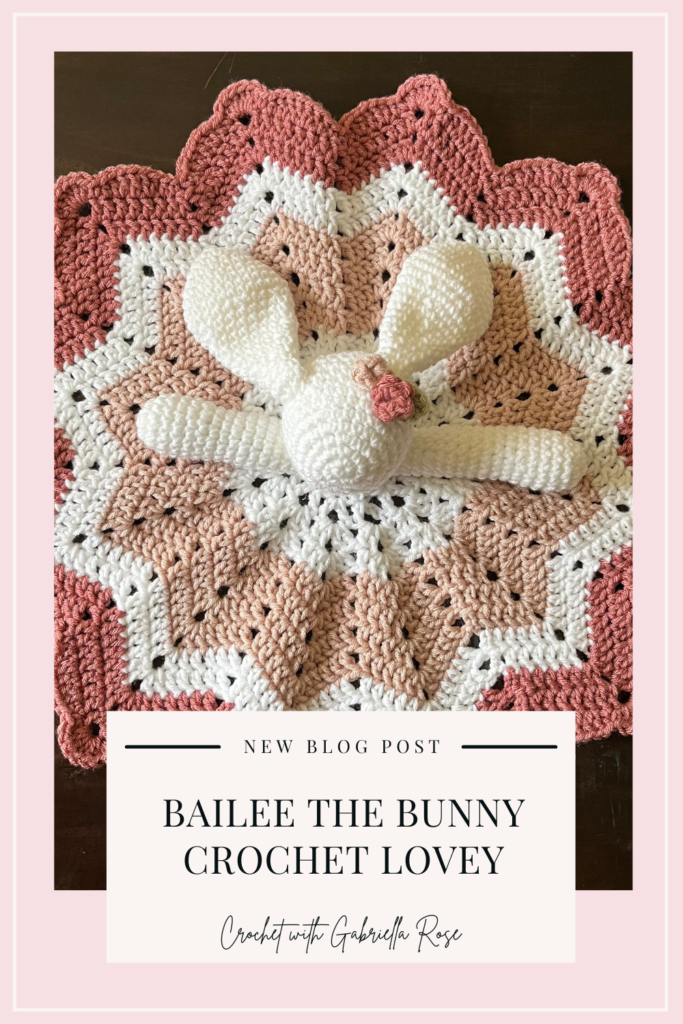
Bailee the Bunny Crochet Lovey Pattern
Got a baby due this spring? Looking for a last minute baby shower gift idea? Not enough time for a baby blanket? Crochet loveys are my new obsession and this bunny crochet lovey pattern is no exception!
This post contains affiliate links, which means I receive a small commission, at no extra cost to you, if you make a purchase using that link. Please see my disclosure for more details.
The Story
If saw my Miles the Moose crochet lovey pattern a couple weeks ago you’ll know that I’ve been IN LOVE with all things crochet lovey related lately. I am filled with ideas! As I mentioned in my crochet hats post, I am considering doing my first craft fair in the fall. If my husband asks, that is my excuse for all the loveys that are to come this year.
As we all anxiously await Easter so that we can break into all those Reese’s Eggs we’ve been stocking up on, I wanted to crochet something that just… emulated springtime in all its bright, happy, and florally glory! In comes the Bailee the Bunny crochet lovey pattern! Bailee is what I think of all the animal version of the girl-next-door. Sweet, cute, quiet… that girl who turns out to be fun and quirky and wins over the boy’s heart in the end. I hope Bailee has won your heart over as much as she has mine! Let’s jump in!
The Crochet Lovey Pattern
A little note: There is no particular order that these pieces need to be crocheted in. For me personally, I loved seeing the lovey blanket portion come together, which motivated me to work on the other pieces, but feel free to crochet in whatever order works for you!
I would recommend waiting to assemble the pieces until they are all made and you can just do them all at once. That way, you can also spot pieces that might need to be redone before assembling!
Lastly, for little ones, I recommend avoiding any little plastic eyes that may be a potential choking hazard. I like the simplicity (and ease) of doing no eyes on my loveys, but I’ve also sewn eyes on my crochet preemie octopus pattern in the past that you could use for inspiration!
Materials
- Yarn Bee Soft & Sleek Yarn. 134 yards of White; 85 yards of Mauve; 65 yards of Blush; some green scrap yarn (I used Sage that I had leftover from Miles the Moose)
- 7 / 4.50mm Crochet Hook (Clover Amour is my favorite!)
- Polyfil for stuffing
- Tapestry Needle for weaving in ends (Susie Bates is a LIFESAVER!)
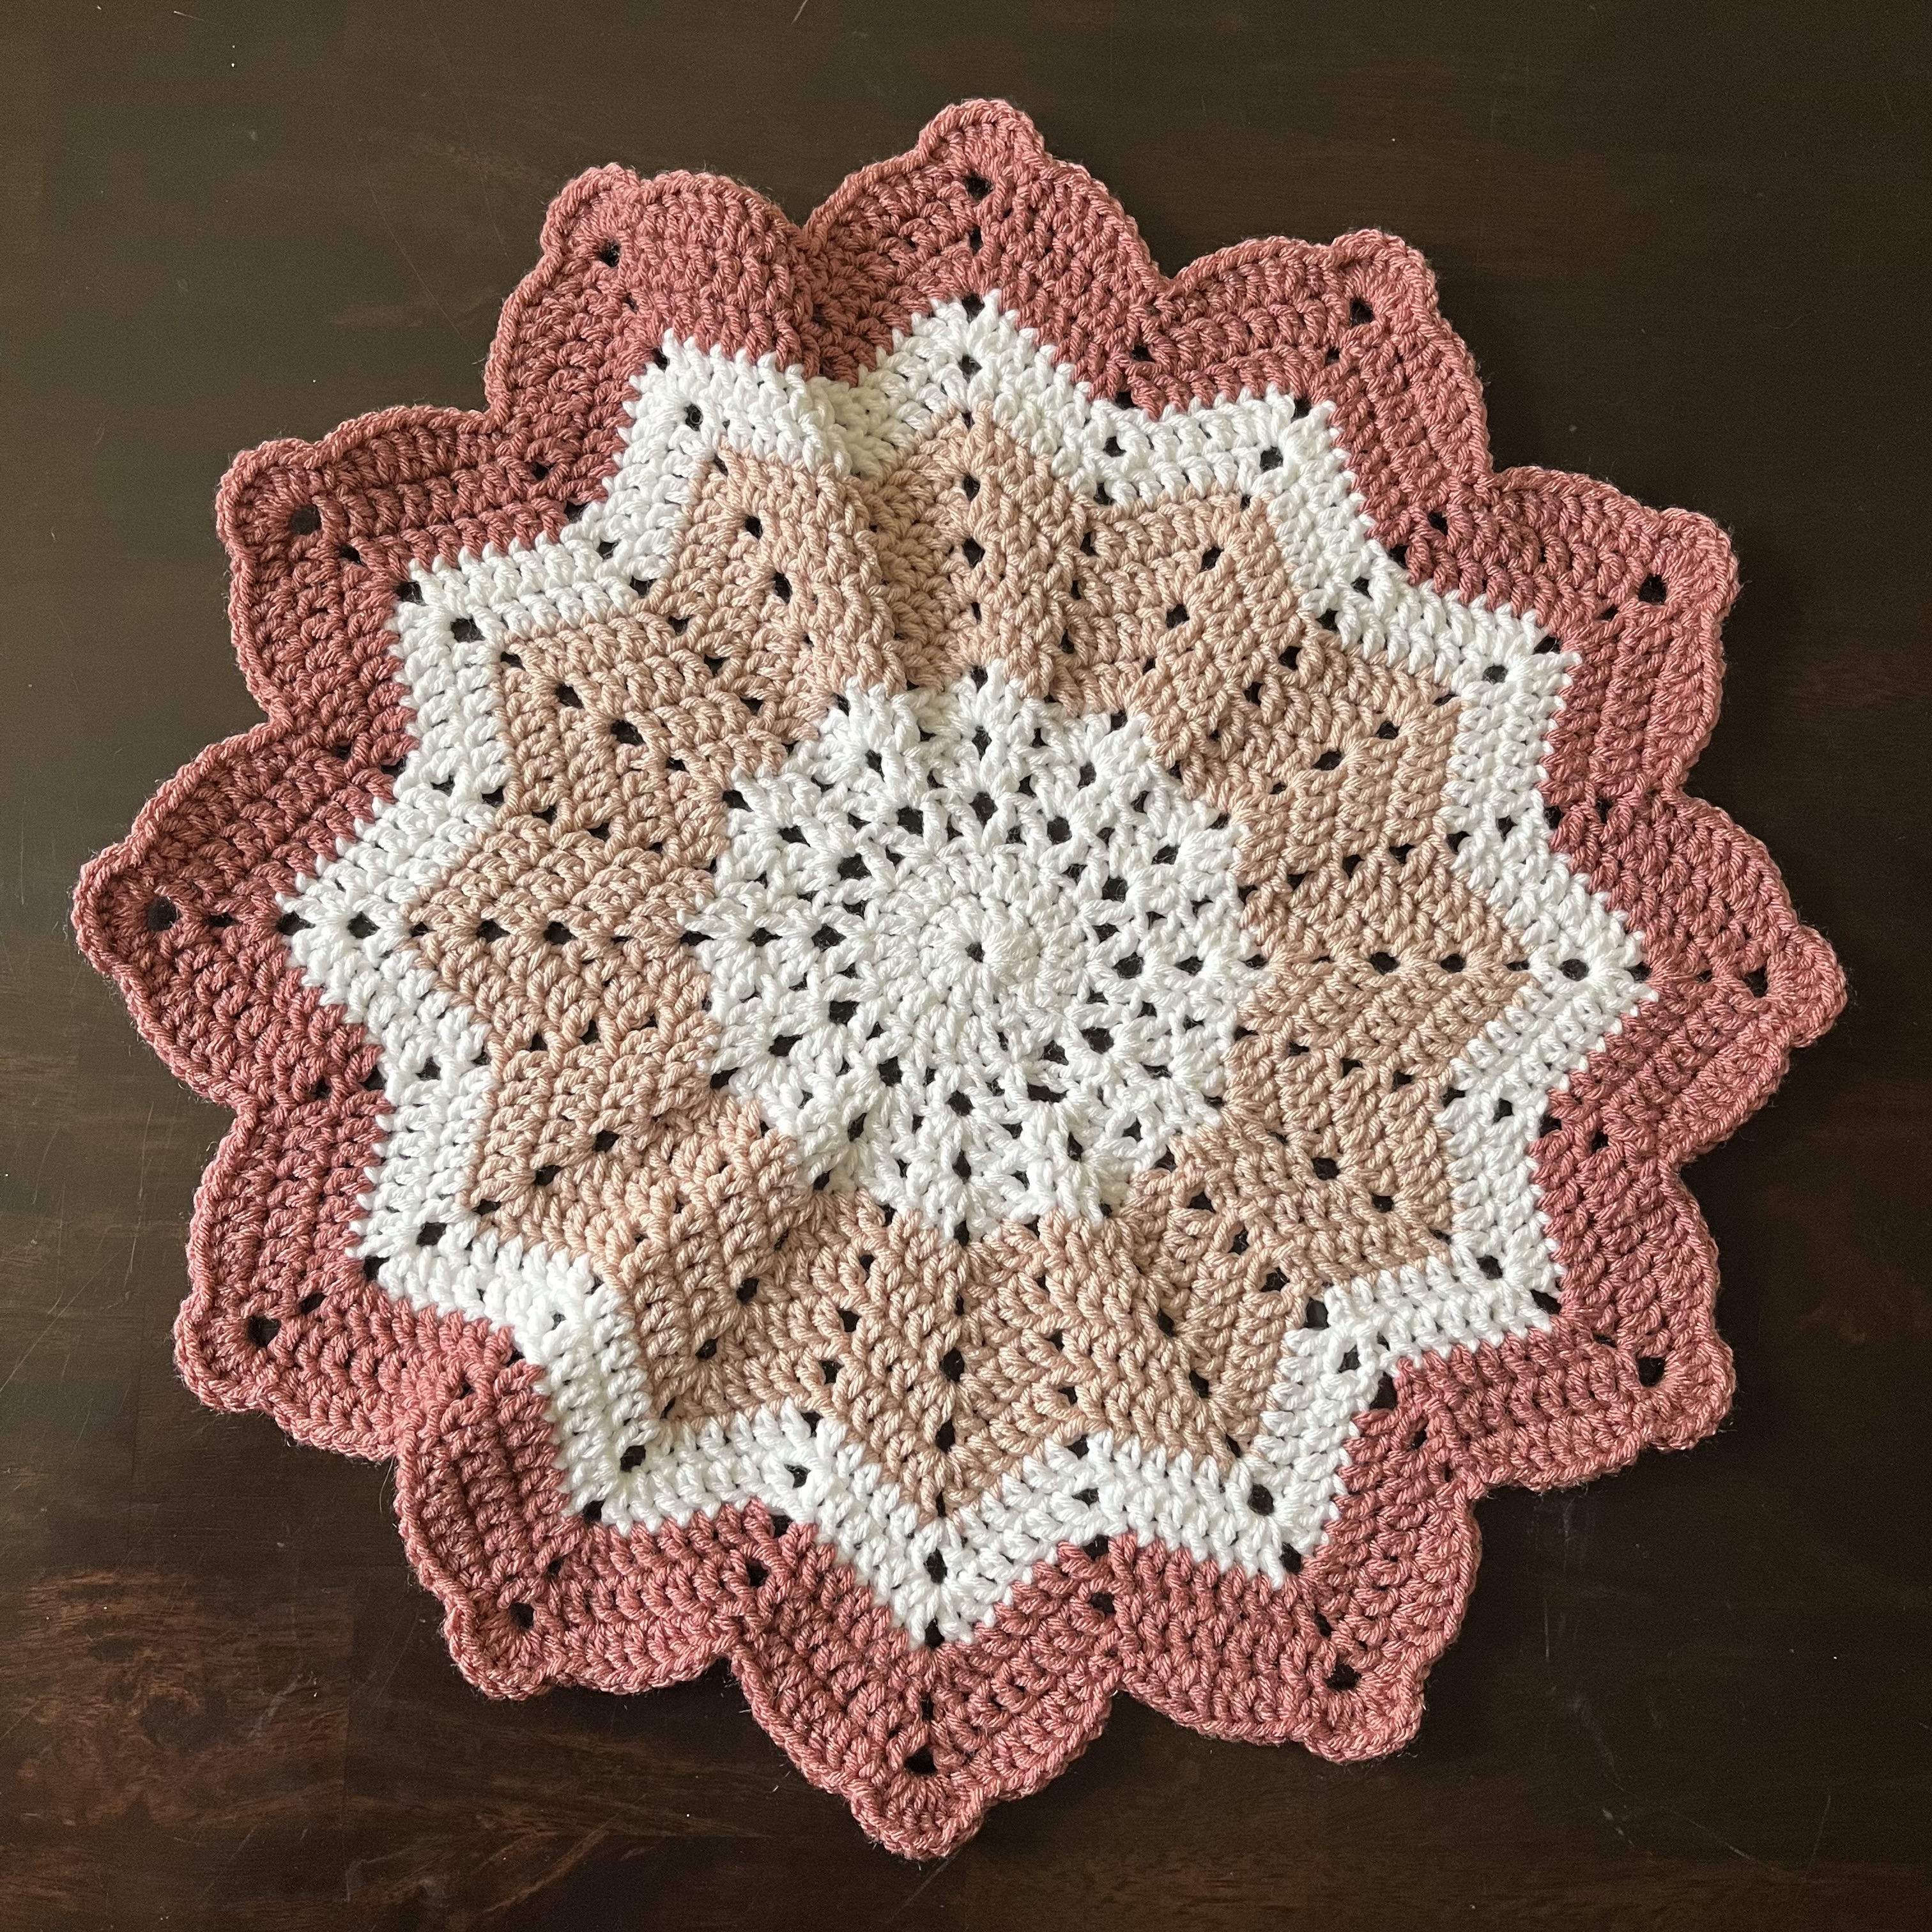
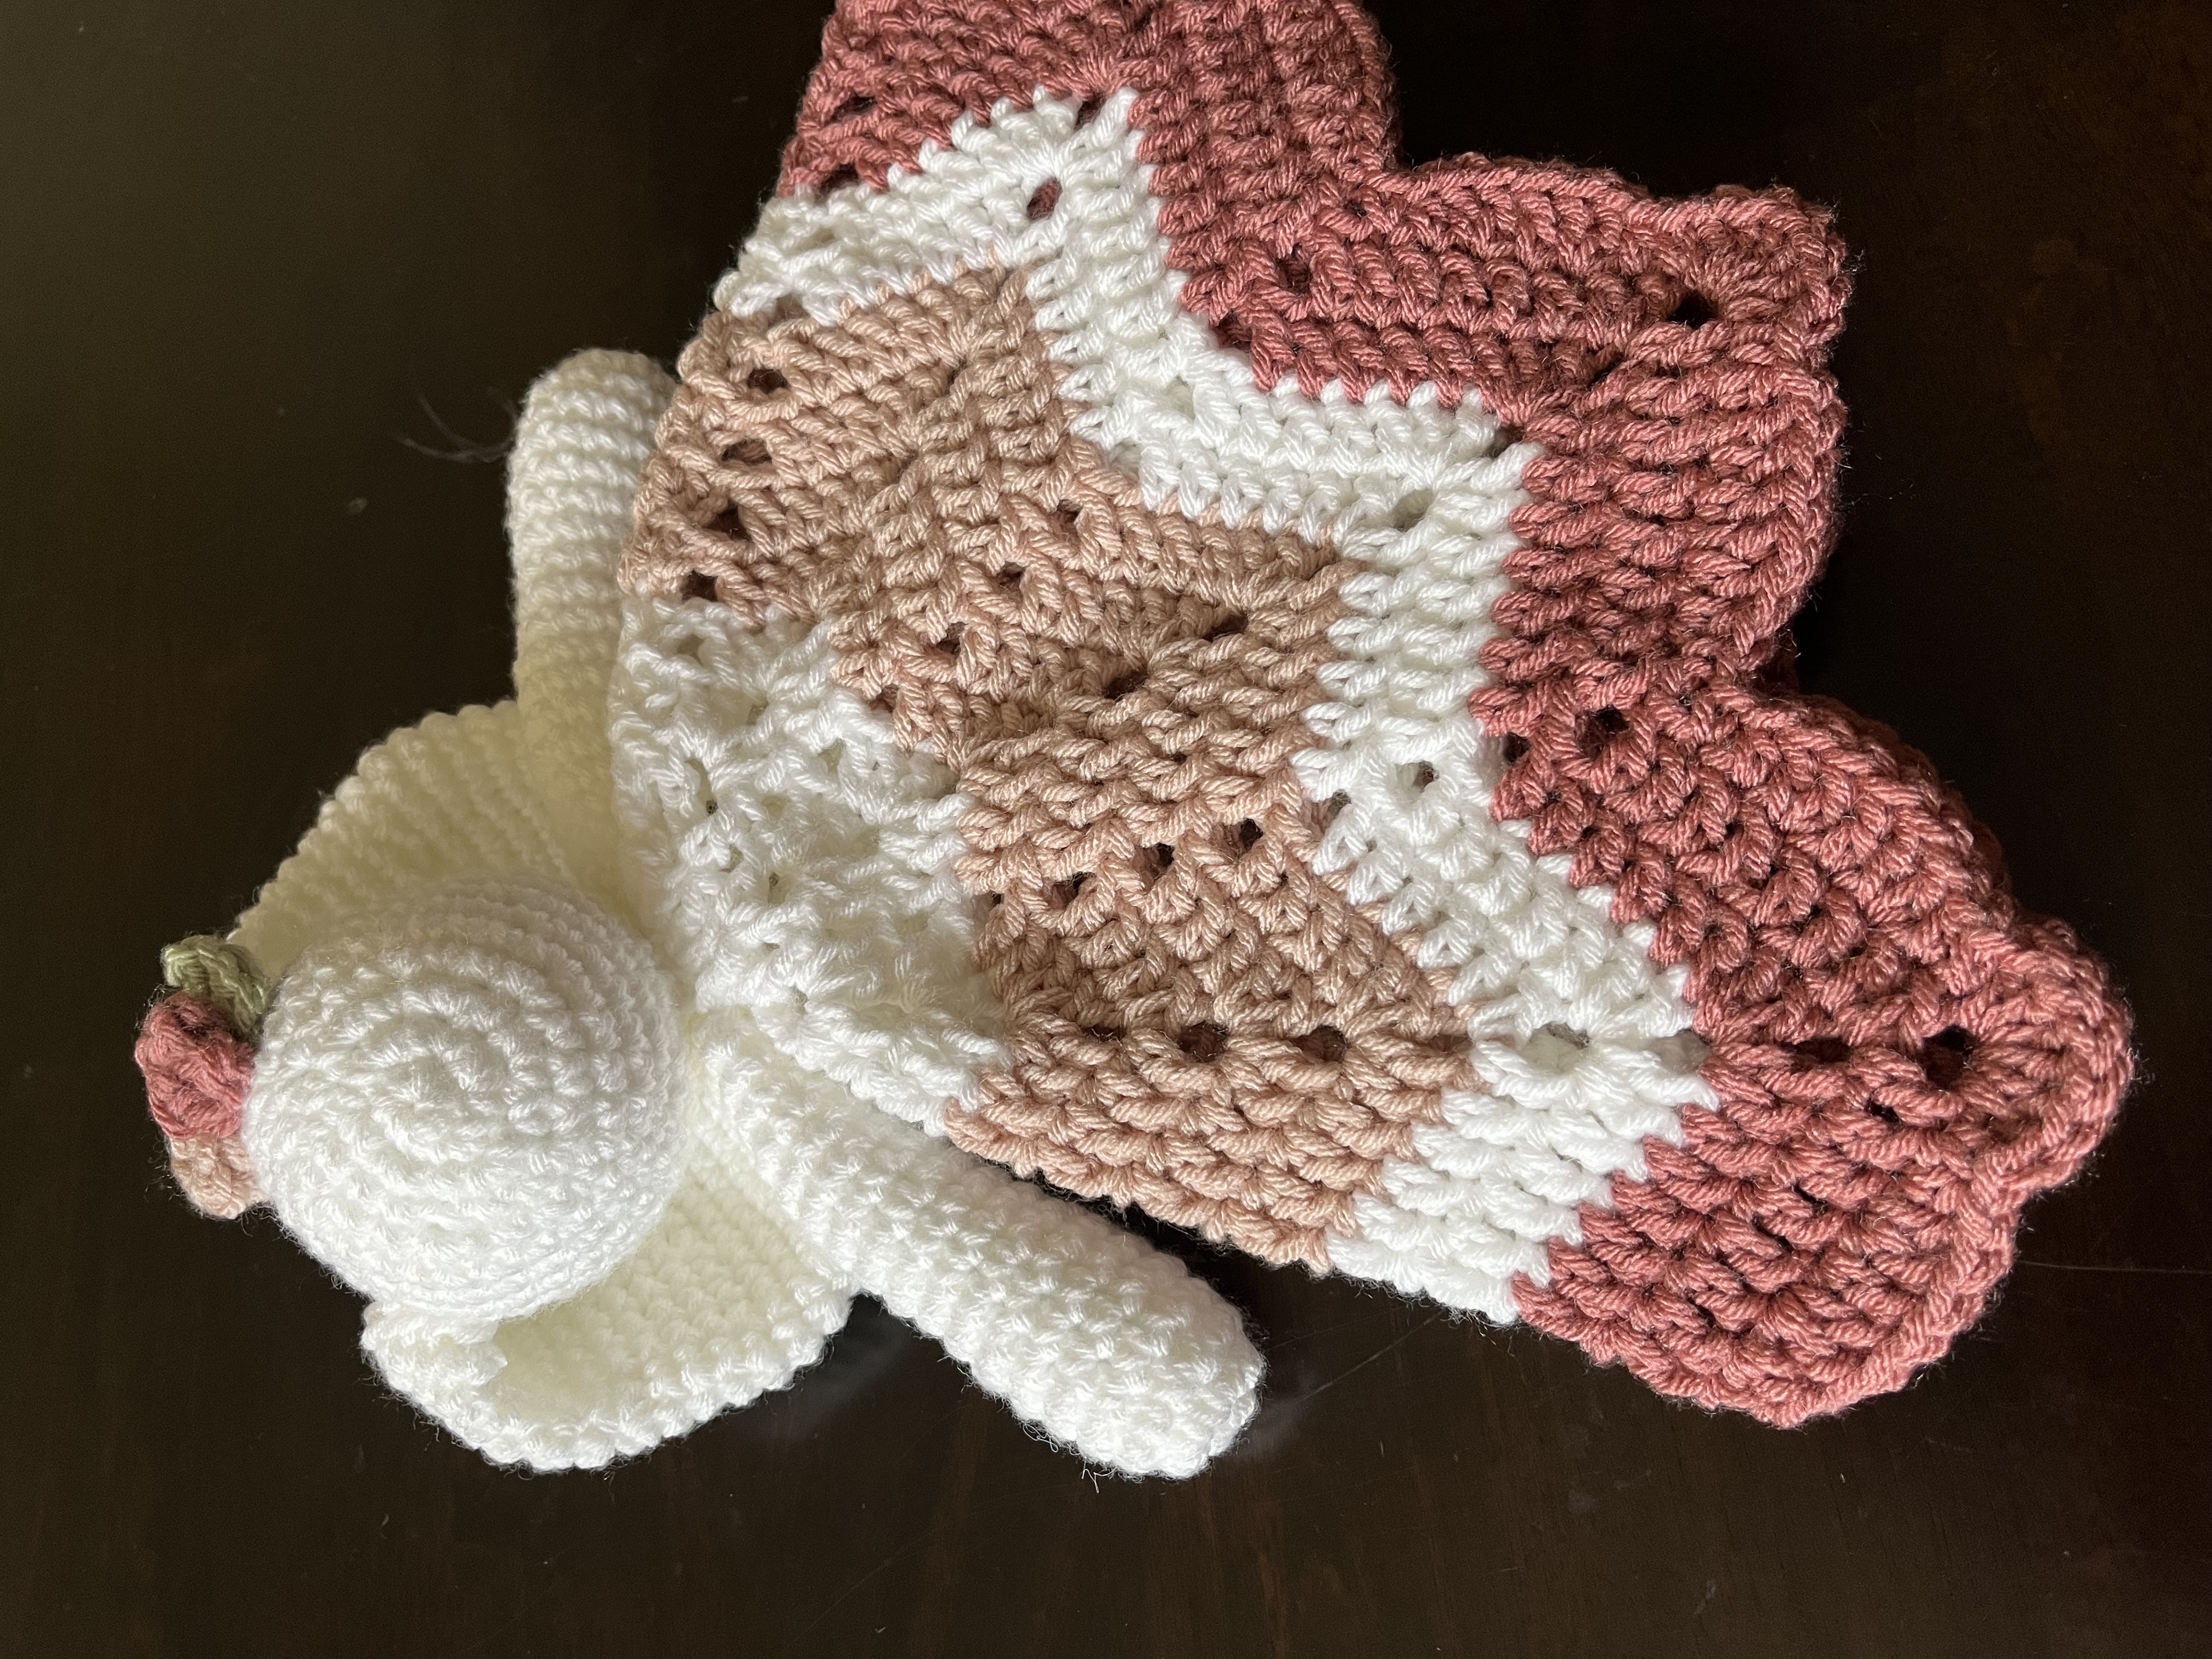
Lovey Blanket
R1: Joining with first color (White), Ch 4. Sl st into first ch. Loop made. Ch 3 (counts as dc here and throughout), 11dc in loop. Sl st into top ch of ch3.
R2: Ch 3. 1dc in same st. 2dc in each st. Sl st into top of ch3.
R3: Ch 3. *Skip st. In next st: 1dc, ch2, 1dc.* Repeat from *to* until last st. Skip last st. Back into first st: 1dc, ch2, sl st into top of ch3.
R4: Sl st into nearest ch2 space. In ch2 space: ch3, 1dc, ch2, 2dc. *In next ch2 space: 2dc, ch2, 2dc.* Repeat from *to* until end of row. Sl st into top of ch3.
R5: Sl st into next st. *1dc in next st. In next ch2 space: 2dc, ch2, 2dc. 1dc in next st. Skip next 2 st.* Repeat from *to* until end of row. Sl st into top of ch3. Fasten off.
R6: Joining with second color (Blush), Sl st into next st. Ch3, 1dc in next st. In next ch2 space: 2dc, ch2, 2dc. 1dc in next 2 st. Skip next 2 st. *1dc in next 2 st. In next ch2 space: 2dc, ch2, 2dc. 1dc in next 2 st. Skip next 2 st.* Repeat from *to* until end of row. Sl st into top of ch3.
R7: Sl st into next st. Ch3, 1dc in next 2 st. In next ch2 space: 1dc, ch2, 1dc. 1dc in next 3 st. Skip next 2 st. *1dc in next 3 st. In next ch2 space: 1dc, ch2, 1dc. 1dc in next 3 st. Skip next 2 st.* Repeat from *to* until end of row. Sl st into top of ch3.
R8: Sl st into next st. Ch3, 1dc in next 2 st. In next ch2 space: 2dc, ch2, 2dc. 1dc in next 3 st. Skip next 2 st. *1dc in next 3 st. In next ch2 space: 2dc, ch2, 2dc. 1dc in next 3 st. Skip next 2 st.* Repeat from *to* until end of row. Sl st into top of ch3.
R9: Sl st into next st. Ch3, 1dc in next 3 st. In next ch2 space: 2dc, ch2, 2dc. 1dc in next 4 st. Skip next 2 st. *1dc in next 4 st. In next ch2 space: 2dc, ch2, 2dc. 1dc in next 4 st. Skip next 2 st.* Repeat from *to* until end of row. Sl st into top of ch3. Fasten off.
R10: Joining back with the first color (White), Sl st into next st. Ch3, 1dc in next 4 st. In next ch2 space: 1dc, ch2, 1dc. 1dc in next 5 st. Skip next 2 st. *1dc in next 5 st. In next ch2 space: 1dc, ch2, 1dc. 1dc in next 5 st. Skip next 2 st.* Repeat from *to* until end of row. Sl st into top of ch3.
R11: Sl st into next st. Ch3, 1dc in next 4 st. In next ch2 space: 2dc, ch2, 2dc. 1dc in next 5 st. Skip next 2 st. *1dc in next 5 st. In next ch2 space: 2dc, ch2, 2dc. 1dc in next 5 st. Skip next 2 st.* Repeat from *to* until end of row. Sl st into top of ch3. Fasten off.
R12: Joining with third color (Mauve), Sl st into next st. Ch3, 1dc in next 5 st. In next ch2 space: 2dc, ch2, 2dc. 1dc in next 6 st. Skip next 2 st. *1dc in next 6 st. In next ch2 space: 2dc, ch2, 2dc. 1dc in next 6 st. Skip next 2 st.* Repeat from *to* until end of row. Sl st into top of ch3.
R13: Sl st into next st. Ch3, 1dc in next 6 st. In next ch2 space: 1dc, ch2, 1dc. 1dc in next 7 st. Skip next 2 st. *1dc in next 7 st. In next ch2 space: 1dc, ch2, 1dc. 1dc in next 7 st. Skip next 2 st.* Repeat from *to* until end of row. Sl st into top of ch3.
R14: Sl st into next st. *1sc in next st. 1hdc in next st. 2dc in next st. 1dc in next st. 2dc in next st. 1hdc in next st. 1sc in next st. 6dc in ch2 space. 1sc in next st. 1hdc in next st. 2dc in next st. 1dc in next st. 2dc in next st. 1hdc in next st. 1sc in next st. Skip next 2 st.* Repeat from *to* until end of row. Sl st into top of 1st sc st. Fasten off.
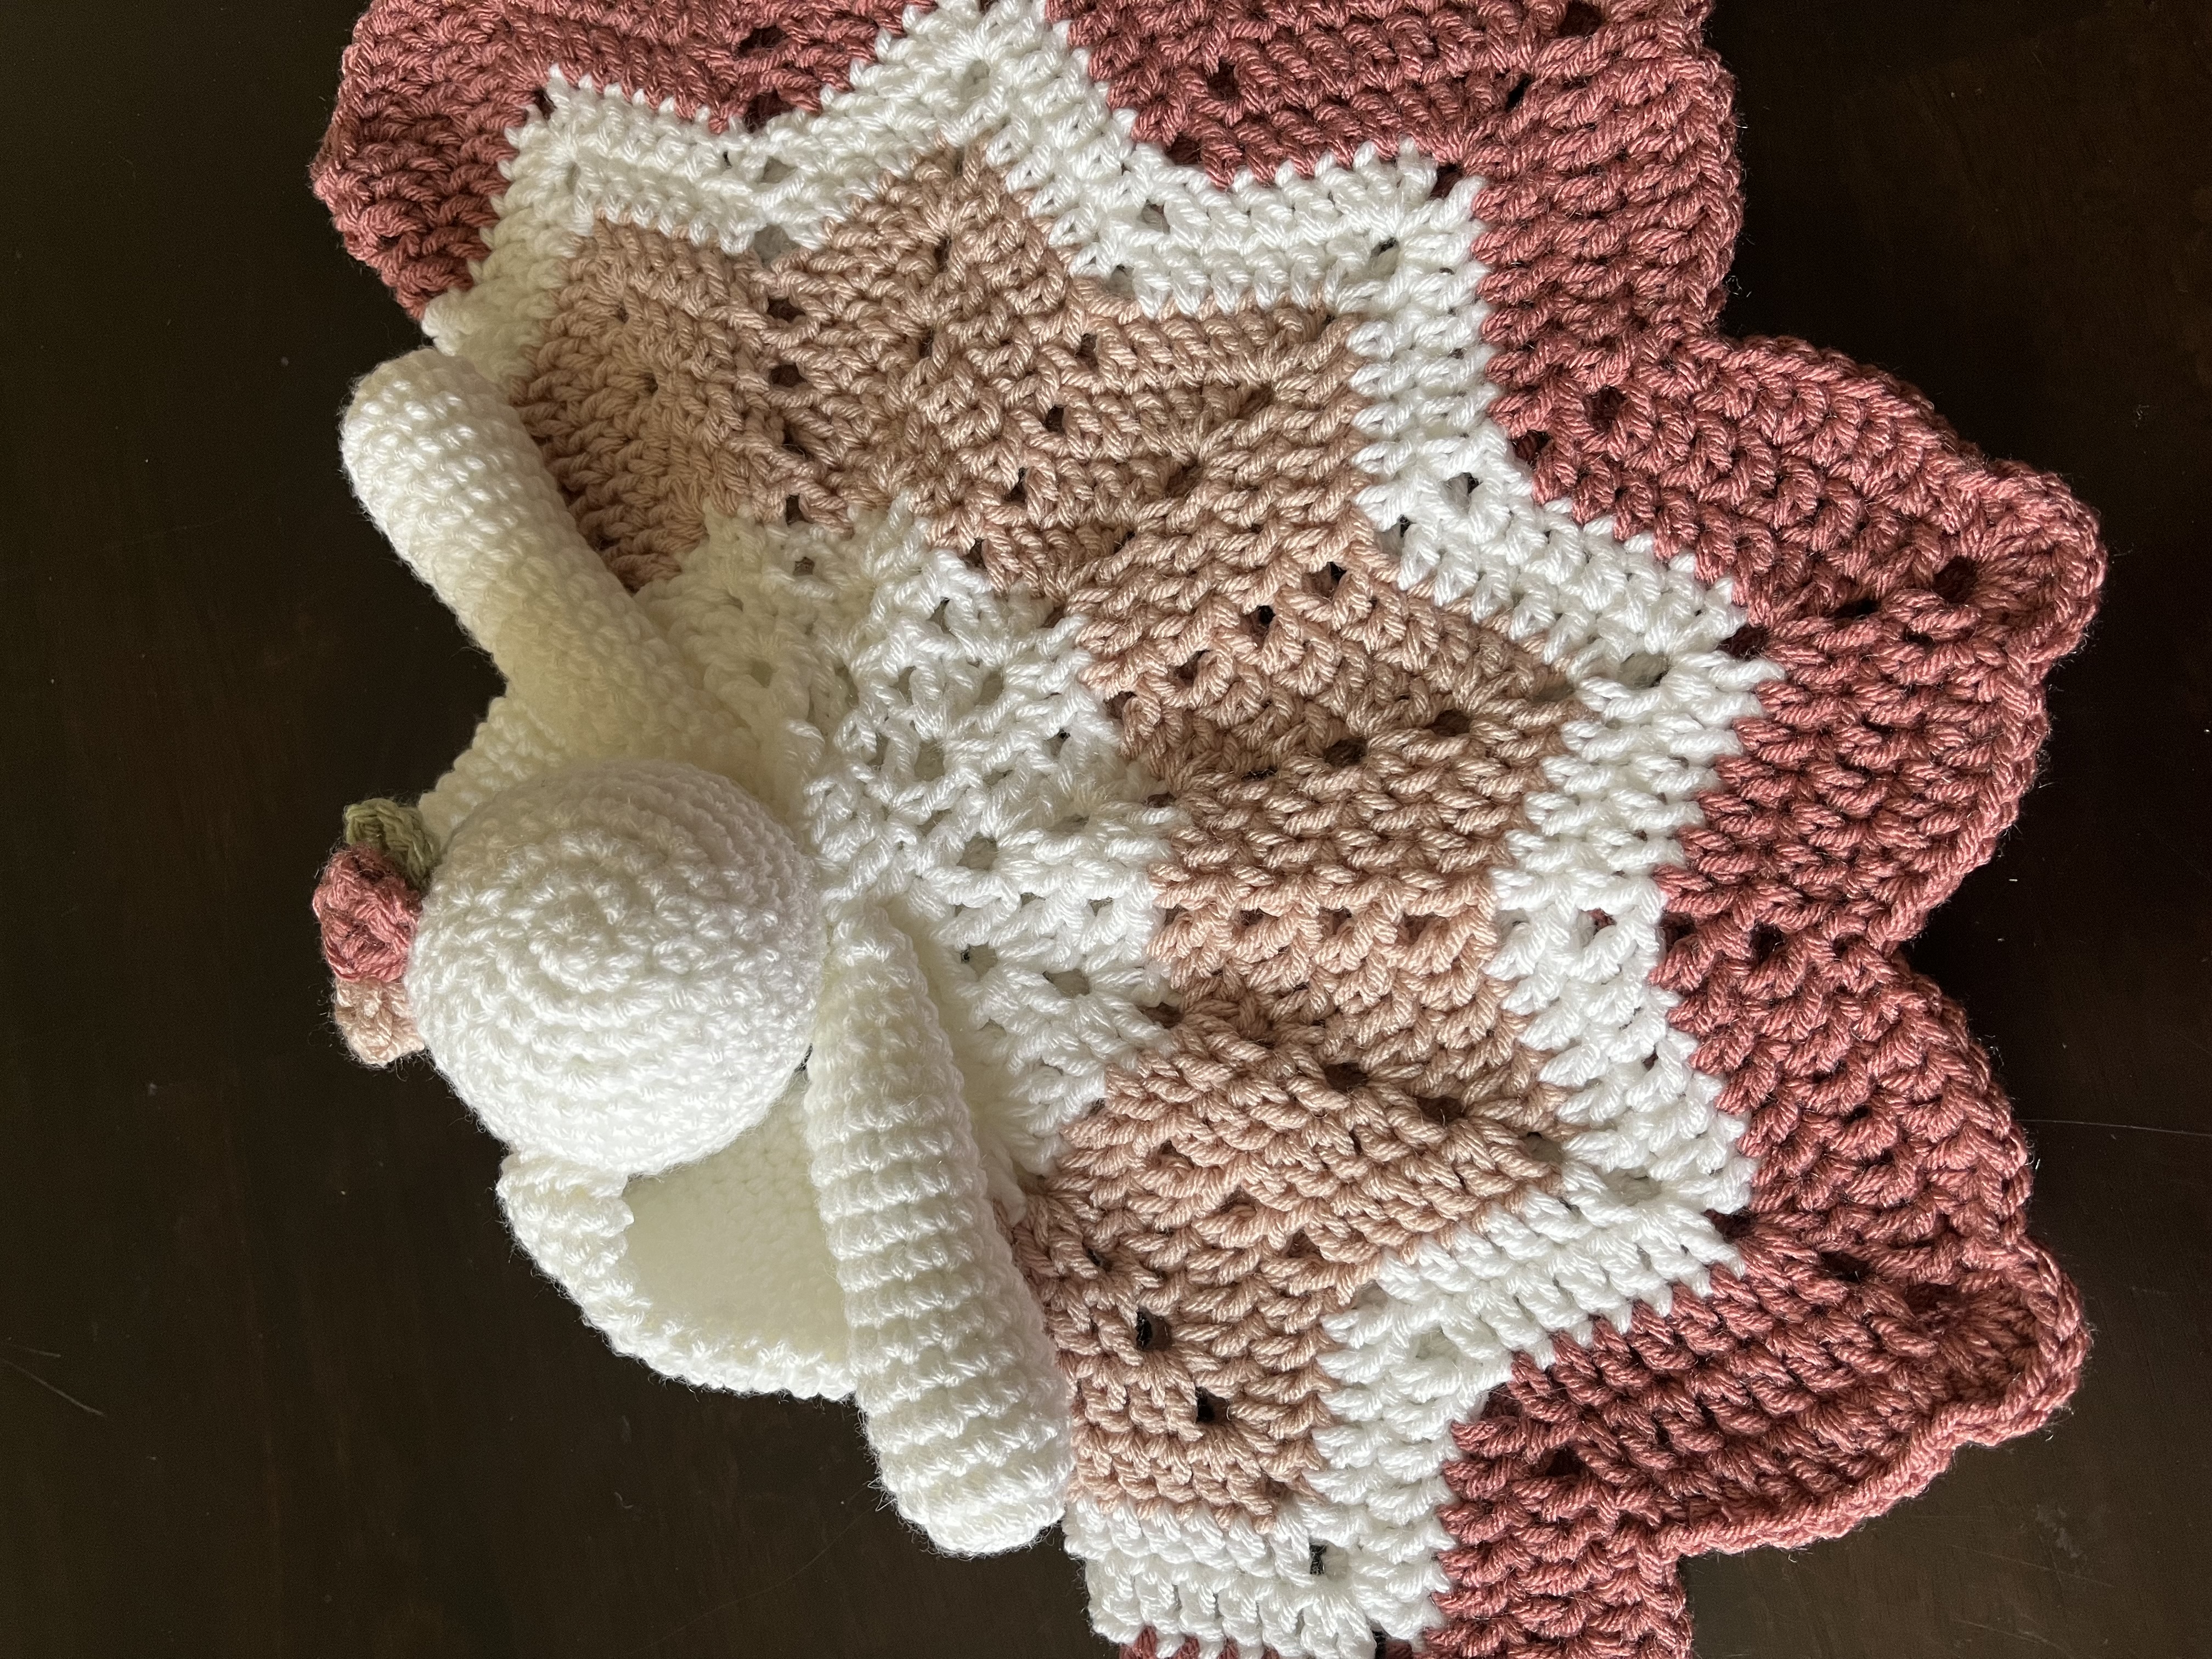
Bunny Head
**Working in a spiral**
R1: Using first color (White), 6sc in magic ring. (6st)
R2: 2sc in each st. (12st)
R3: *1sc. 2sc in next st.* Repeat from *to* 5 more times. (18st)
R4: *2sc. 2sc in next st.* Repeat from *to* 5 more times. (24st)
R5: *3sc. 2sc in next st.* Repeat from *to* 5 more times. (30st)
R6: 1sc in each st. (30st)
R7: *4sc. 2sc in next st.* Repeat from *to* 5 more times. (36st)
R8-12: 1sc in each st. (36st)
R13: *4sc. 1dec sc in next st.* Repeat from *to* 5 more times. (30st)
R14: *3sc. 1dec sc in next st.* Repeat from *to* 5 more times. (24st)
R15: *2sc. 1dec sc in next st.* Repeat from *to* 5 more times. (18st)
R16: *1sc. 1dec sc in next st.* Repeat from *to* 5 more times. (12st)
R17: 1dec sc in each st. Fasten off. (6st)
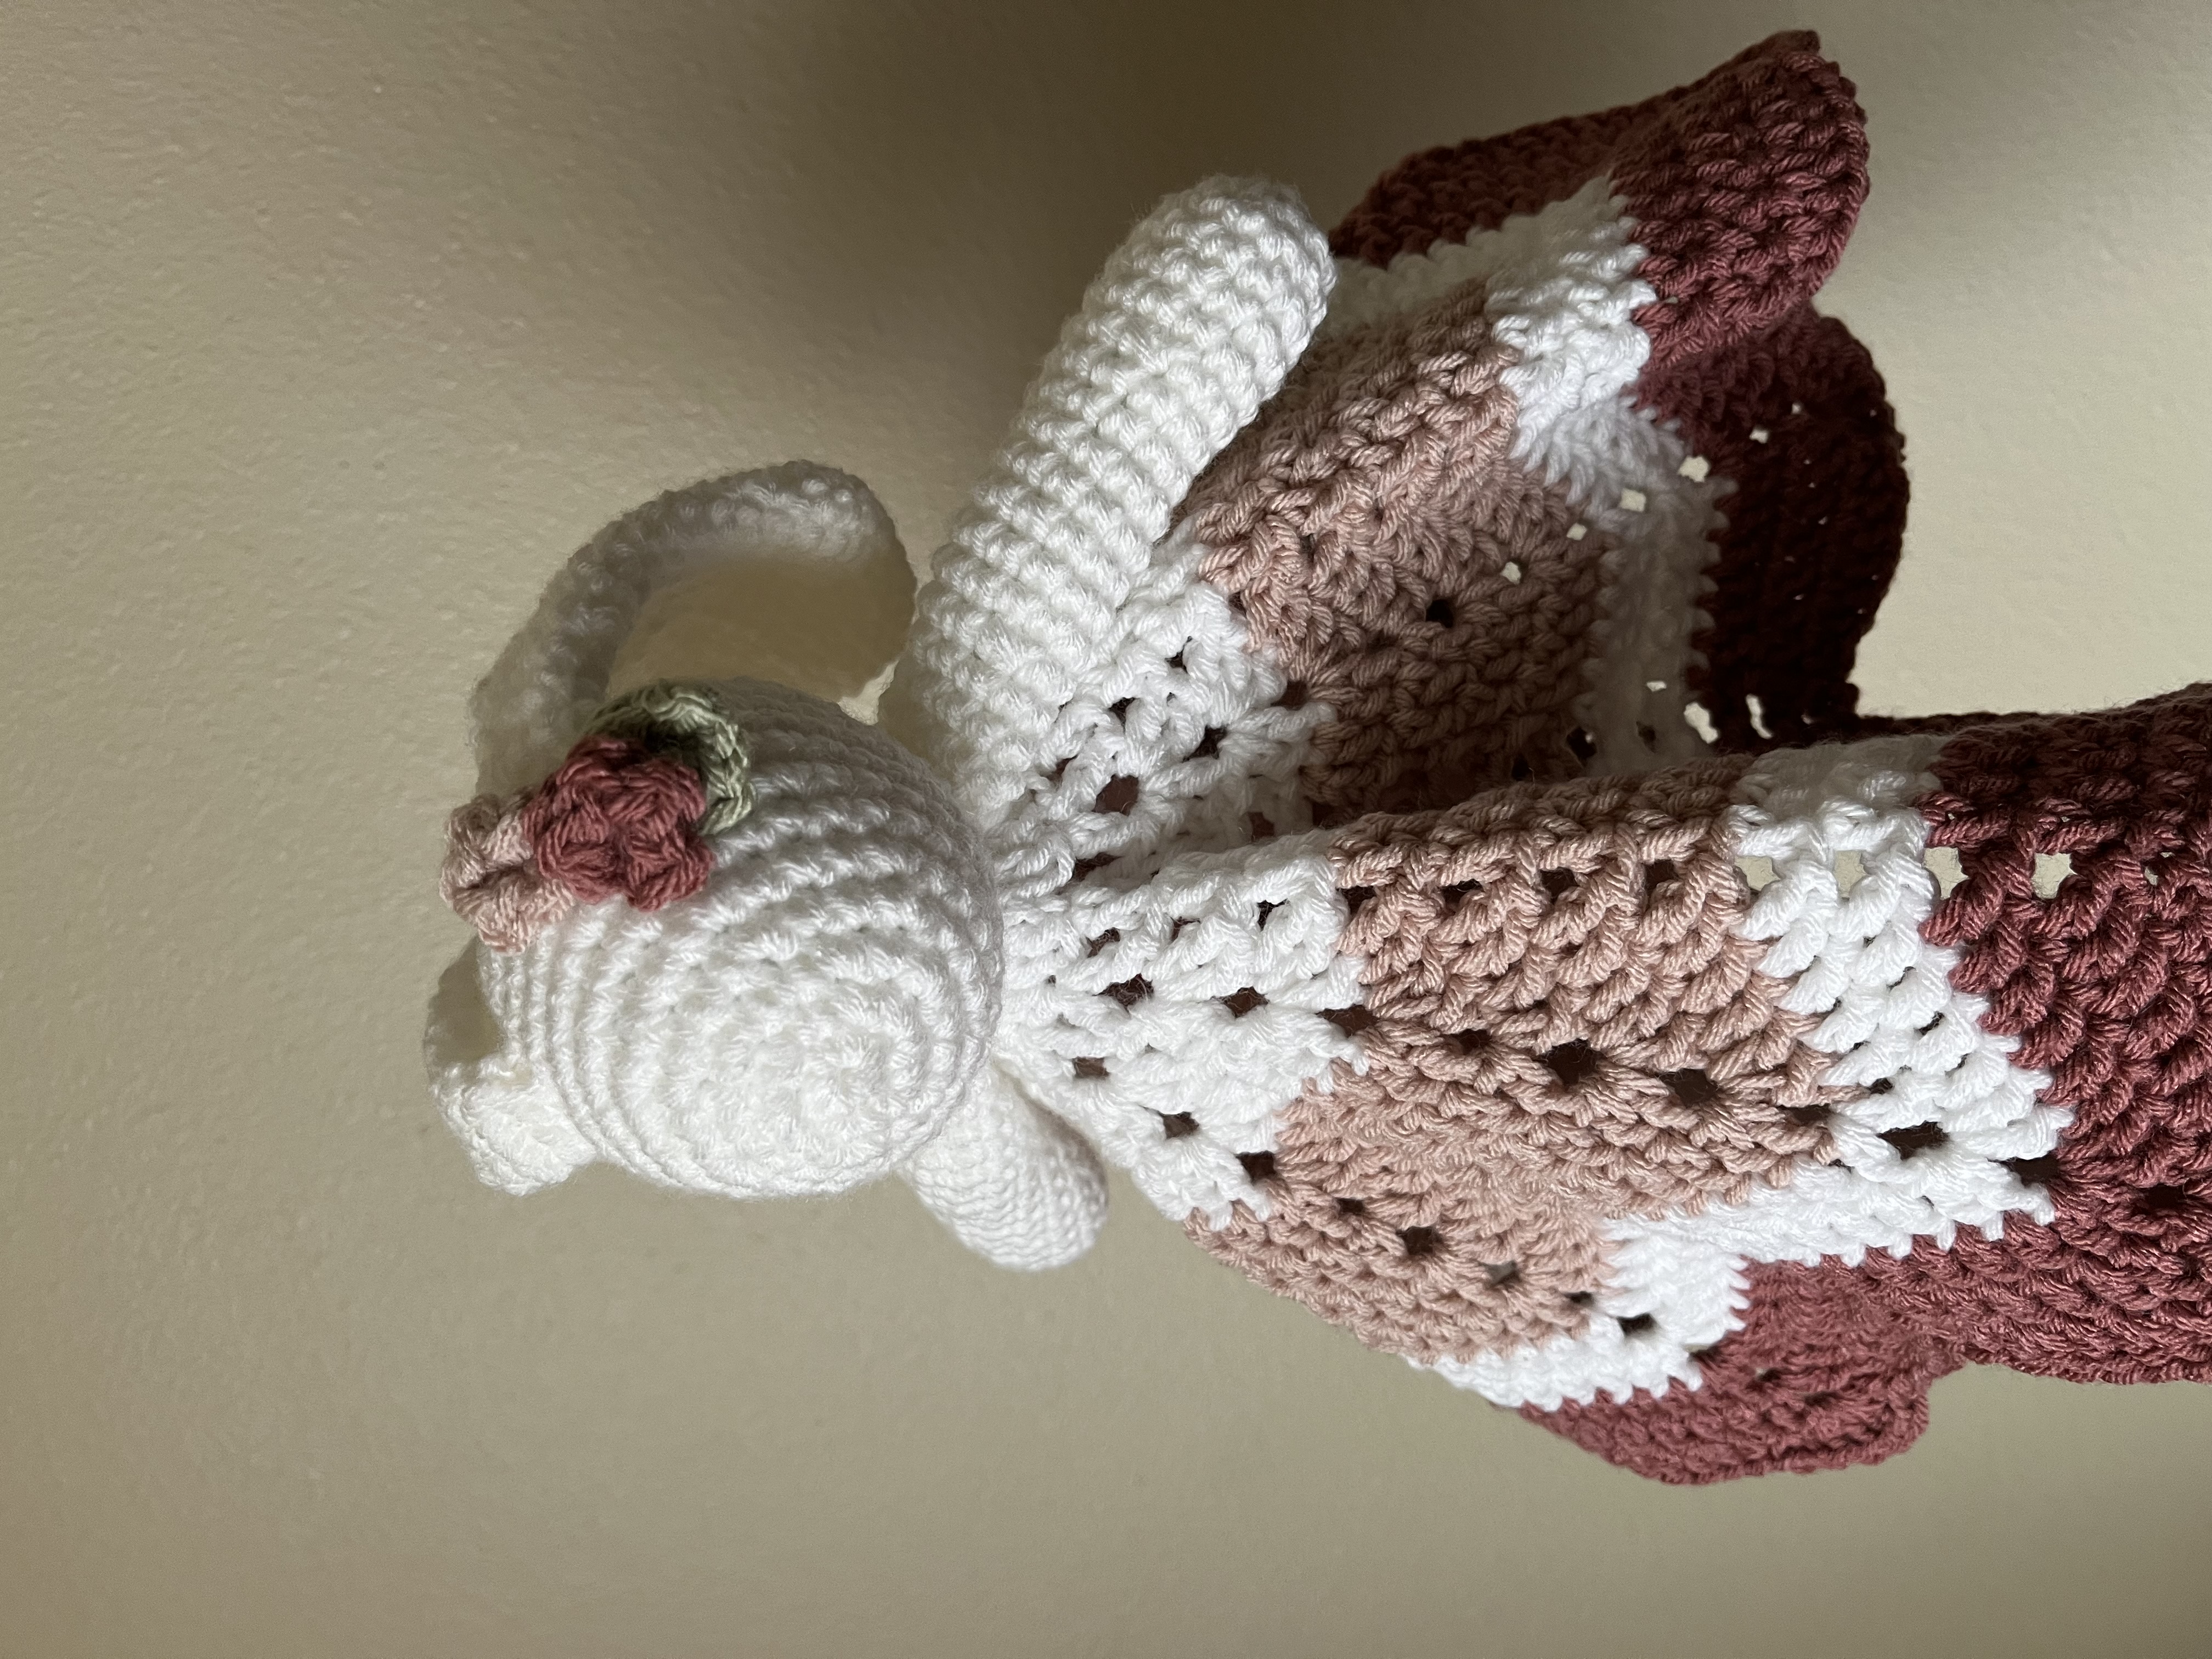
Ears (Make 2)
**Working in a spiral**
R1: Using first color (White), 4sc in magic ring. (4st)
R2: 2sc in each st. (8st)
R3: *1sc in next st. 2sc in next st.* Repeat from *to* 3 more times. (12st)
R4: 1sc in each st. (12st)
R5: *1sc in next st. 2sc in next st.* Repeat from *to* 5 more times. (18st)
R6: 1sc in each st. (18st)
R7: *1sc in next 2 st. 2sc in next st.* Repeat from *to* 5 more times. (24st)
R8-9: 1sc in each st. (24st)
R10: *1sc in next 2 st. 1dec sc in next st.* Repeat from *to* 5 more times. (18st)
R11: 1sc in each st. (18st)
R12: *1sc in next 7 st. 1dec sc in next st.* Repeat from *to* once. (16st)
R13: 1sc in each st. (16st)
R14: *1sc in next 6 st. 1dec sc in next st.* Repeat from *to* once. (14st)
R15: 1sc in each st. (14st)
R16: *1sc in next 5 st. 1dec sc in next st.* Repeat from *to* once. (12st)
R17: 1sc in each st. (12st)
R18: *1sc in next st. 1dec sc in next st.* Repeat from *to* 3 more times. (8st)
R19-21: 1sc in each st. Fasten off. (8st)
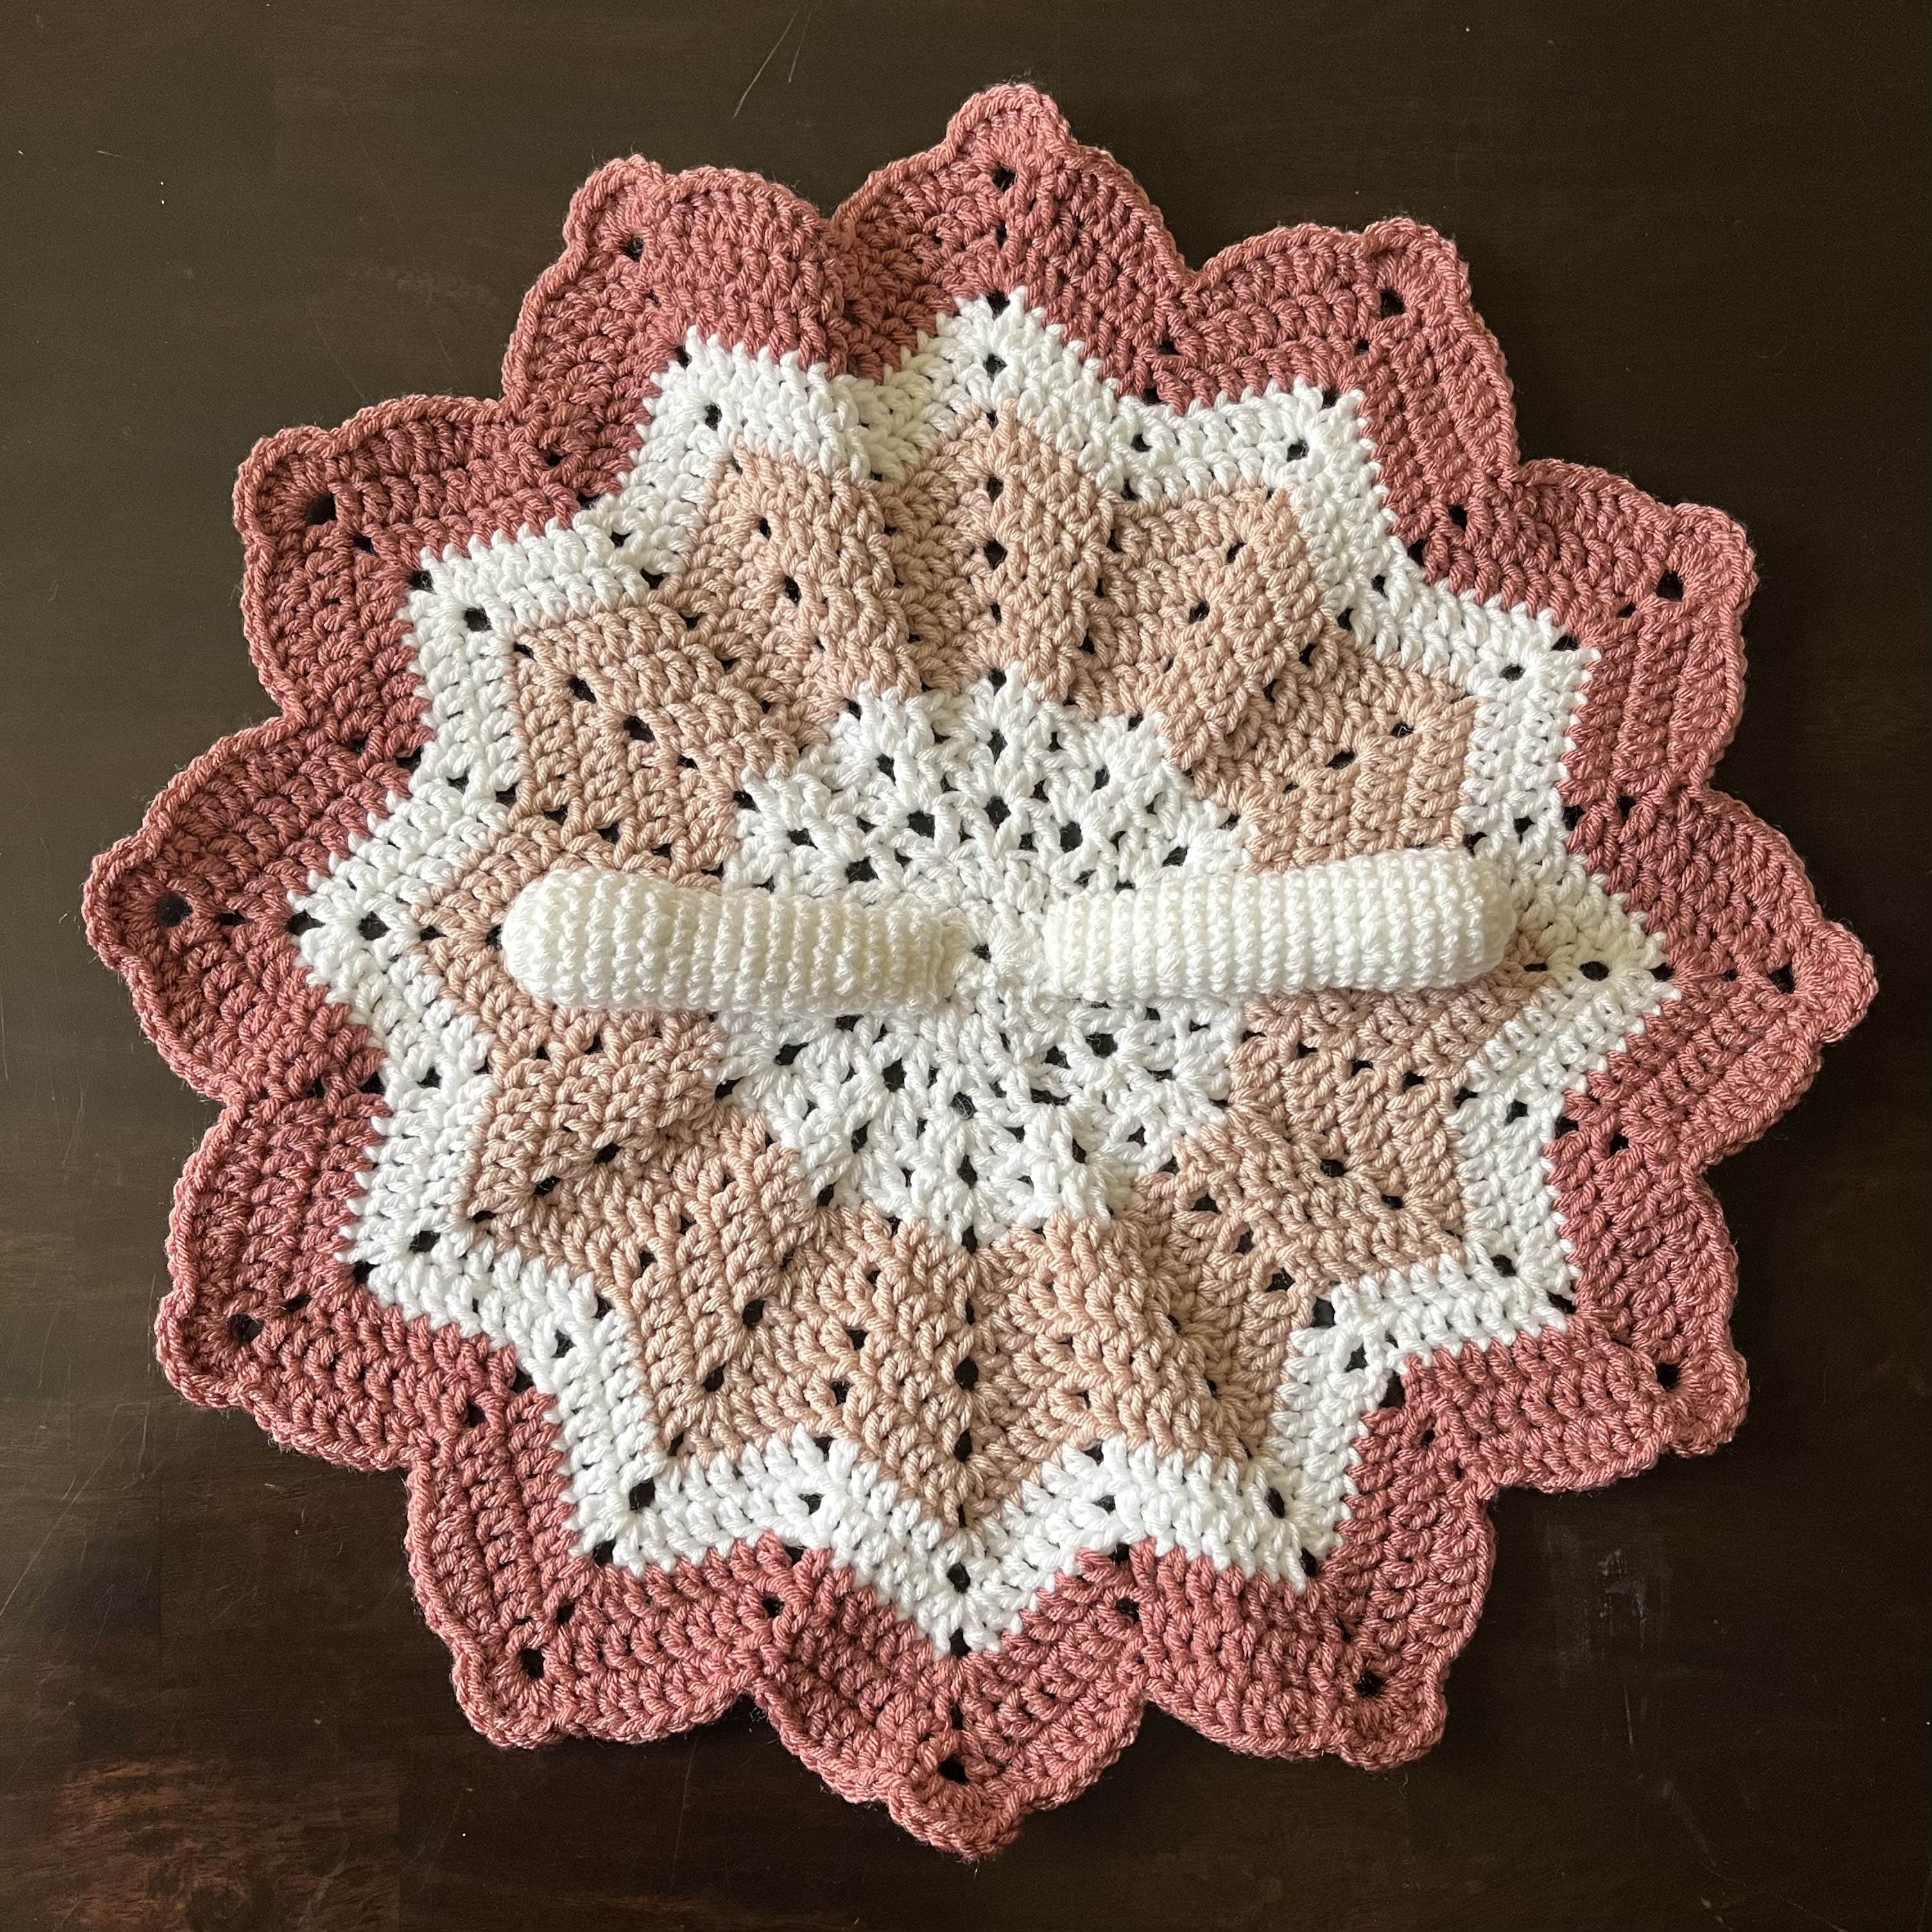
Arms (Make 2)
**Working in a spiral**
R1: Using first color (White), 6sc in magic ring. (6st)
R2: 2sc in each st. (12st)
R3: *5sc. 2sc in next st.* Repeat from *to* once. (14sc)
R4-6: 1sc in each st. (14sc)
R7: *5sc. 1dec sc in next st.* Repeat from *to* once. (12sc)
R8-14: 1sc in each st. (12sc)
**Begin stuffing**
R15: *4sc. 1dec sc in next st.* Repeat from *to* once. (10sc)
R16-18: 1sc in each st. Sl st into next st. Fasten off. (10sc)
**Finish stuffing. Leave top of arm unstuffed so that top opening can be folded.**
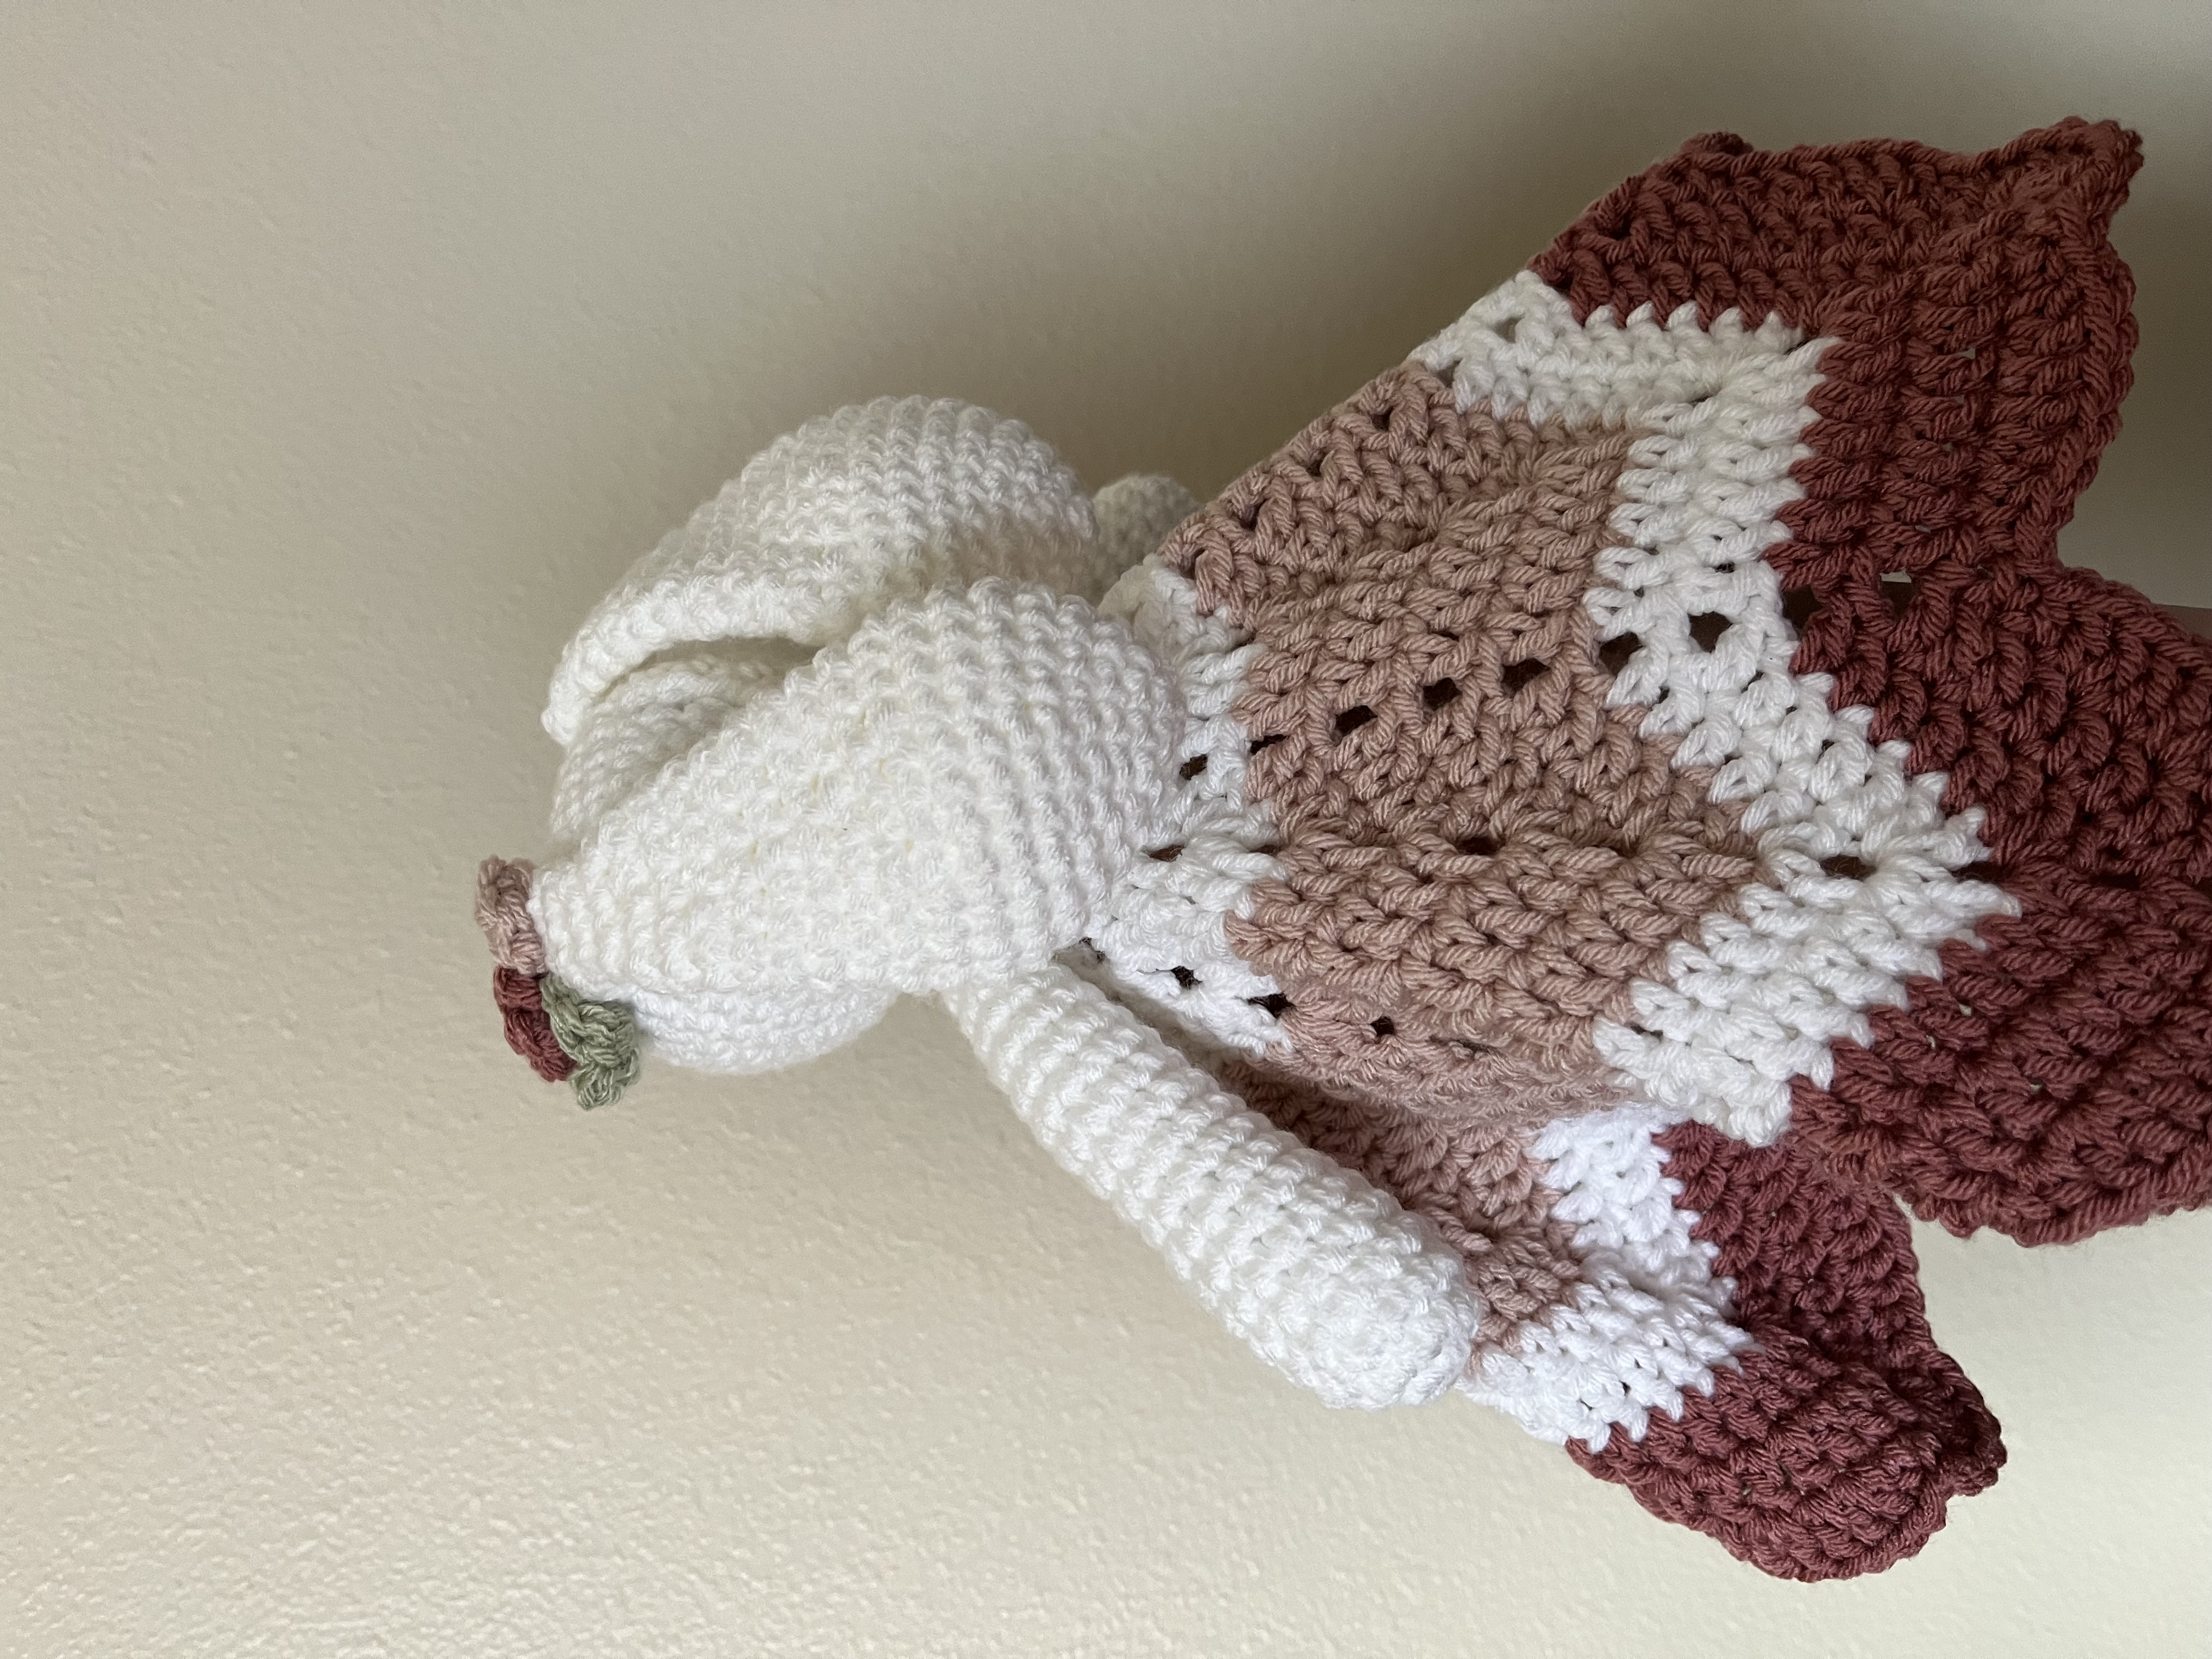
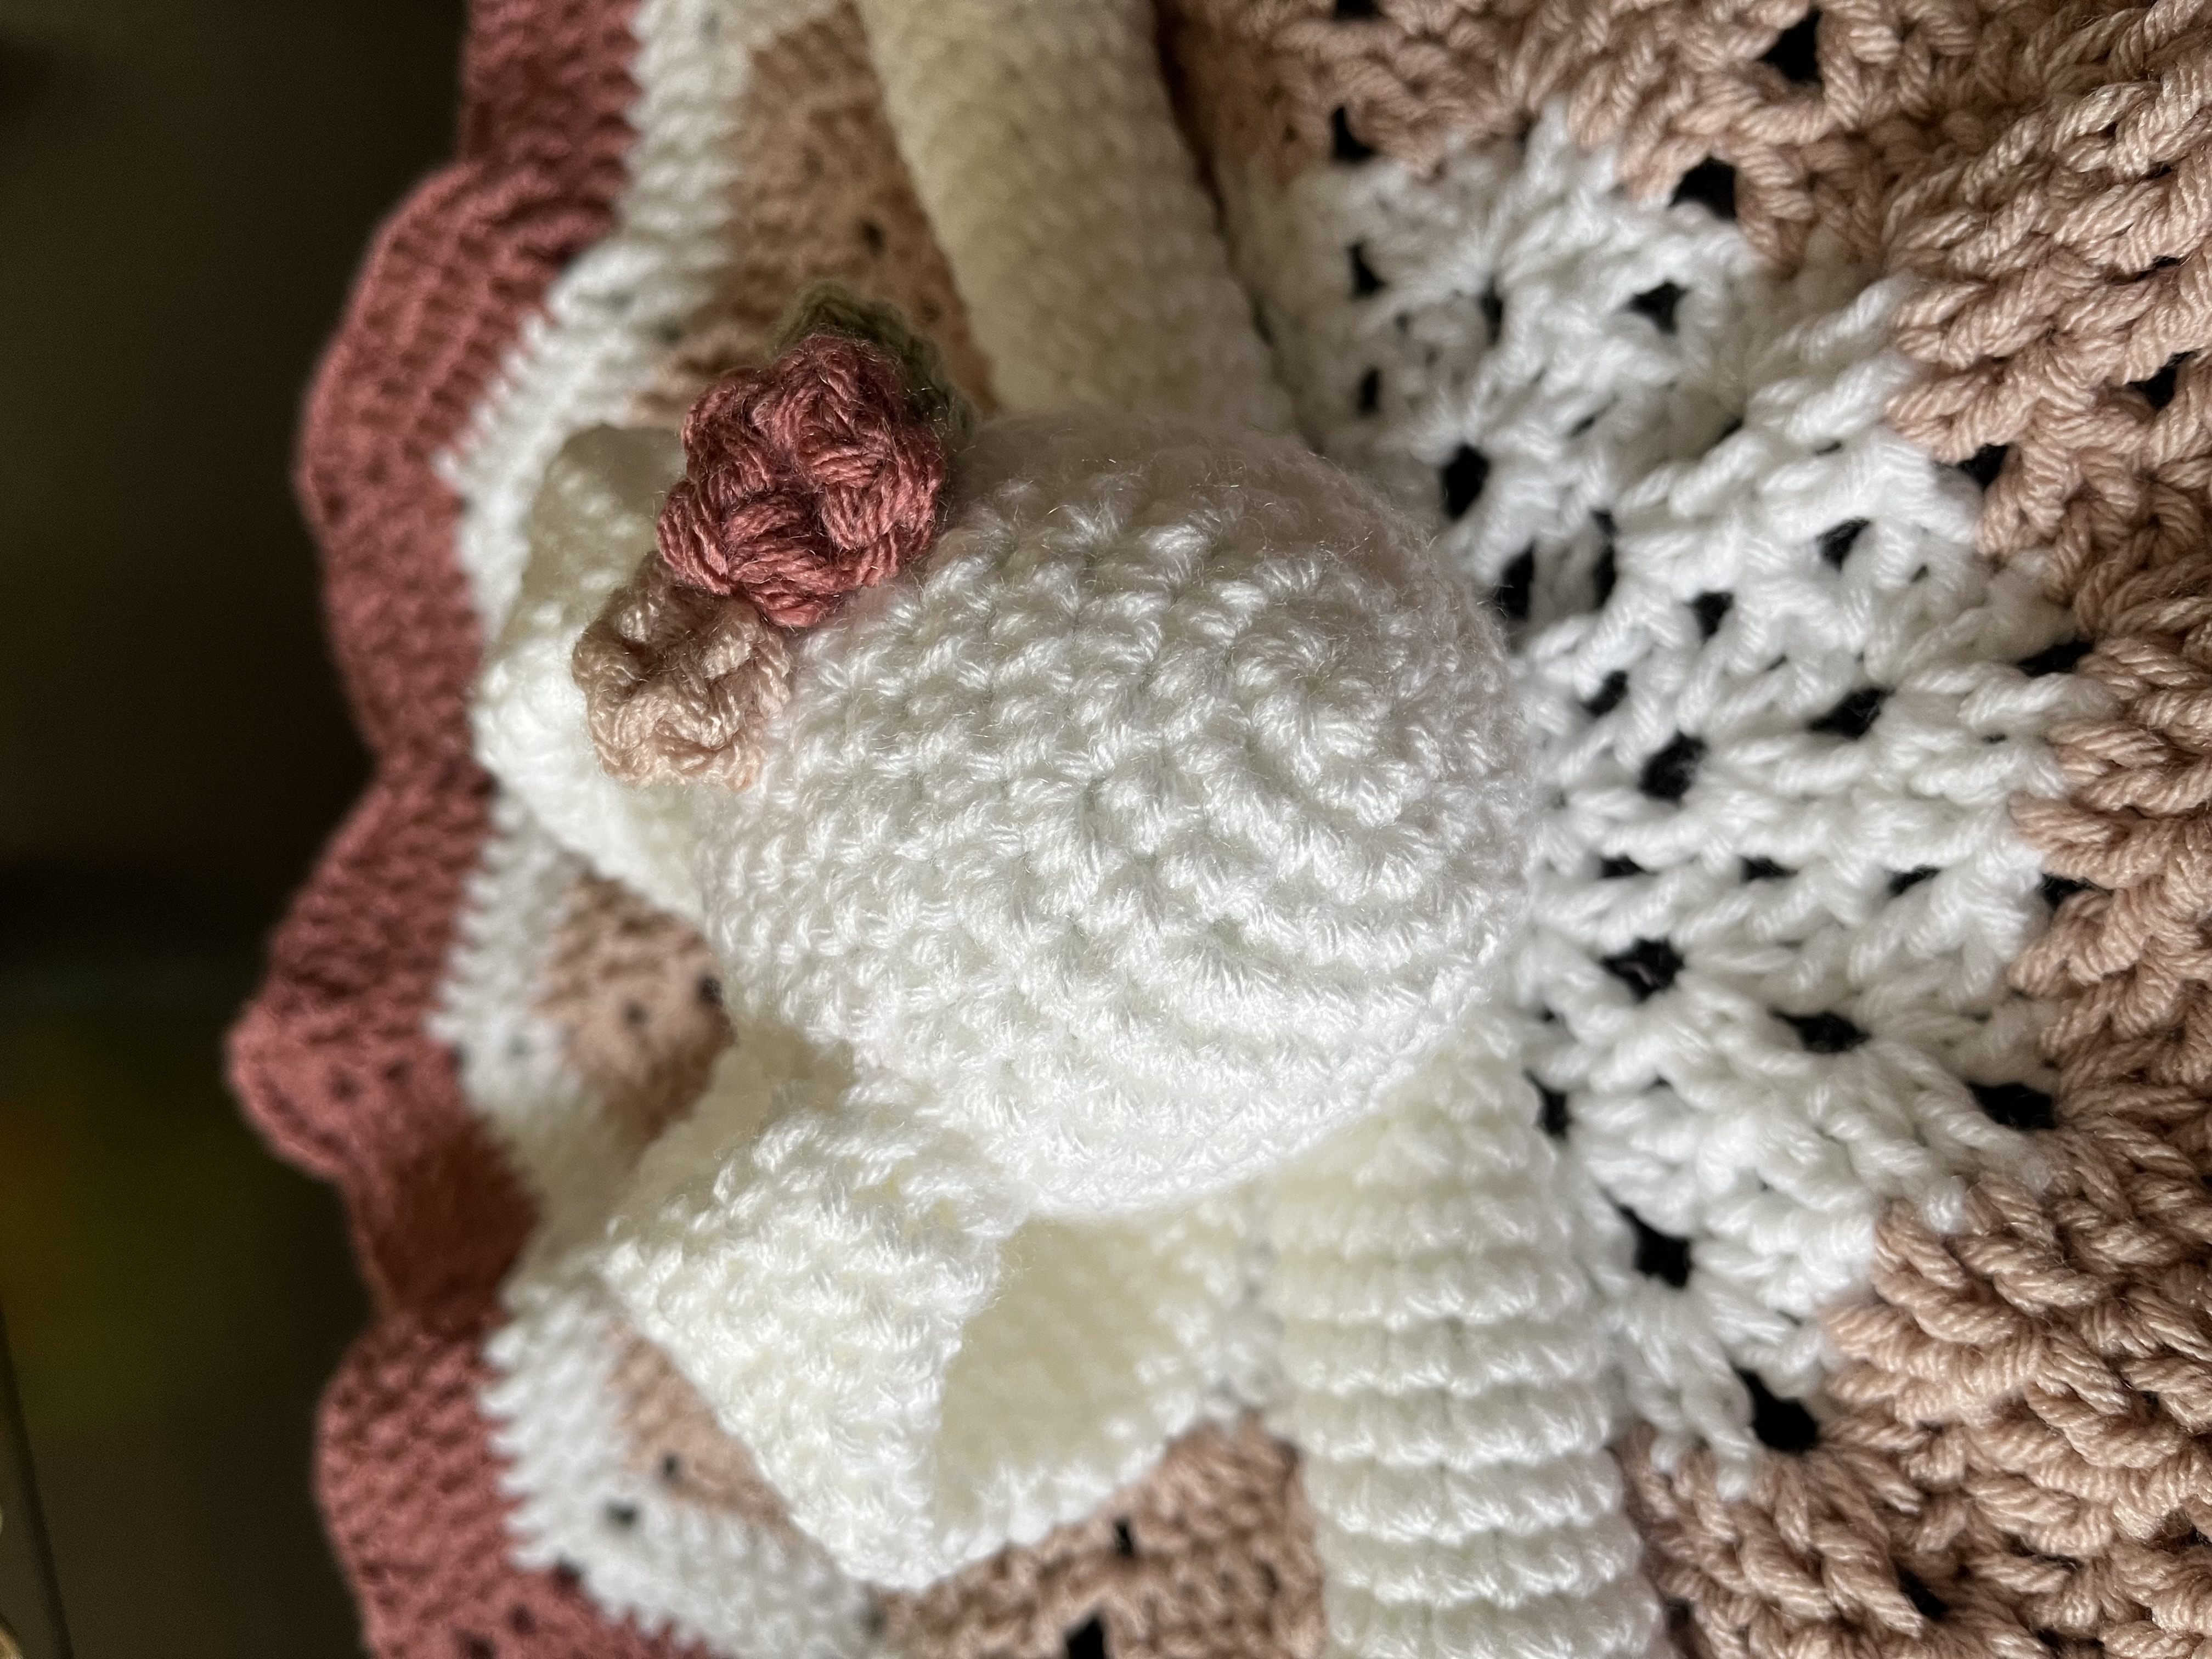
Florals
SMALL FLOWER
R1: Using second color (Blush), in magic ring: *1hdc. Sl st.* Repeat from *to* 4 more times. Fasten off.
LARGE FLOWER
R1: Using third color (Mauve), in magic ring: *1dc. Sl st.* Repeat from *to* 4 more times. Fasten off.
LEAF
R1: Using green scrap yarn, in magic ring: 2dc, 1sc, [ch2, sl st into 2nd ch from hook], 1sc. 2dc. Fasten off.
Assembly
**Sew pieces to one another using a Tapestry Needle**
EARS – Row 13 of the HEAD, 12 stitches apart.
ANTLERS – Just above the EARS, in between the 12 stitches.
ARMS – Row 2 of the lovey blanket, directly across from one another.
HEAD – In between the ARMS.
Conclusion
Thanks for making it to the end of my crochet lovey pattern! If you would like to make your own bunny lovey, check out the pattern on my Etsy and Ravelry shops. If you are looking for some crochet hooks to use, Clover Amour is my favorite! Not sure if Clover Amour is for you? I have a Clover Amour review post that offers some great cheap alternatives!
What animal would you want to see made into a crochet lovey pattern? Which crochet lovey pattern is your favorite so far? Comment below!
I love seeing your finished crochet projects! If you enjoyed making one of my patterns I’d love to see it on Instagram! Make sure to tag me @crochetwithgabriellarose. If you are more of a Facebook person, check out the Crochet with Gabriella Rose Facebook page for notifications of new blog posts and crochet patterns!
One Comment
Comments are closed.